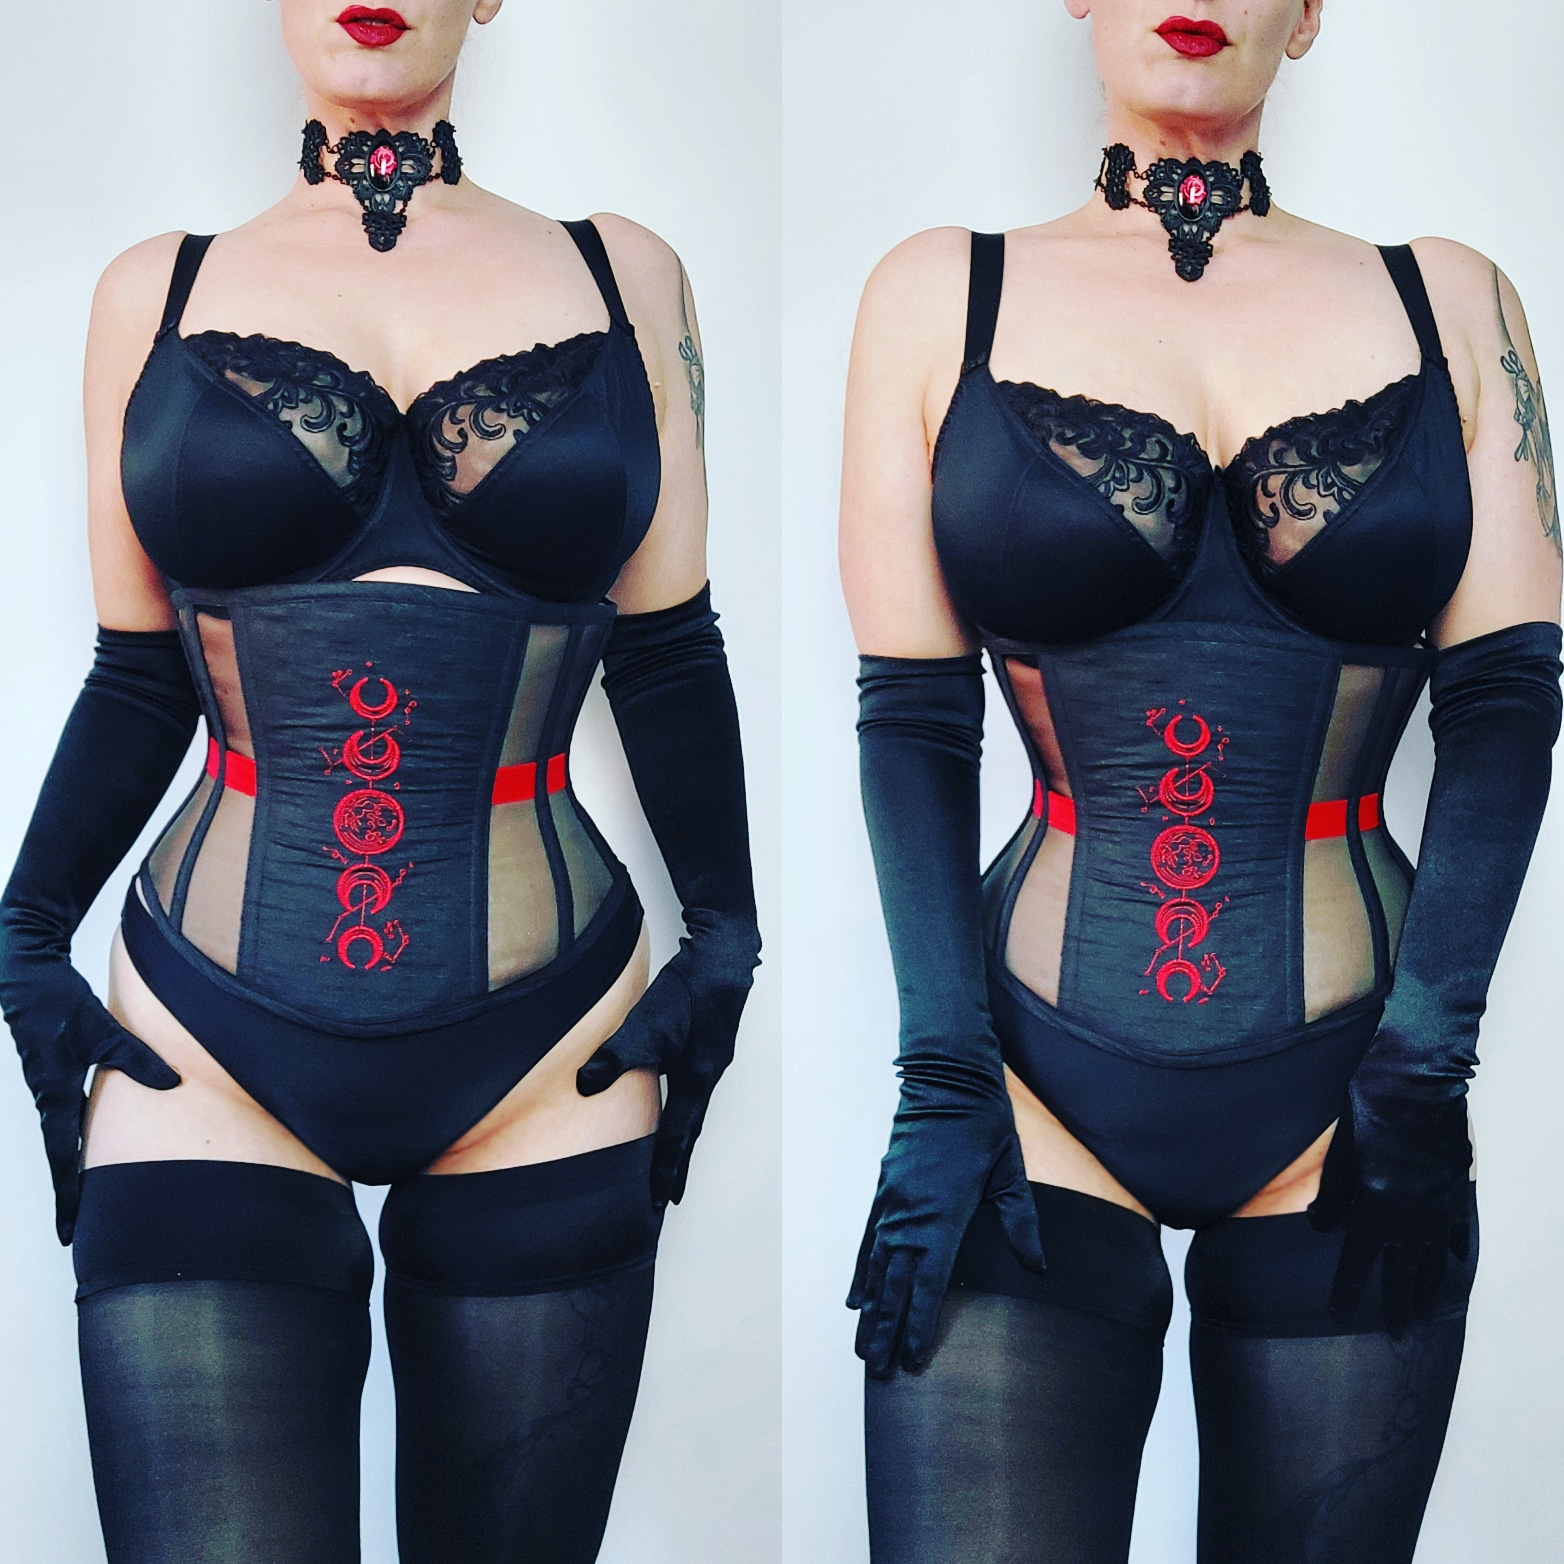
In 2019 I made the first moonchild corset. The moonchild corset is made out of black silk, coutil, ivory corsetry mesh. It has a front panel made out of coutil covered in silk, 2 mesh side panels and a back panel made out of coutil and silk. It has an inner waist tape. The moonchild corset is for the unique and curious souls who are out of this world and do not want to live in the harsh reality.
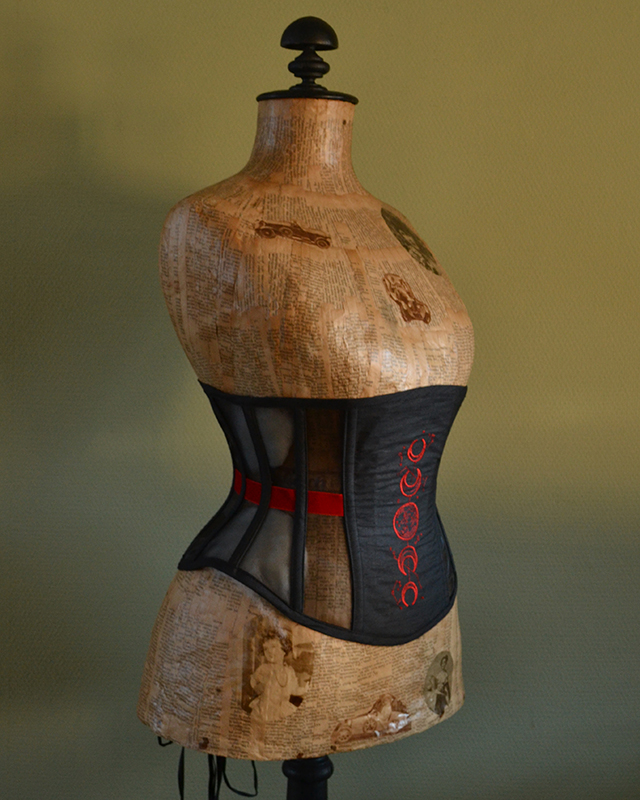
Now the Moonchild corset has a dark sister. This is the Bloodmoon corset.
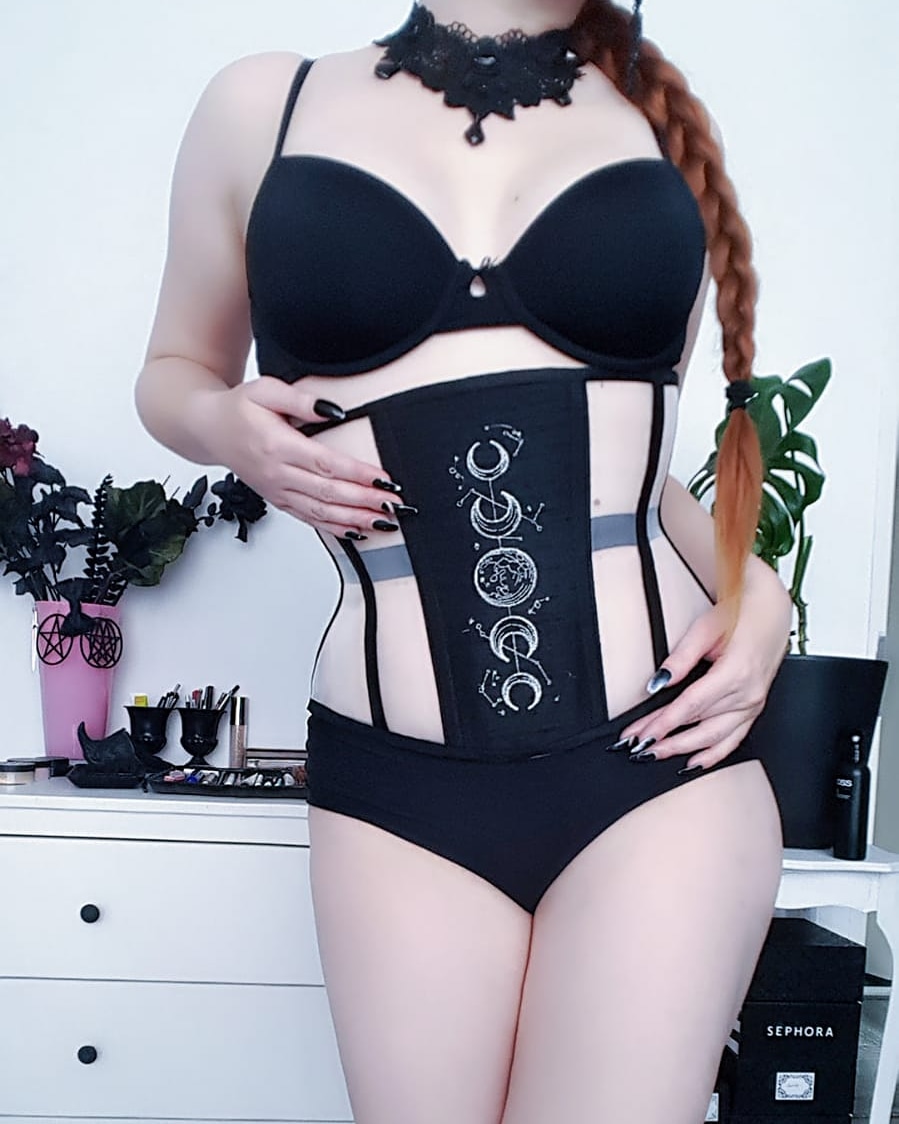
Bloodmoon corsetBloodmoon corsetBloodmoon corset by Skeletons in the Closet
The Bloodmoon corset is made out of black silk, coutil, and black corsetry mesh. This corset has a front panel made out of coutil covered in silk, 4 mesh side panel and a back panel made out of coutil and silk. The waist tape is made out a velvet ribbon. The extra mesh panel compared to the moonchild corset gives it a bit more space to show your skin underneath the corset. The creation of this Bloodmoon corset for me is about change, new beginnings and embracing the darker aspects of femininity. Be unapologetic feminine.
One of the styles I love to make more and more these years are the 1940s outfits. They are so classy and elegant. Perfect for many occasions.
Not only do I love the fashions, I also love the make do and mend attitude of the era. An important resolution for the new year is to do more with the large amount of fabrics I already have in stock. This means that there will be more ready to ship items available in the web shop in the coming year.
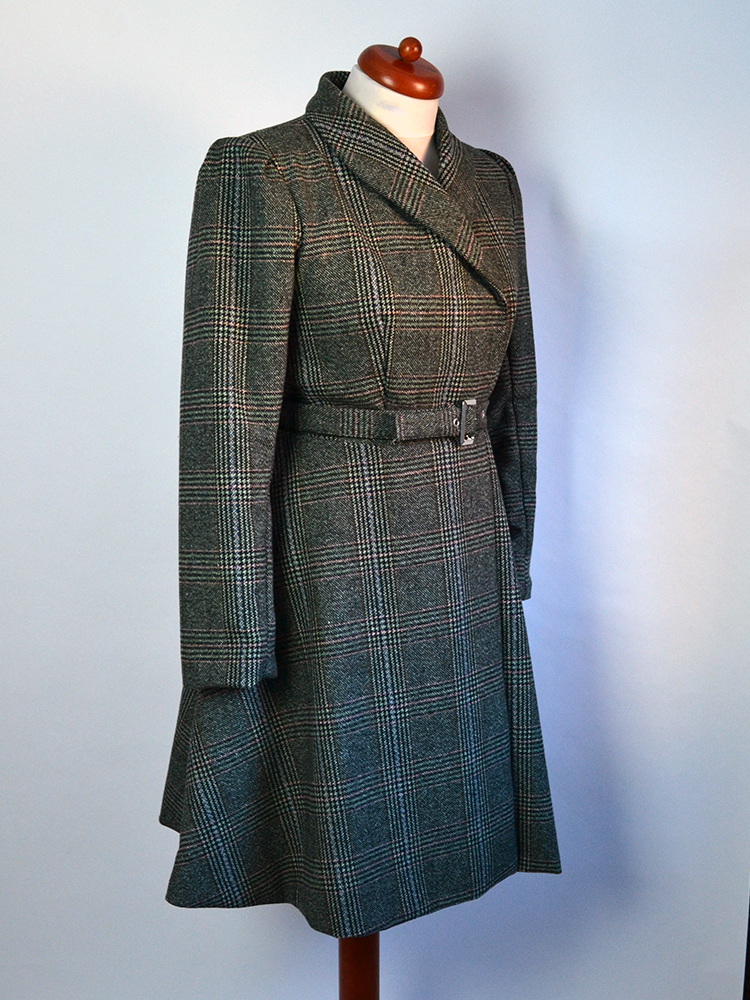
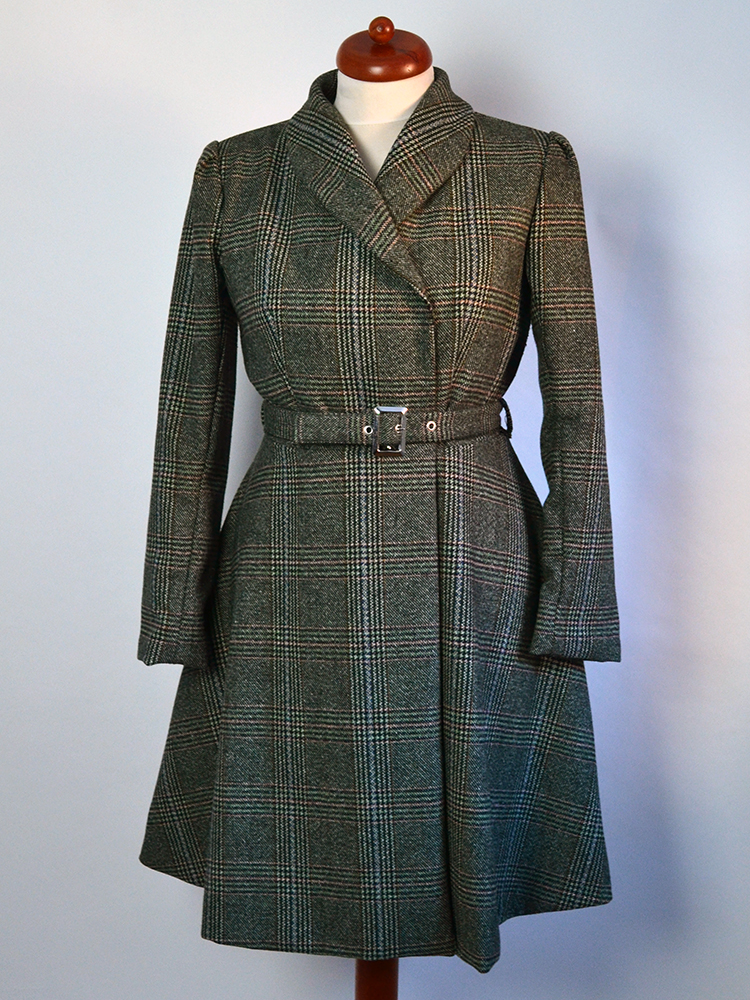
1940s coat by Skeletons in the Closet1940s coat by Skeletons in the Closet1940s coat by Skeletons in the Closet
This coat is based on an historical pattern from the 40s. It features a shawl collar, an A-line skirt and belt. It is made out of a wool mix and closes with snap buttons to give it that smooth look at the front.
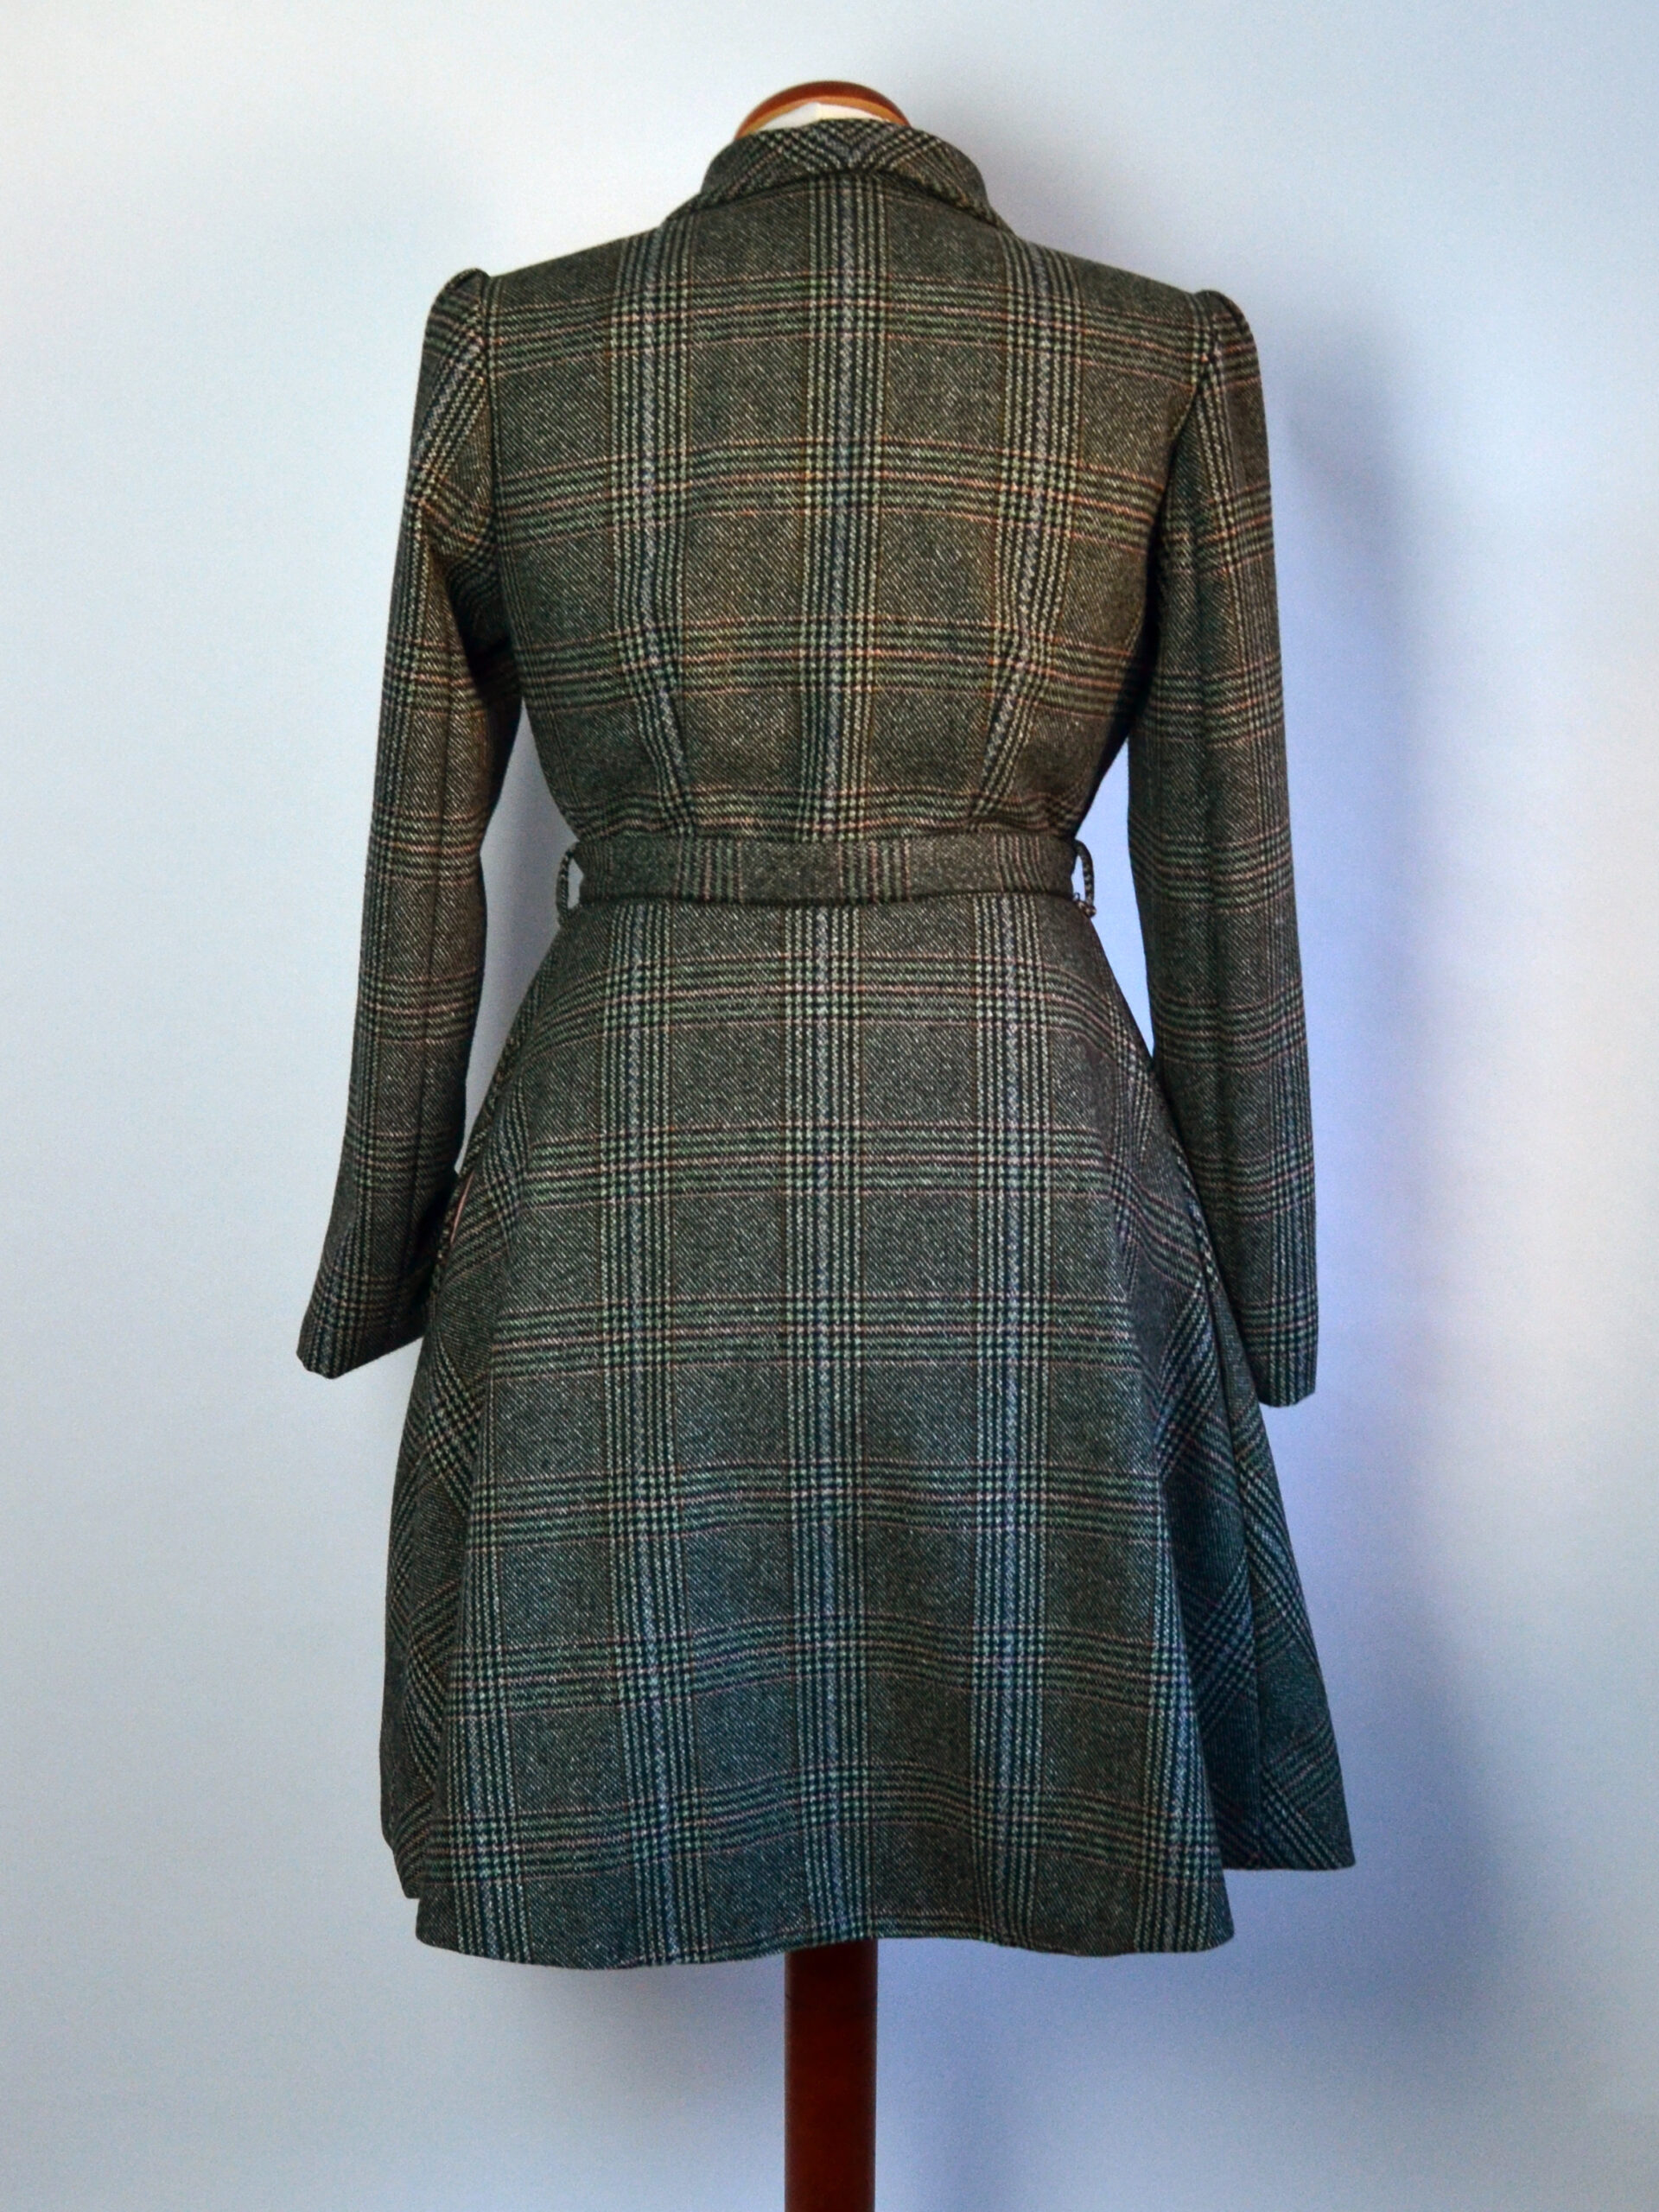
Since the fabric had a check pattern I made sure to match the pattern down the centre back and centre front. Also I made sure that both sleeves have the same place where the check pattern starts at the top.
The coat has light shoulder padding and a pleated puff sleeve.
Now I have not added this coat to the web shop, since I made it for me. However, of course I can make you a similar coat. We can find your own unique fabric and create a 1940s dream just for you.
After a bit of a summer hiatus I am trying to get back into the swing of things. With covid and the lack of events and such my sewing-focus is at an all time low. Now I have learned about myself in the past years that sometimes I just need to start on a project and then the creativity will follow. To make myself follow trough with this project I decided to document it on the Blog.
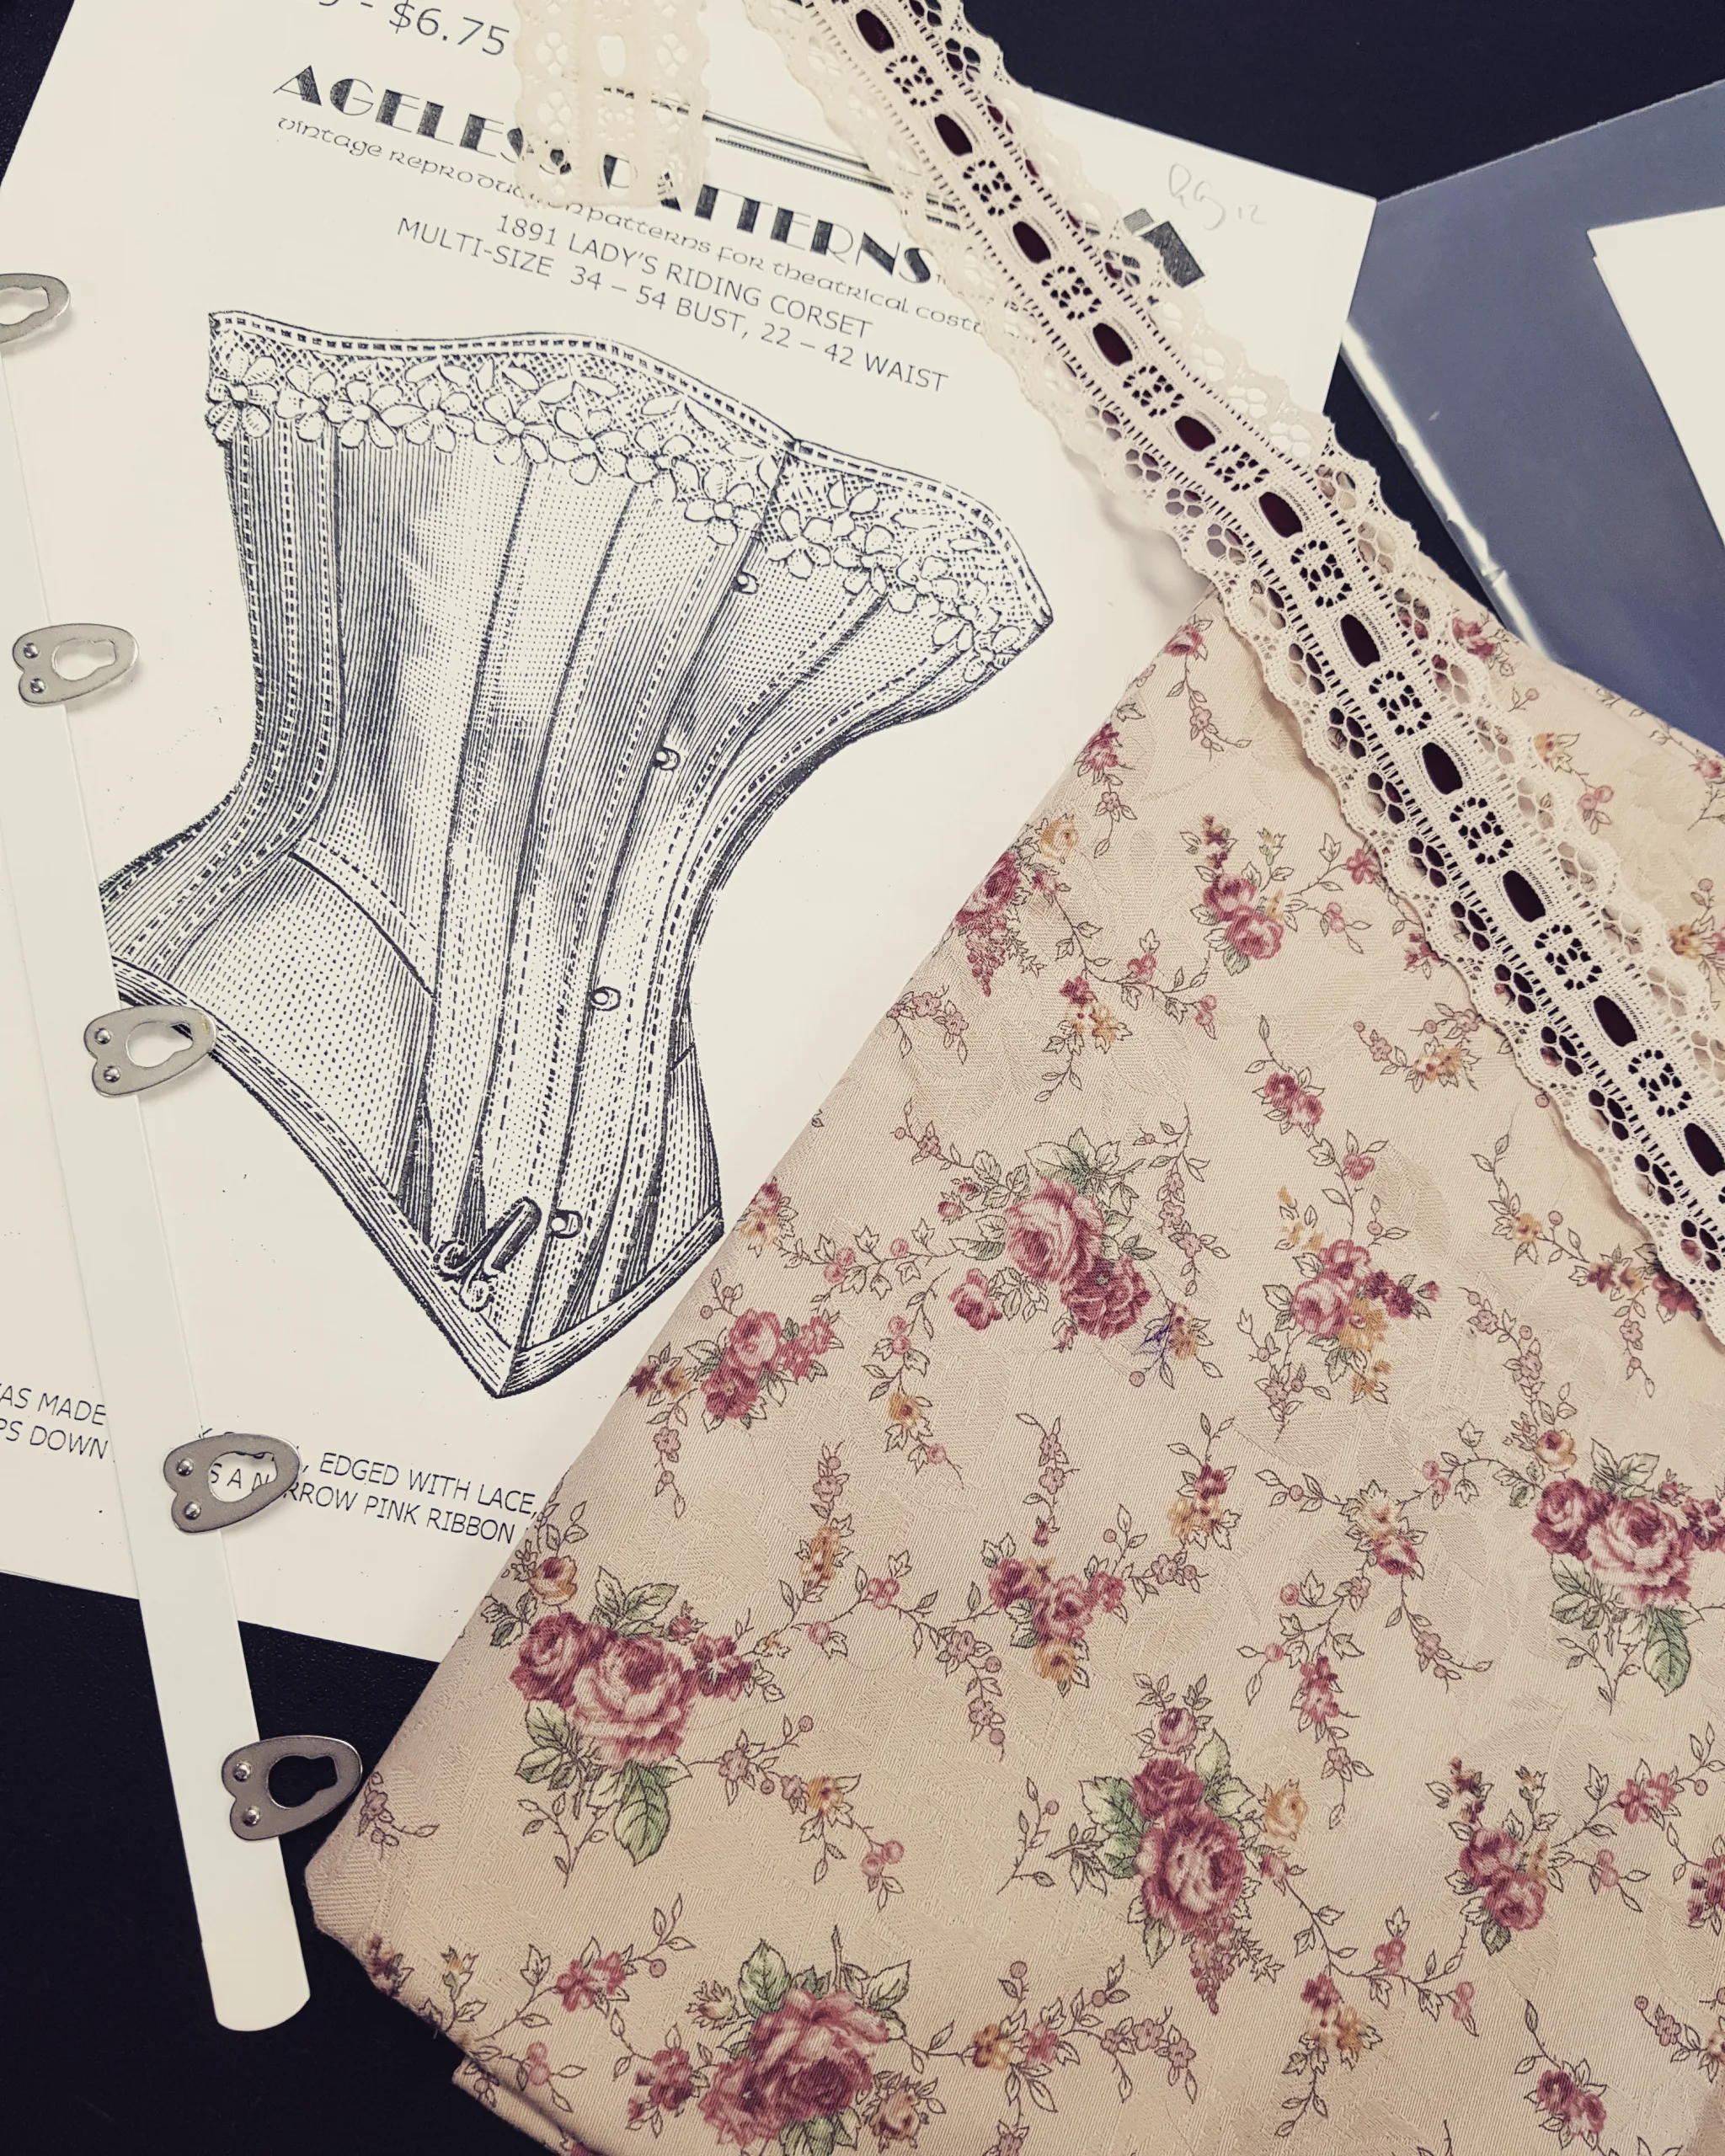
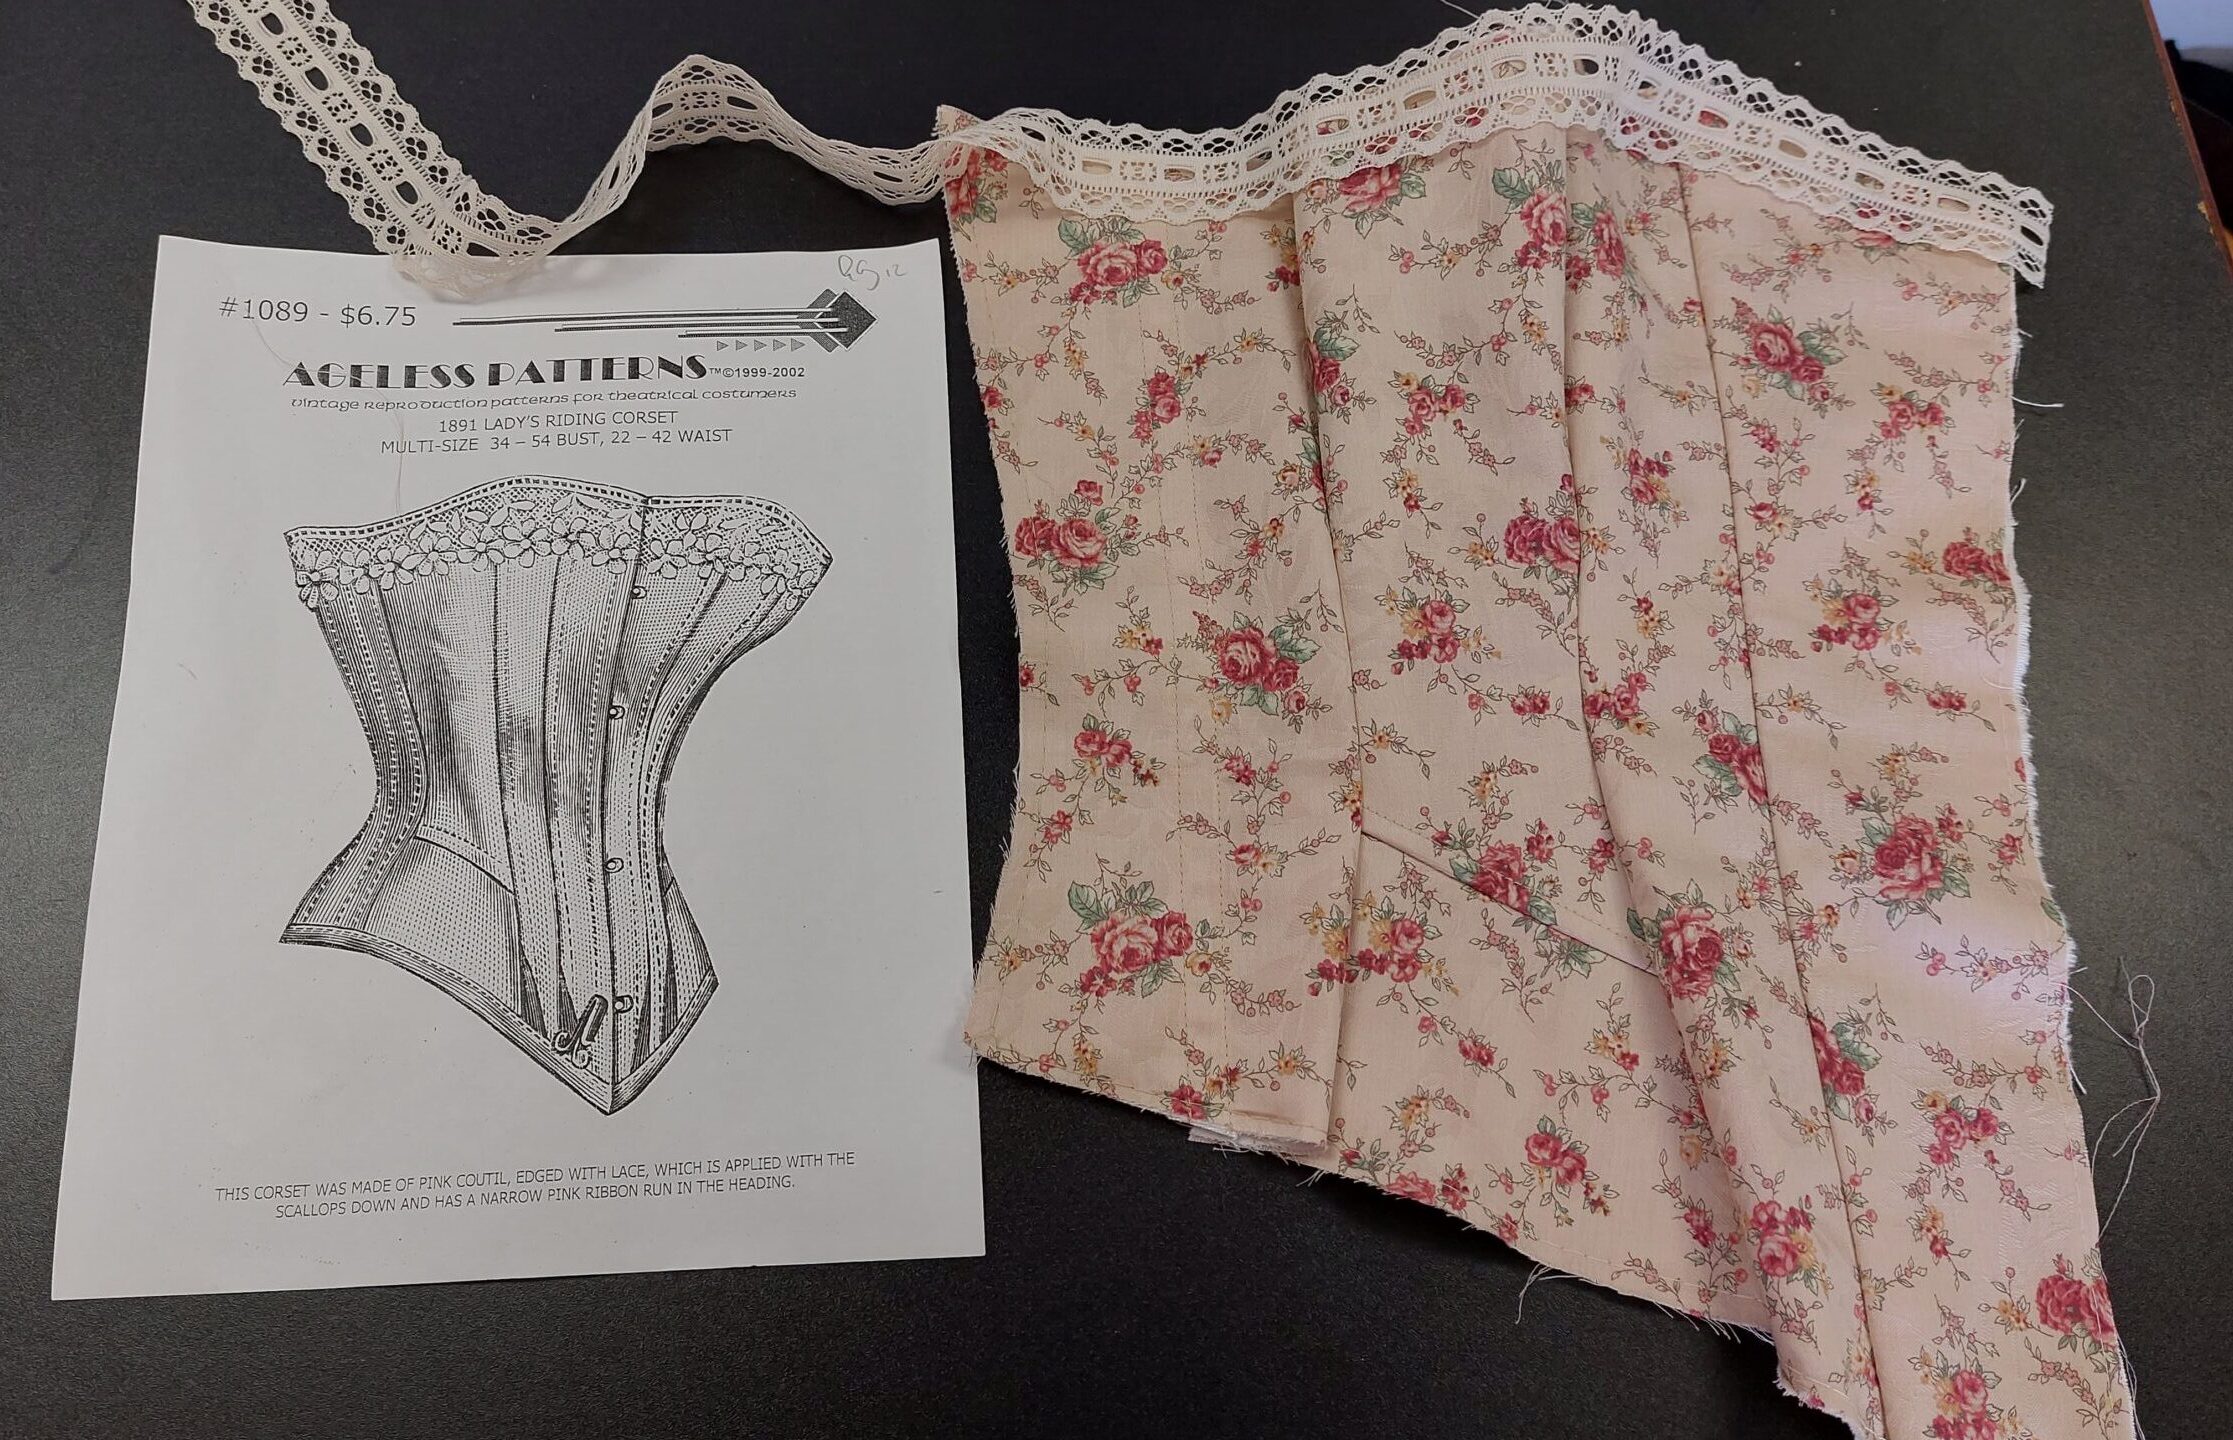
A corsetry colleague of mine was selling a part of the corset making collection, including this ageless patterns version of a 1891 riding corset. I bought this from her in the hopes that it will rekindle my love for corsetry.
Since this is not a commissioned project I decided that it has to be made largely from my stash of fabrics. I have had this floral quilting fabric for ages, the lace is left over from a commission from some years back, and the velvet ribbon is also a left over stash piece.
27-8-2021 – The pattern
If you have worked with Ageless patterns before you may know that the sizing is a little off at times. Ageless patterns takes patterns from historical sources and grades them. So the pattern is just as it was back then. They do add seam allowance.
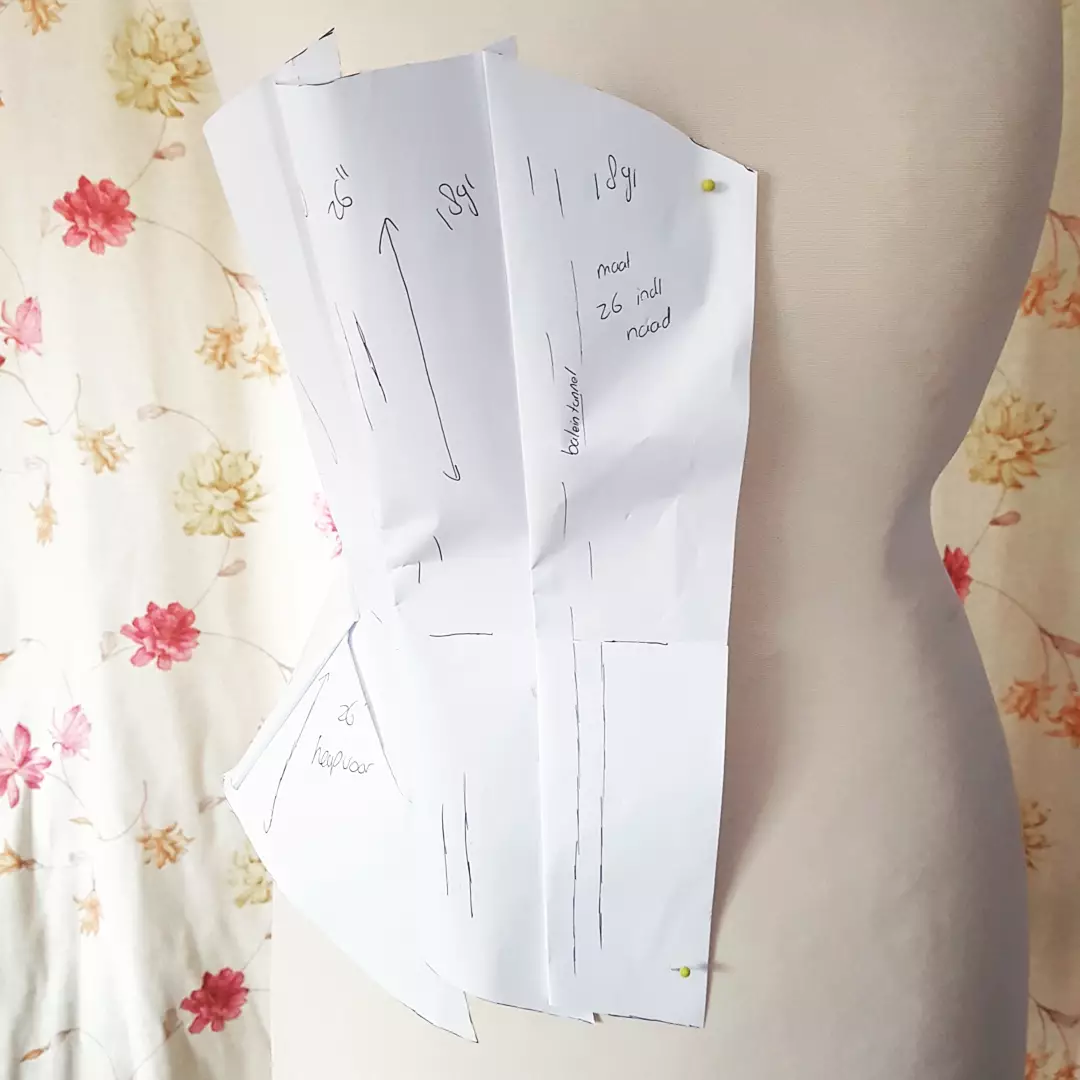
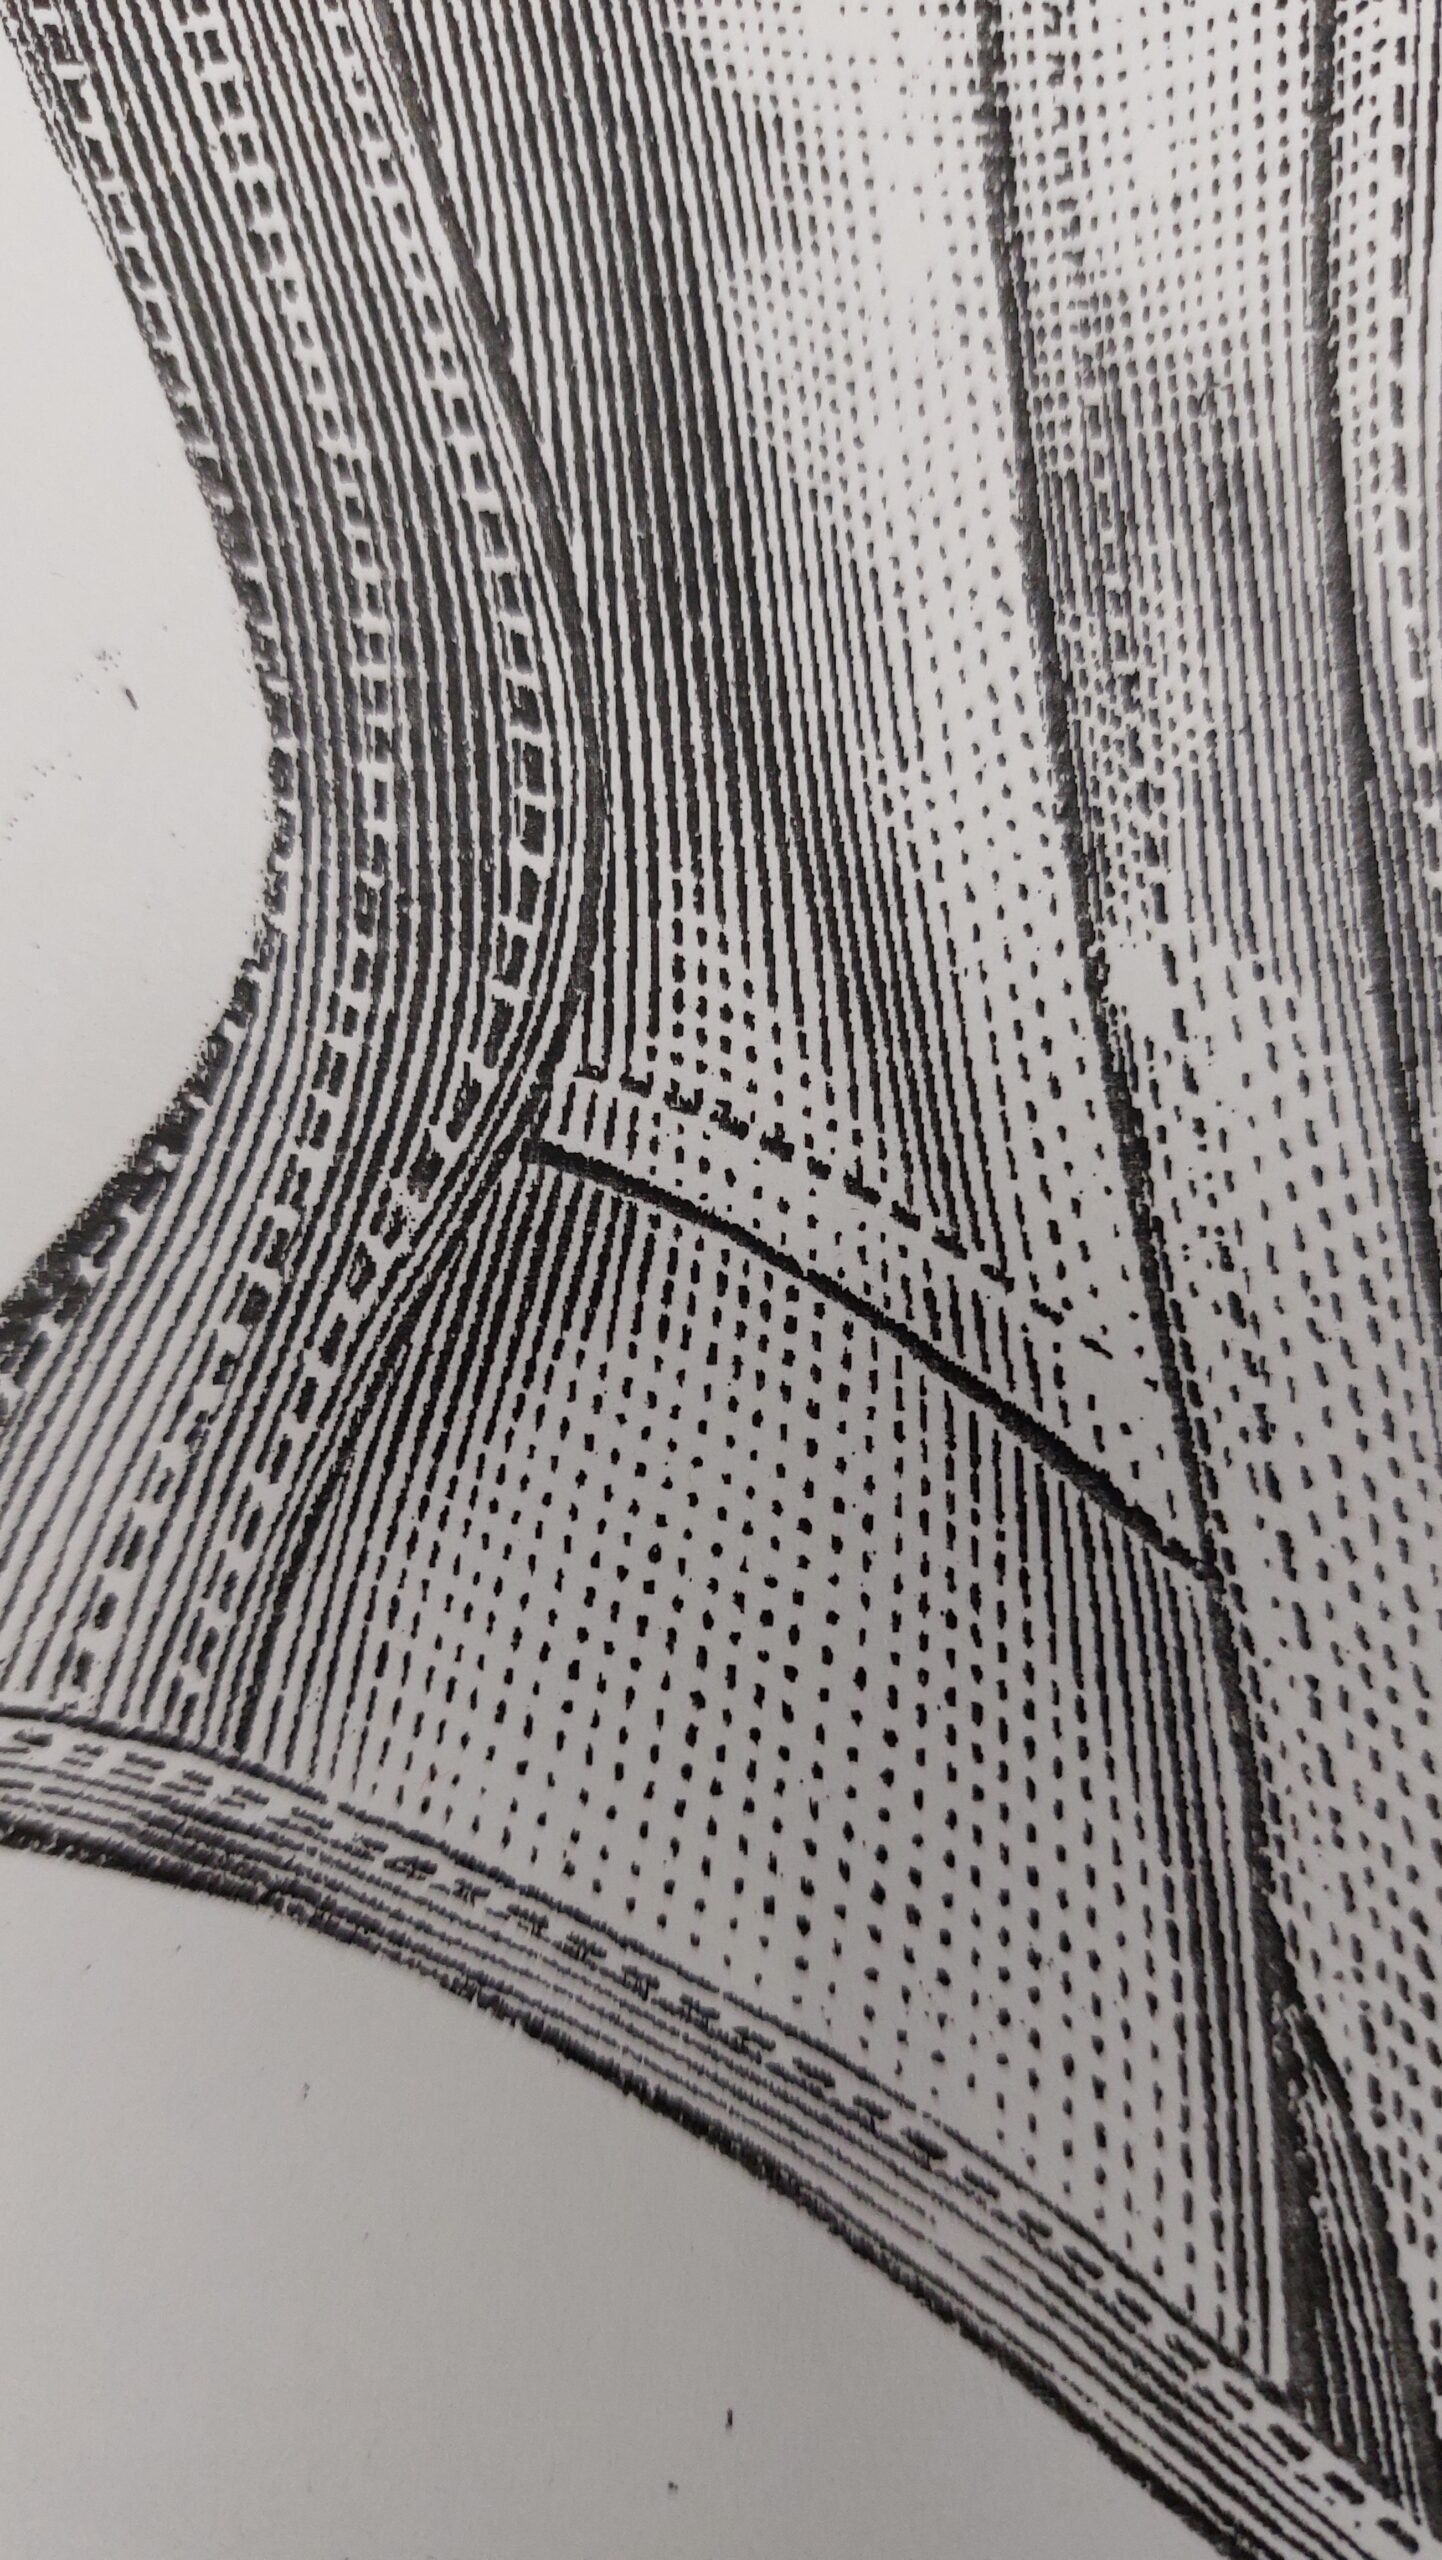
The first thing I do when working with a pattern like this is taping together a paper version of it to just check the pattern pieces. I traced a size 26 inch. I chose this size because it is closest to my size. This way I have the option of keeping it if it does not sell.
Right away I notice that the front hip gusset is longer than the 2nd front piece. Now I have two options, I can add some length to the front pieces or I can shorten the gusset. The drawing from this corset shows quite a pointed look. Since I love this look, and human beings are generally longer now than they were 100 years ago, I decided to go for the lengthening of the front pieces.
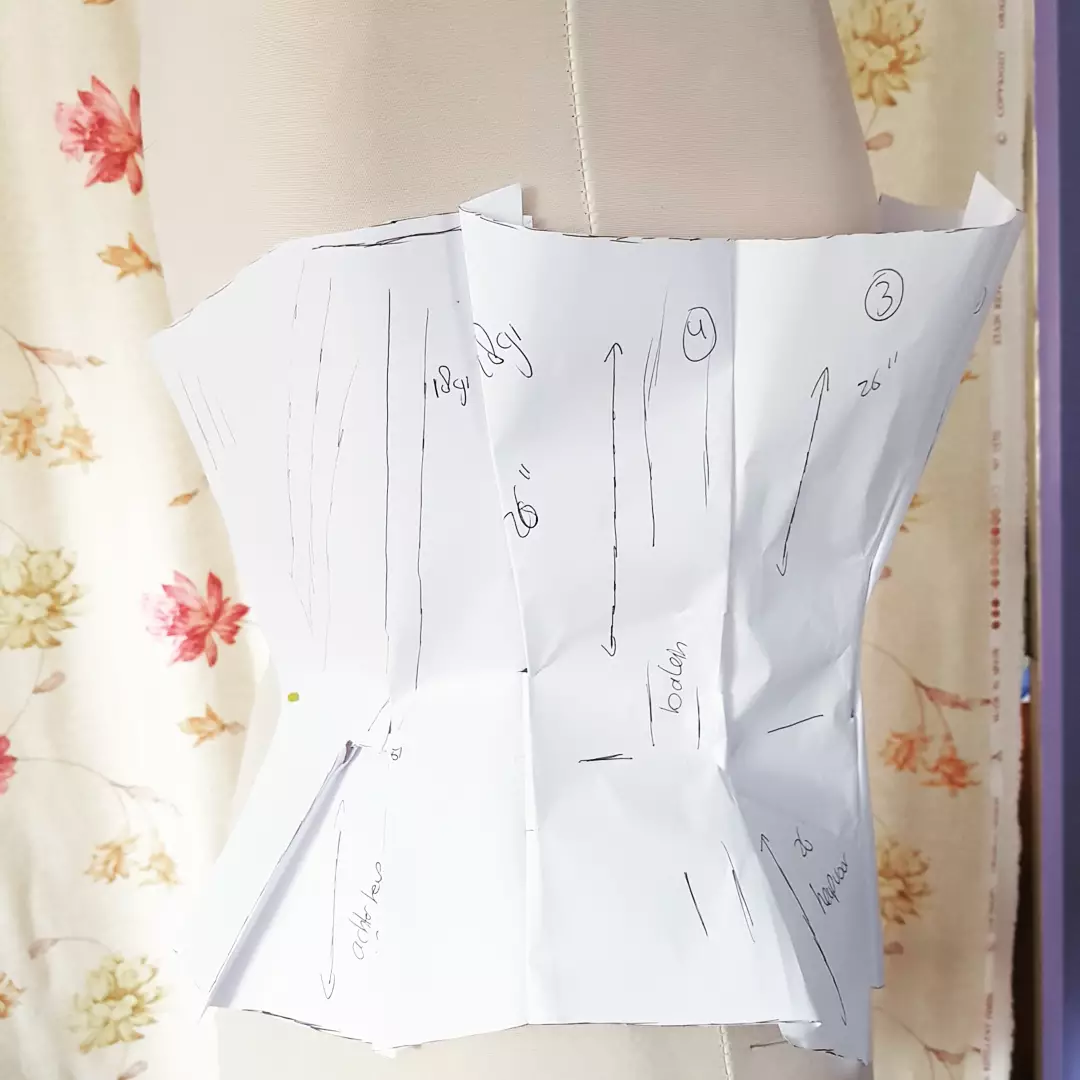
Papier pieces glued together for a first glimps on how this corset will look.
Well it has been a while. Currently I am busy with a study for my day job leaving me not that much time to sew. So there is tons of creative energy but not enough time to do all the projects I want to do. But finally I have taken the time to make some more progress with this corset!
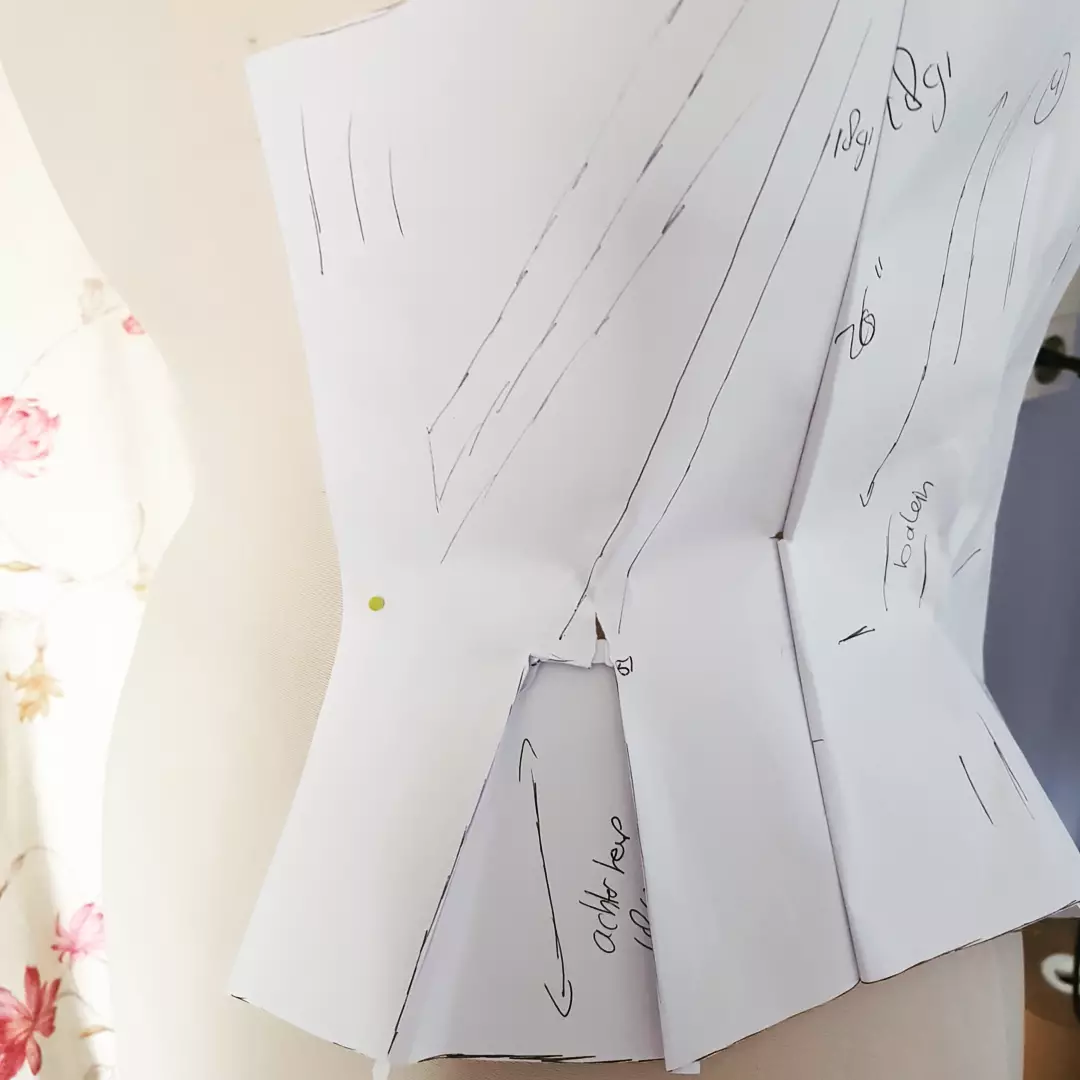
20-03-2022 First steps
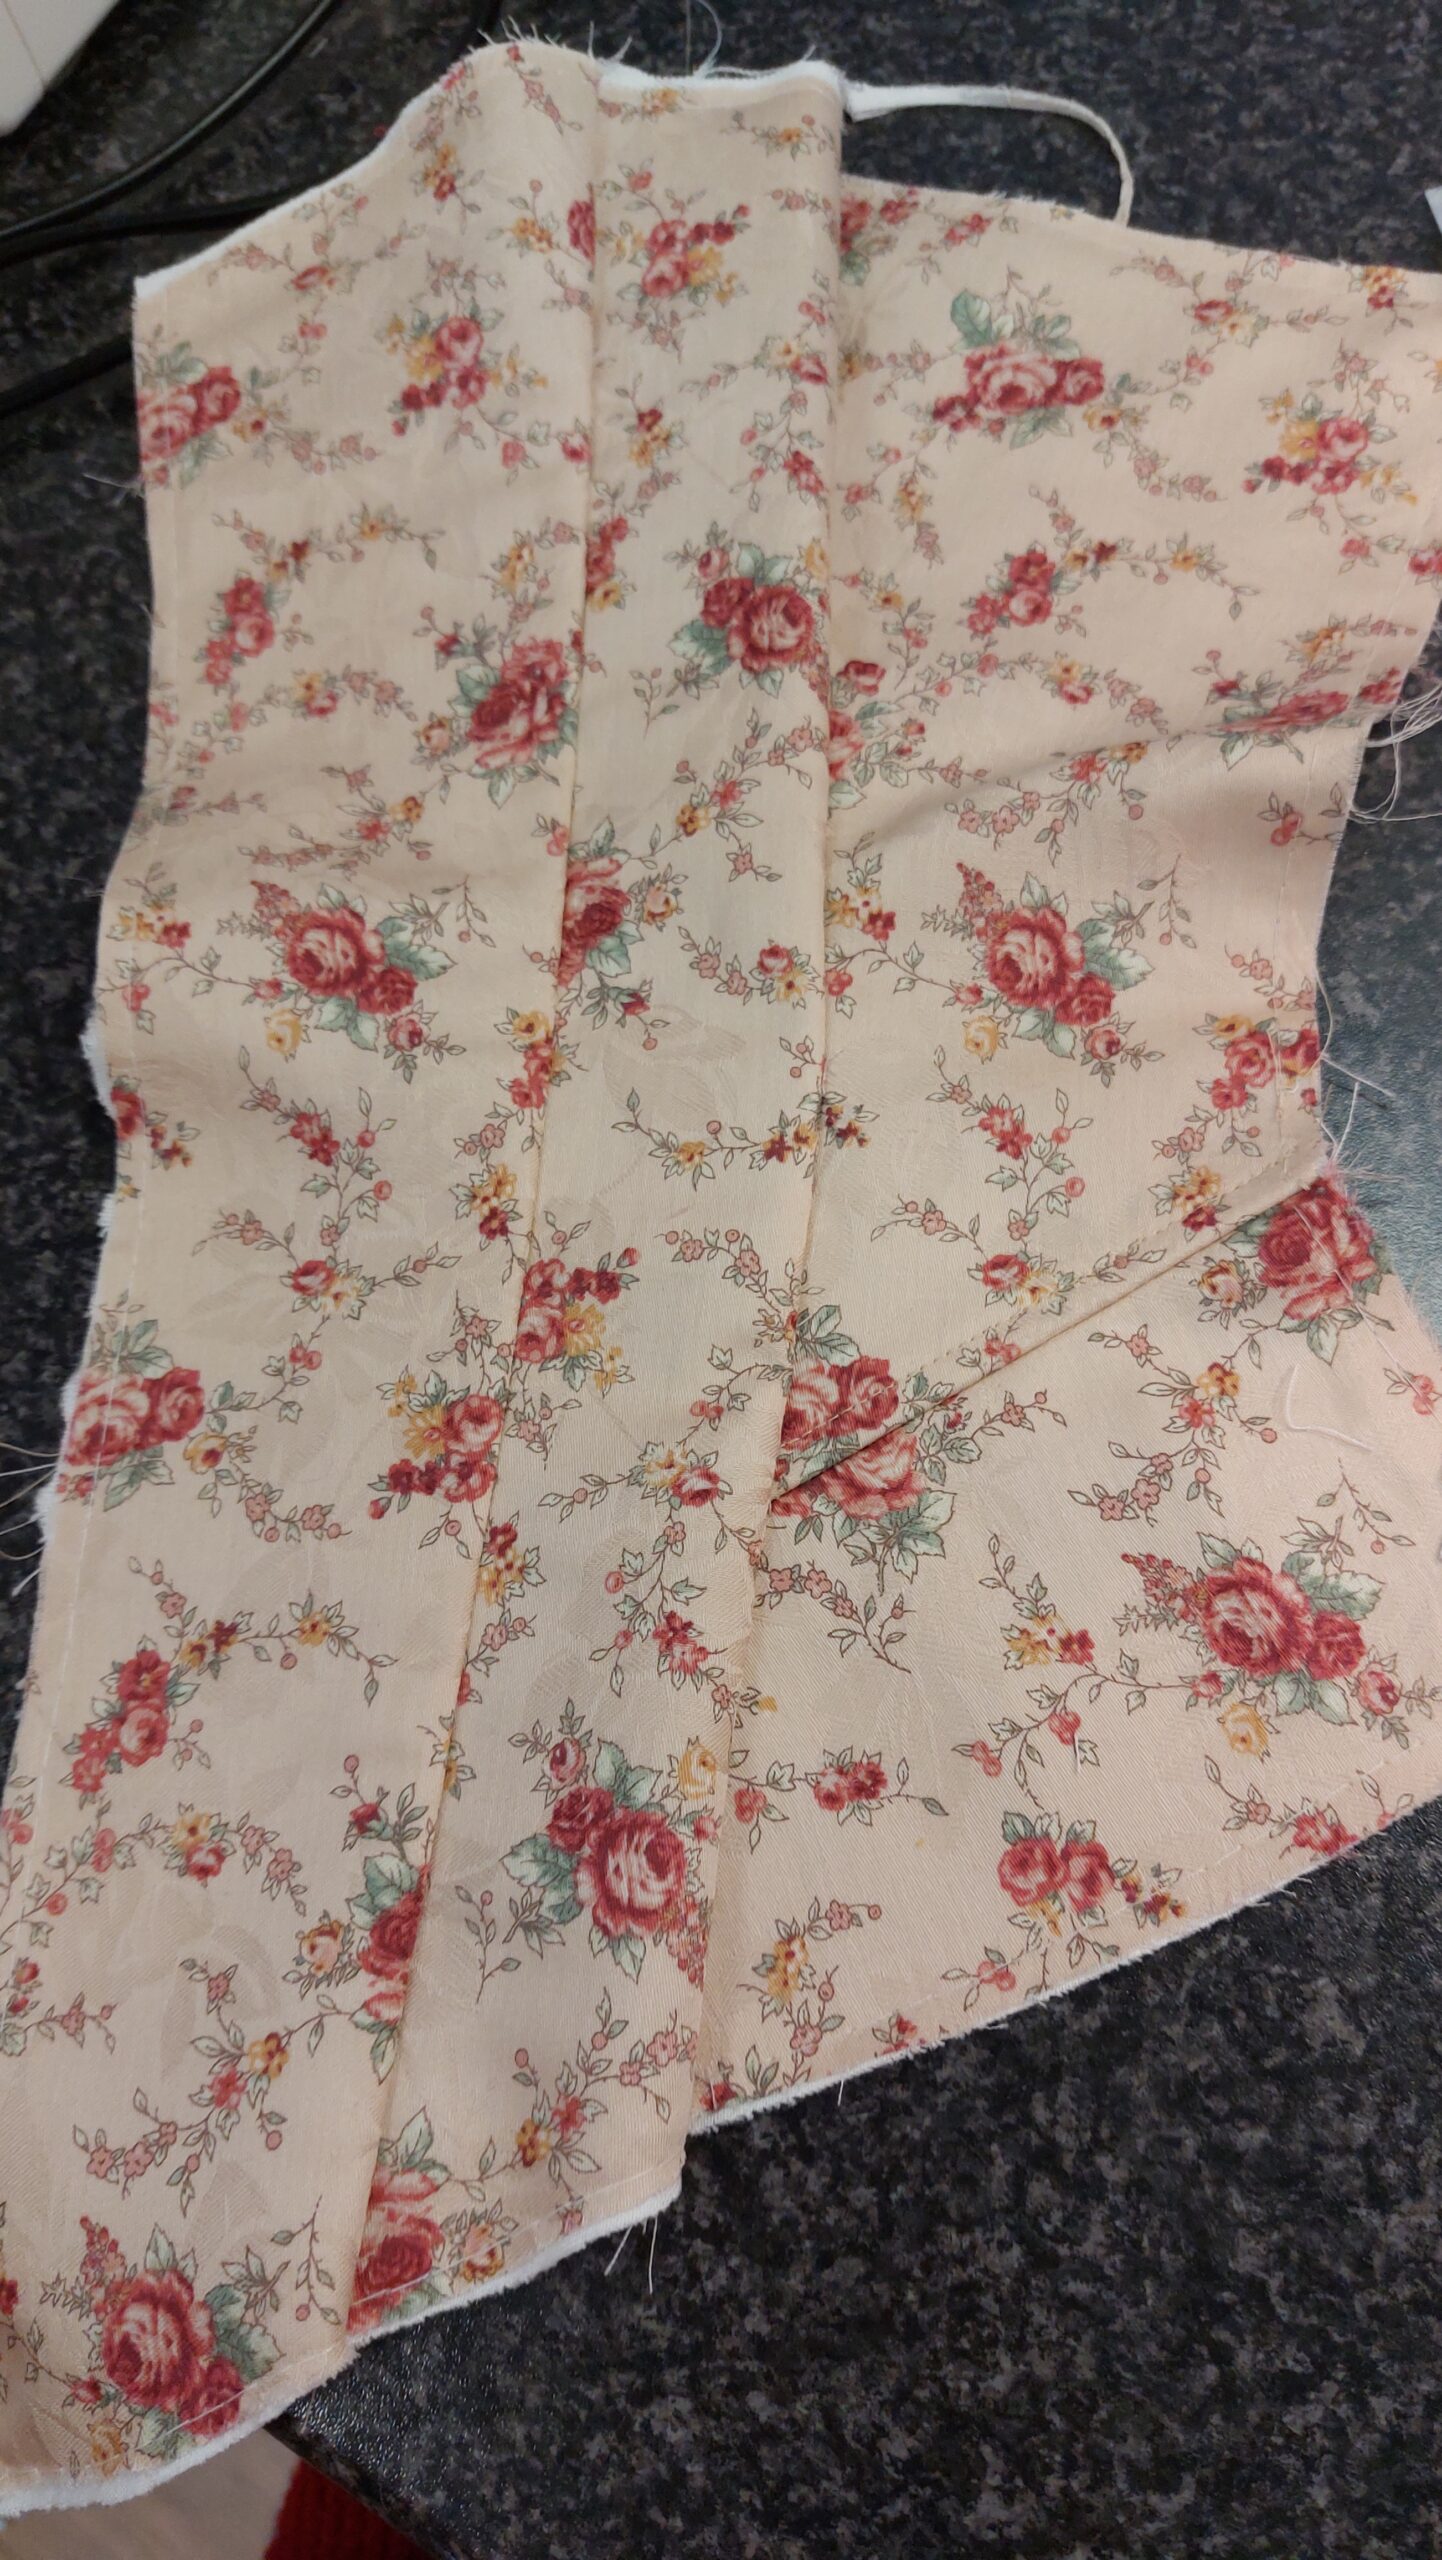
Here you can see the first and second panel and the amount I have lengthened the corset.
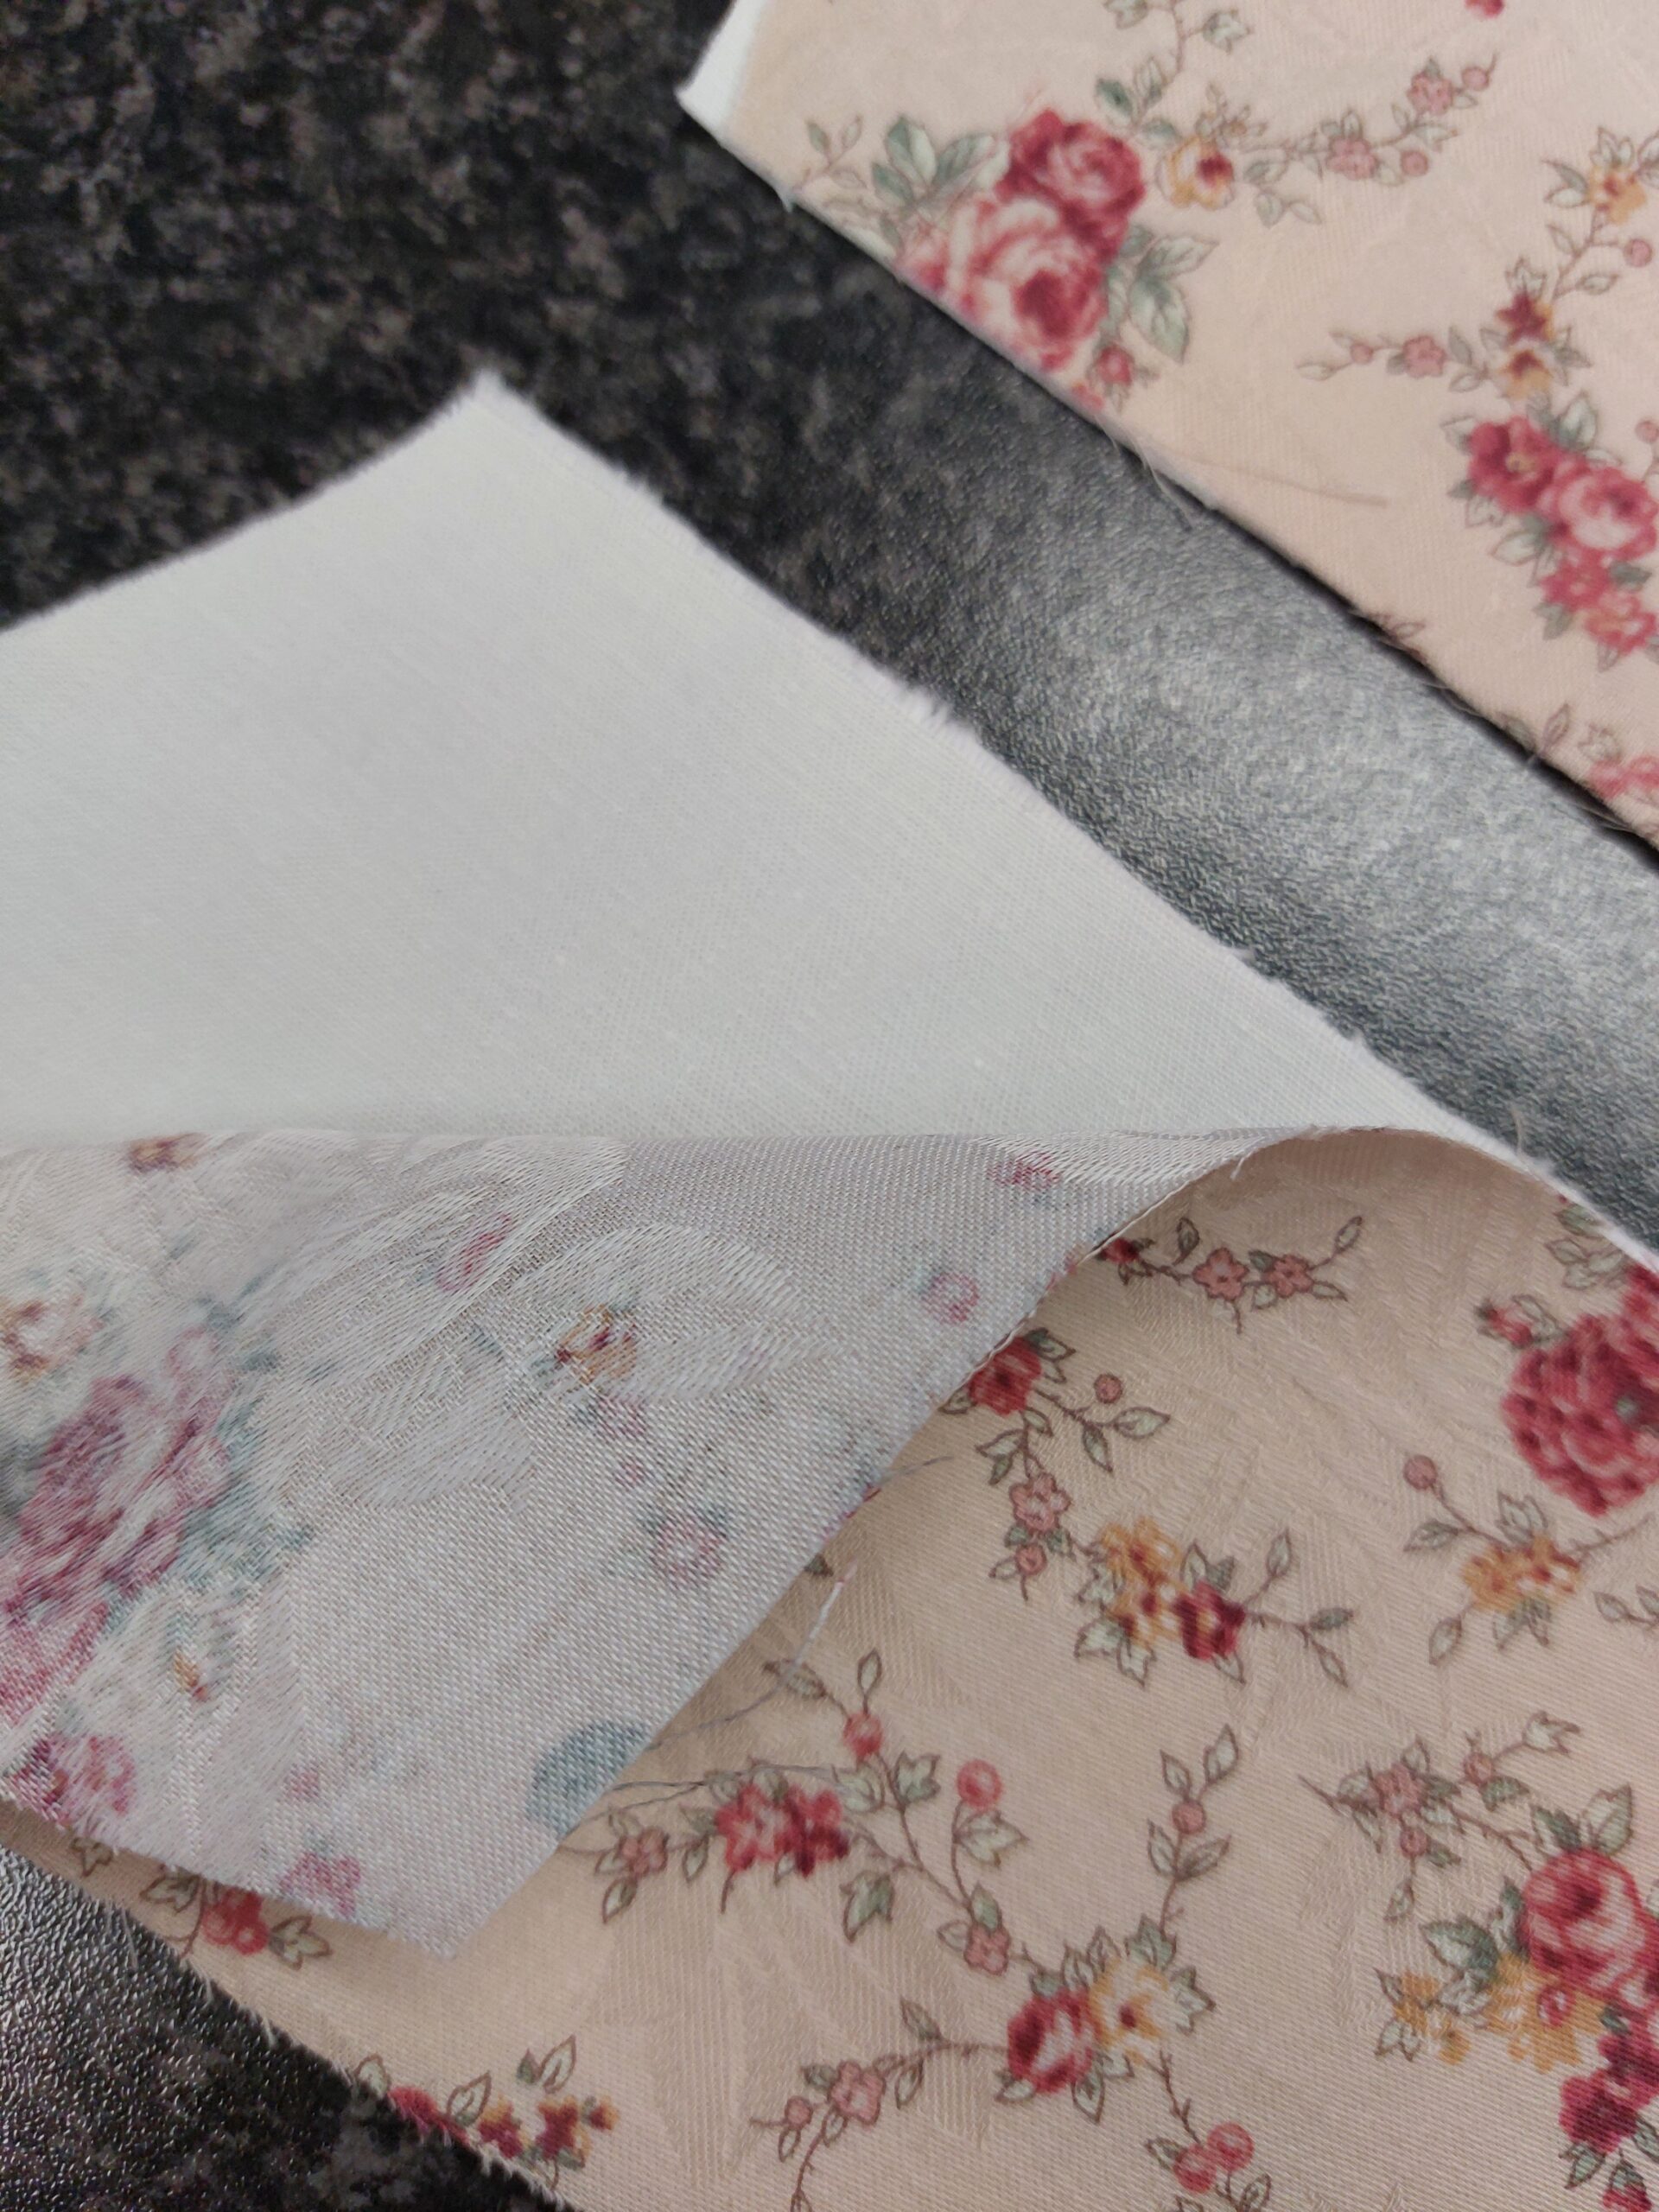
I am making this corset out of a floral quilting cotton and a coutil strength layer. Before assembling the corset stitch the floral cotton to the coutil and then treat it as one layer. In the past I have fused the cotton to the coutil, but I prefer to use a little glue in my sewing as possible. So when it is not necessary just don’t glue.
After attaching the fashion fabric to the coutil I stitched the first to the second panel. The seamlines are stitched twice.
29-5-2022 Corset Panels Assemble!
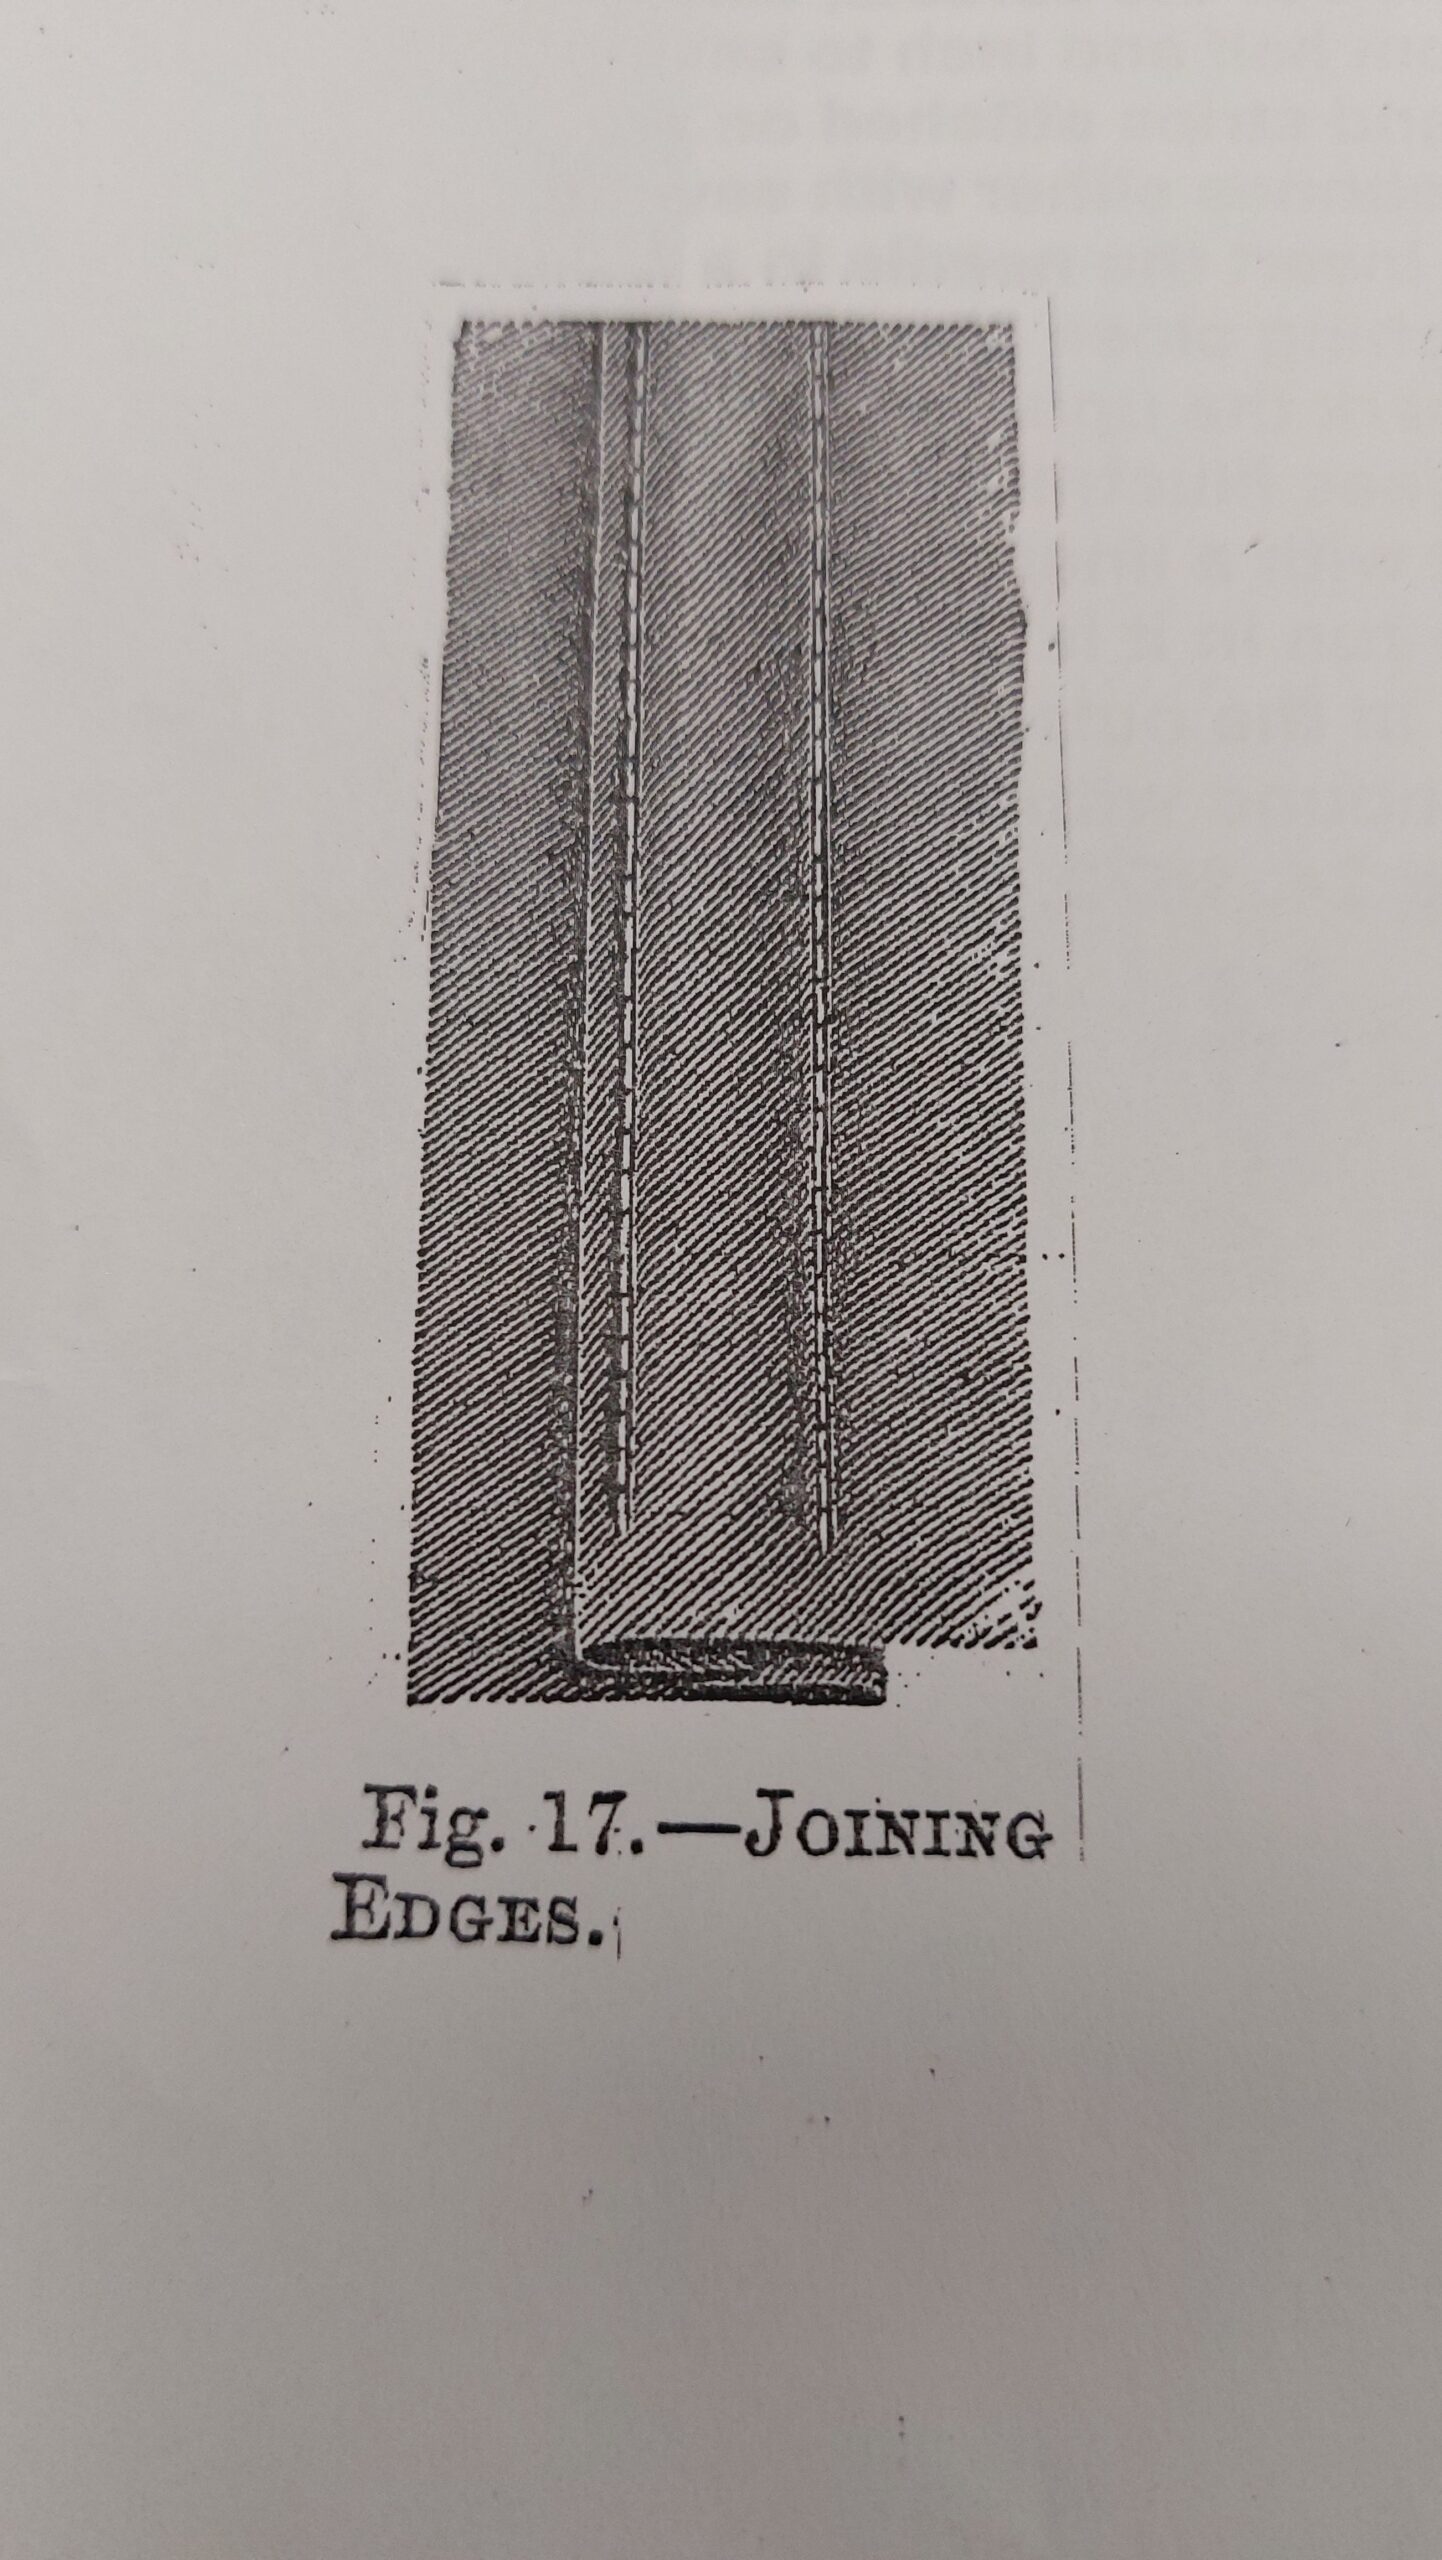
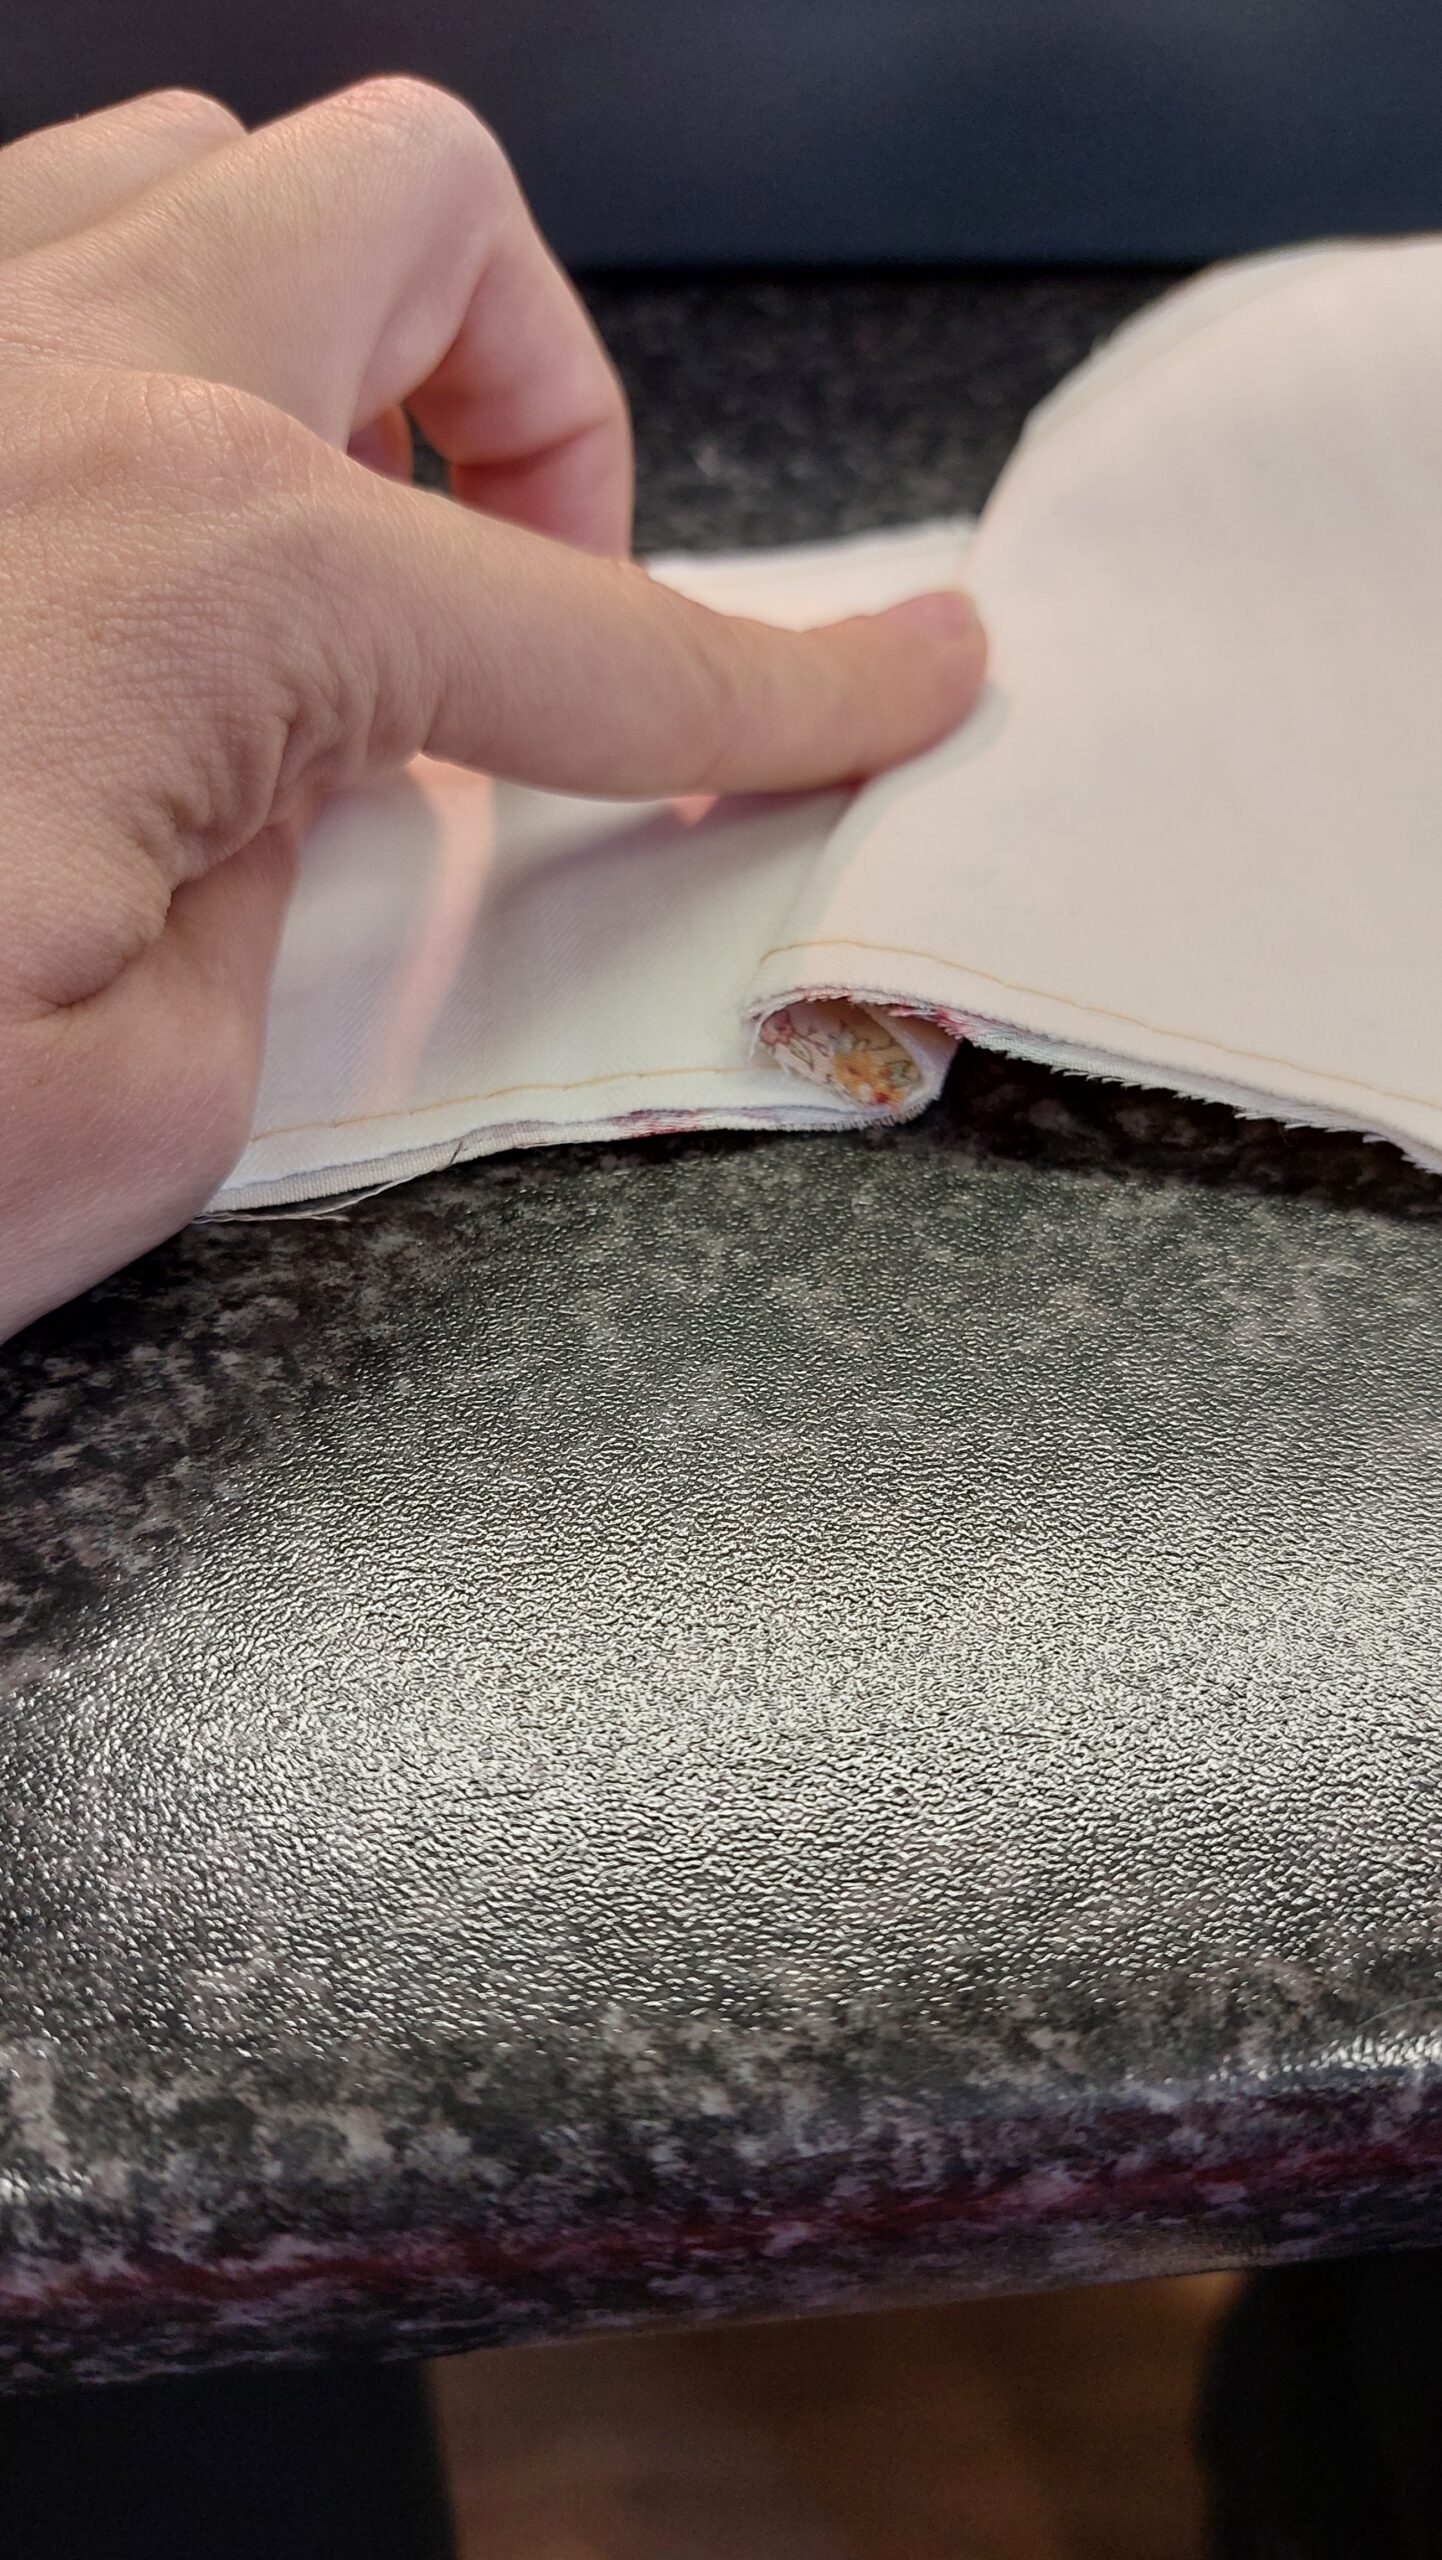
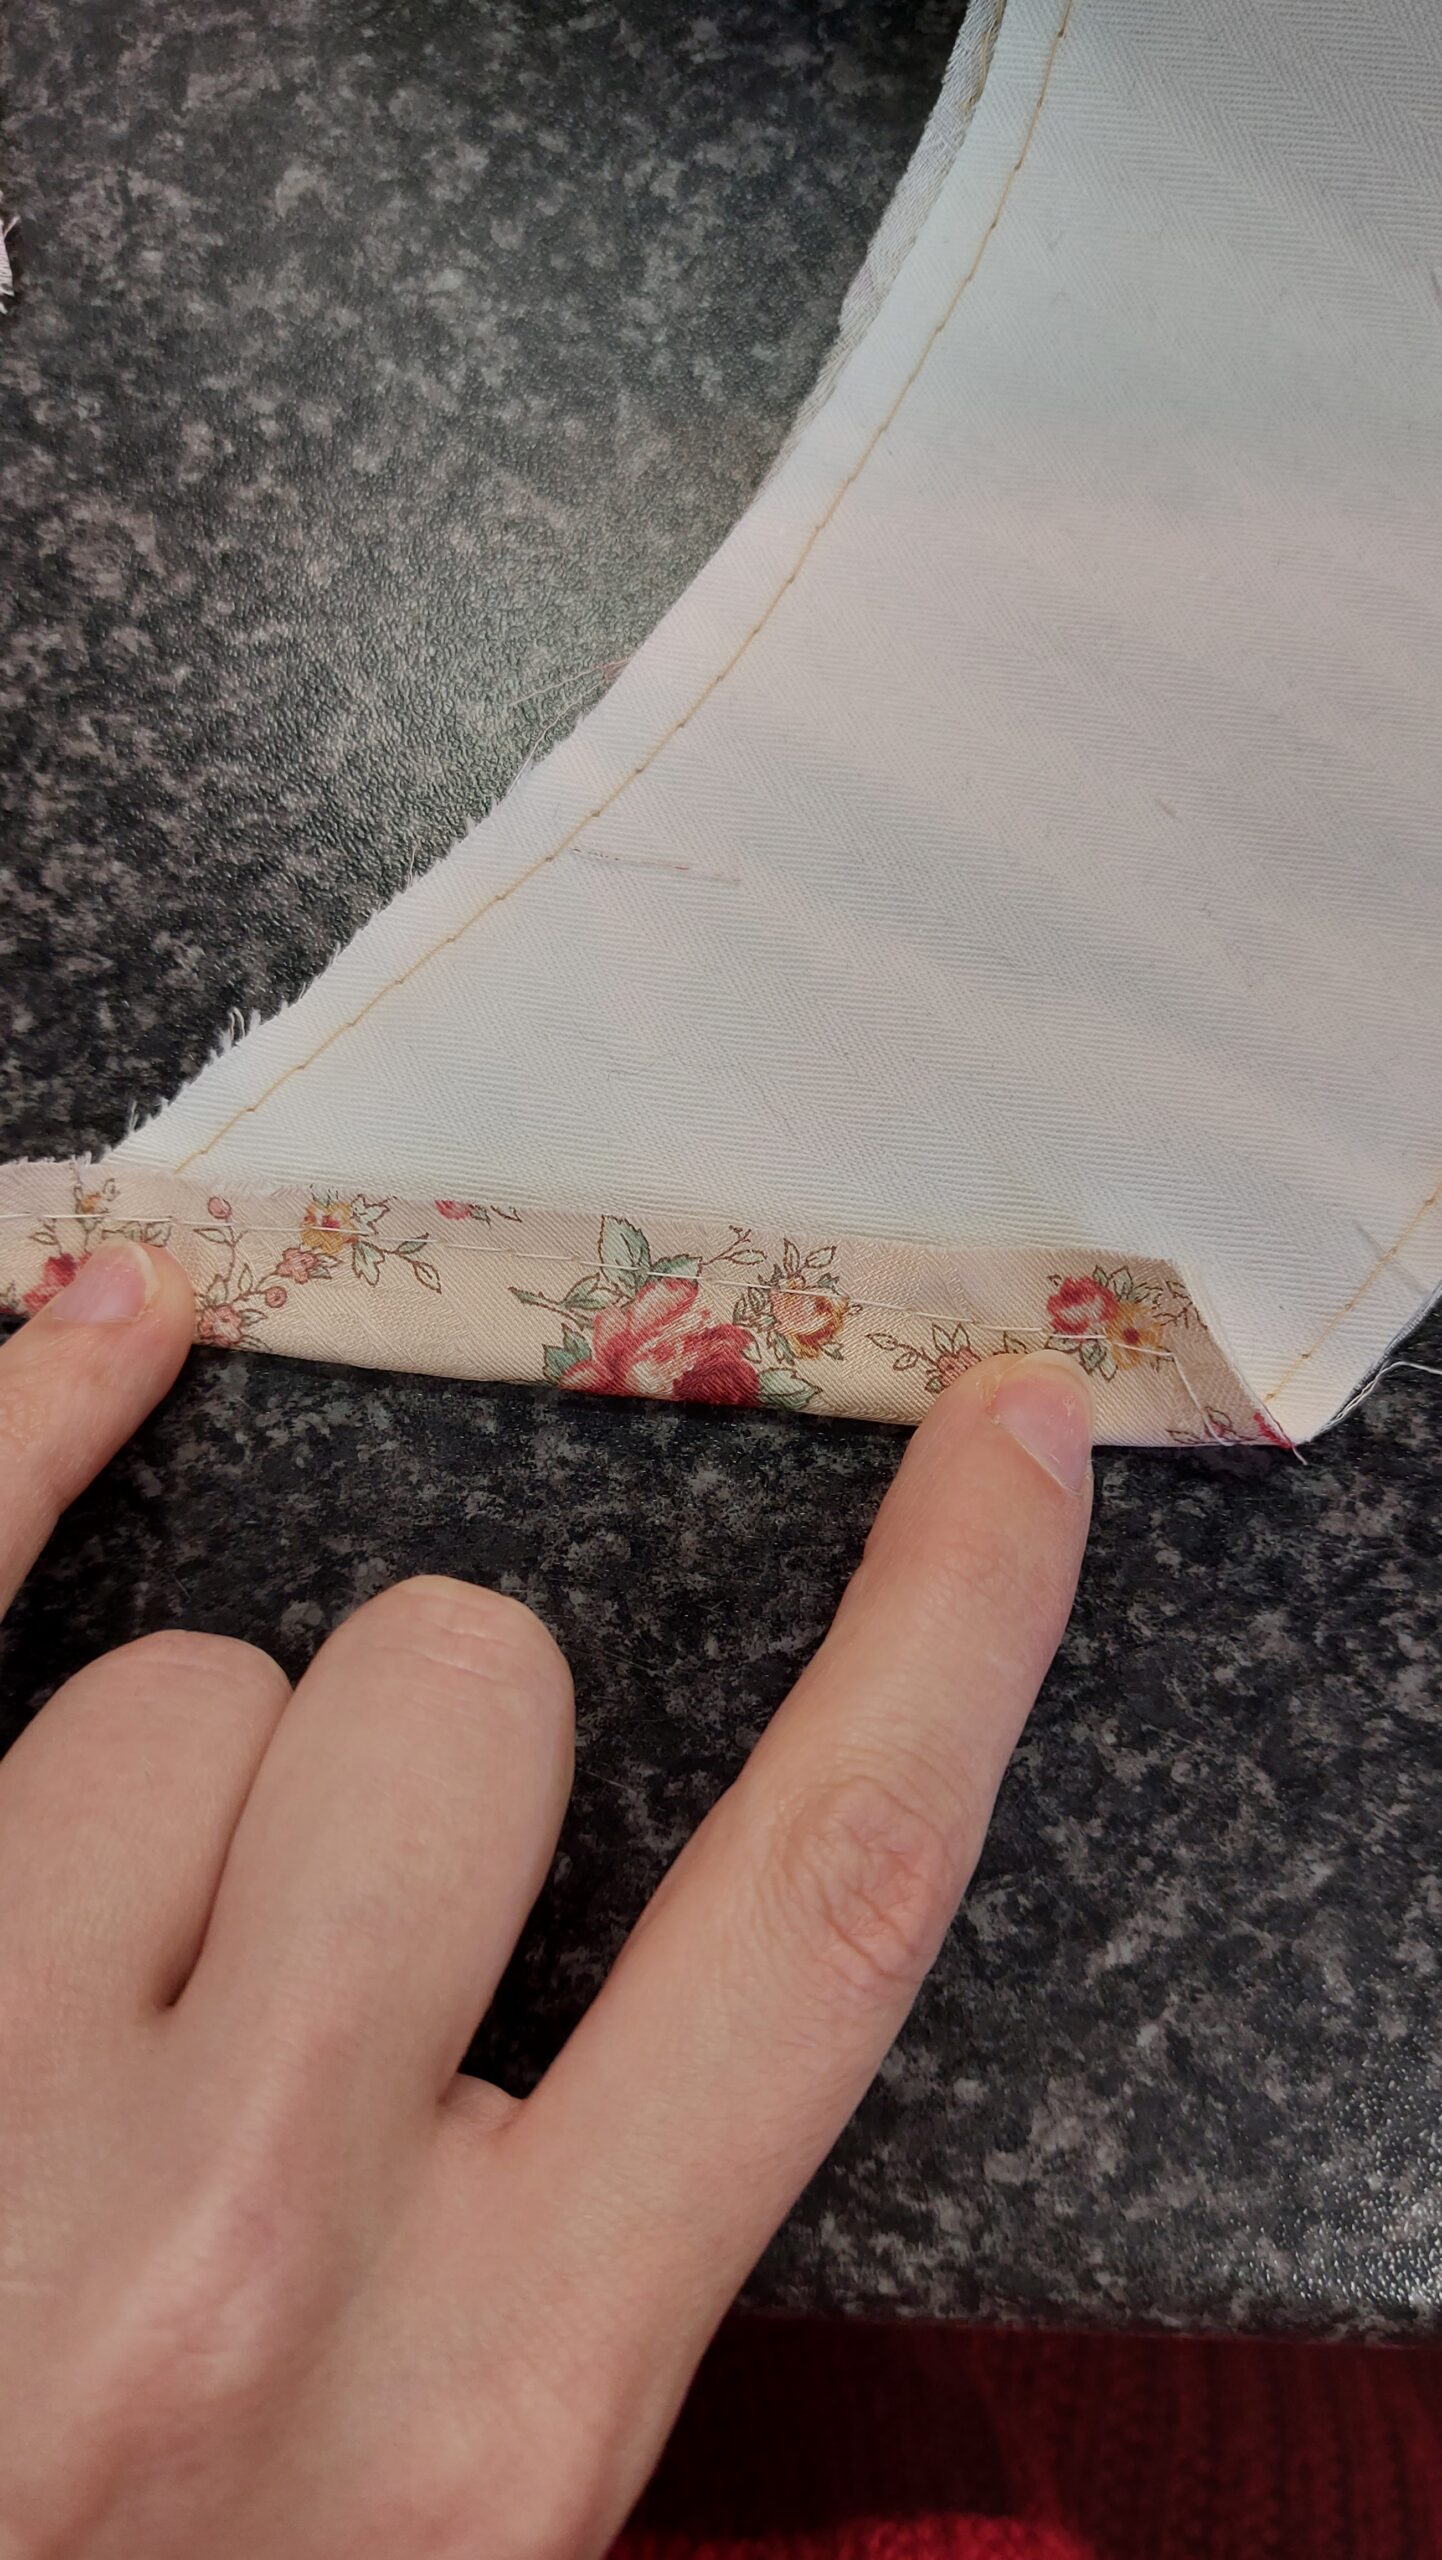
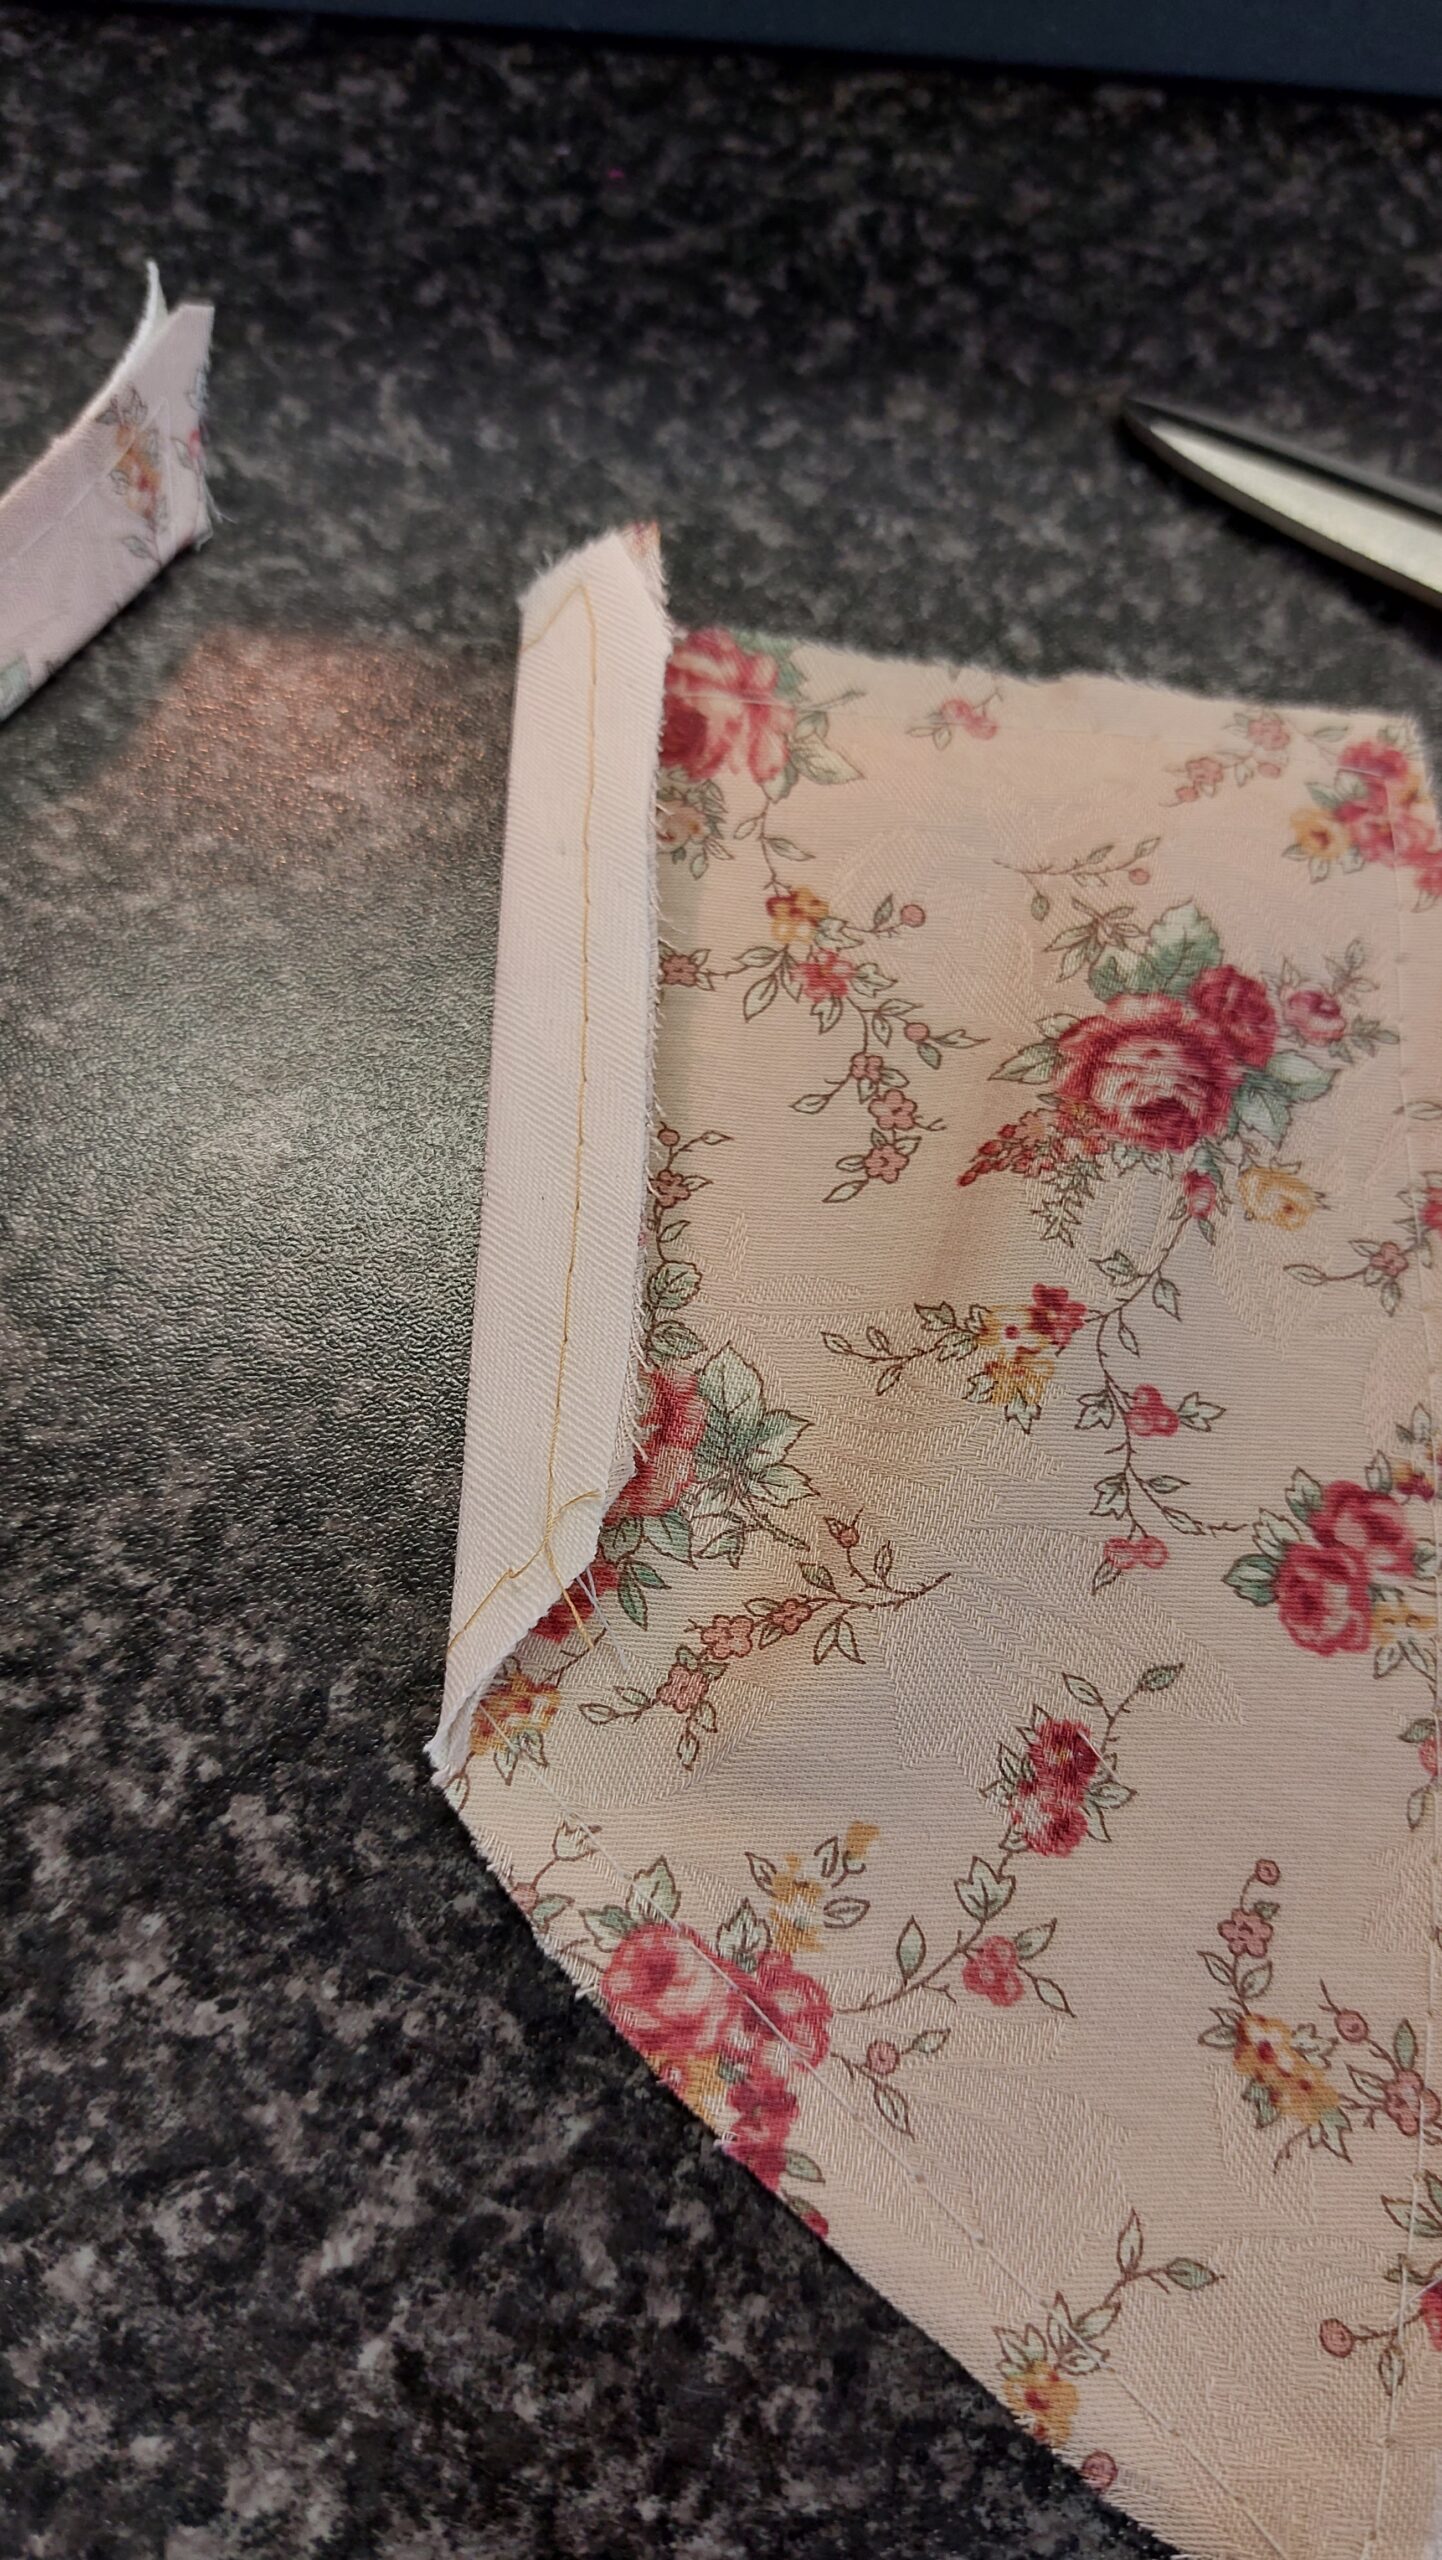
Now it is time to assemble the 3rd panel. This panel is made out of 2 pieces. A hip piece that is attached to the main piece. I want the corset to look as much as the example as possible, so I want to assemble this piece using the method shown with the pattern. I believe the English term is Flat Fell seam. (for the record, I am dutch)
After that I stitched the panel and tada! It looks like a regular 3rd corset panel. This panel I attached to the first two.
Then it was already up to the 4th panel. (I just love how quickly it looks like a corset when you have the first panels assembled) The 4th panel has a bone down the centre of the panel and not just at the seamlines, so I went on ahead and stitched that boning channel in using regular bone channel tape.
Please note that I do allow comments underneath this blog post, if the amount of spam gets to high comments will be closed. You are of course allowed to ask questions, please note that with a full time job next to Skeletons it may take a while before I answer.
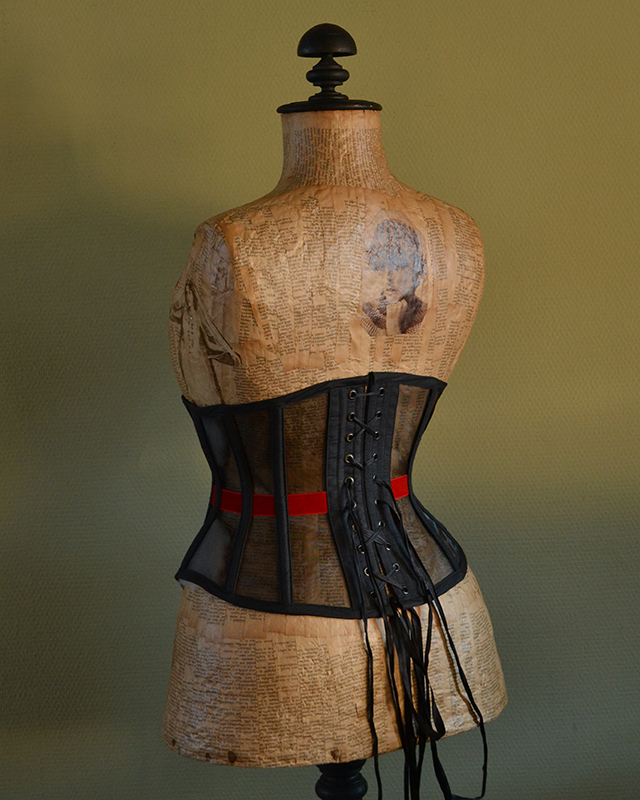
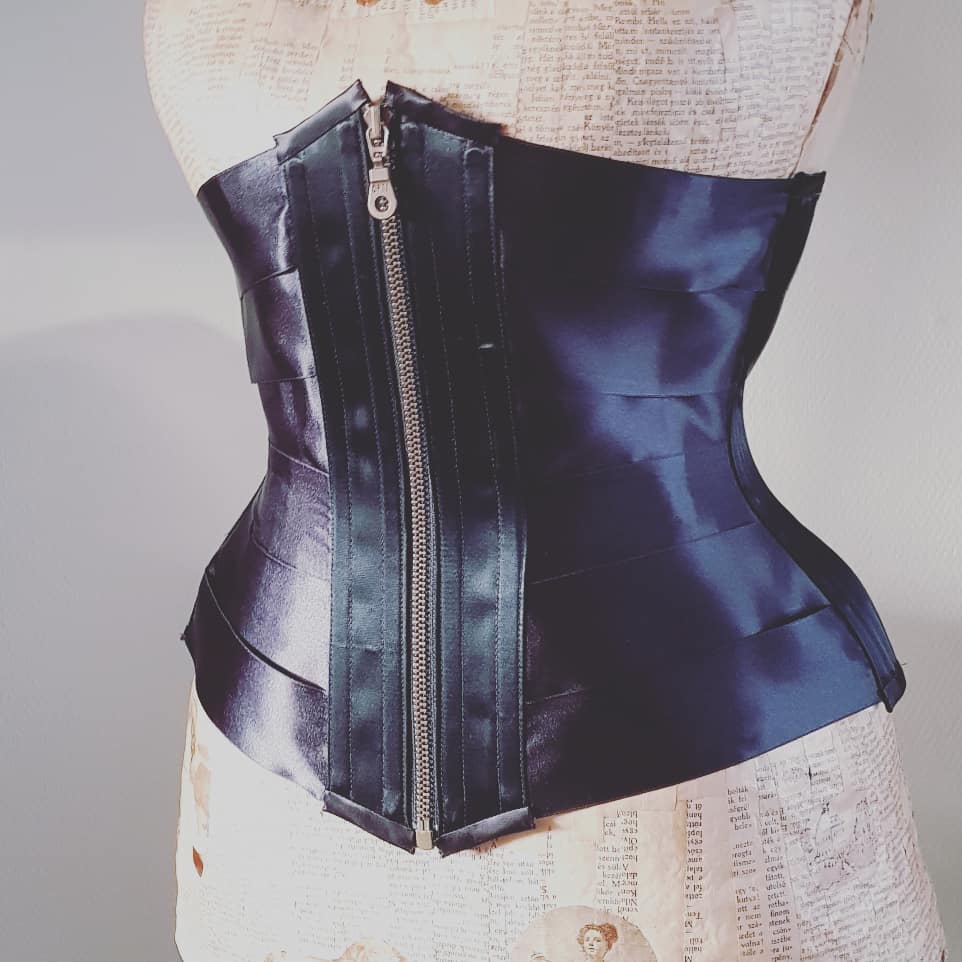
This ribbon corset was a custom order by a lovely customer of mine. She wanted a corset that would give curves but is easy to move around in and was long enough. Beeing an performer and artist she needed something light but still giving shape.
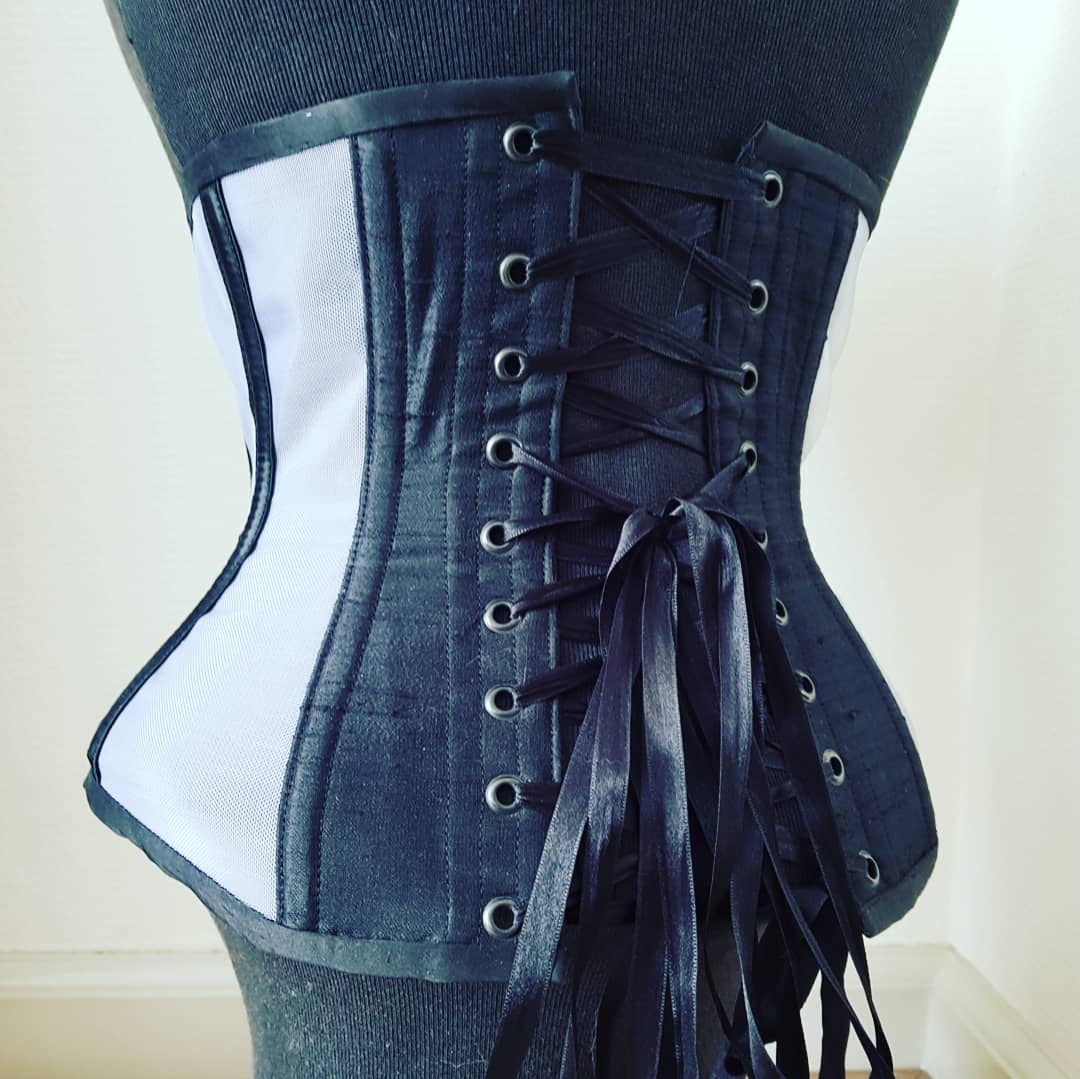
Ribbon corset by Skeletons in the Closet
Ribbon corsets have been around for quite some time. As I said on my Instagram posts, those Edwardians knew what they were doing.
Ribbon corset by Skeletons in the Closet
Most historical examples of ribbon corsets I have seen date back to around 1900. Sometimes made out of the most beautiful silk ribbons. If you have the time go google some of those examples they will surely inspire you. They say ribbon corsets were made to rest in, or as part of a lingerie set.
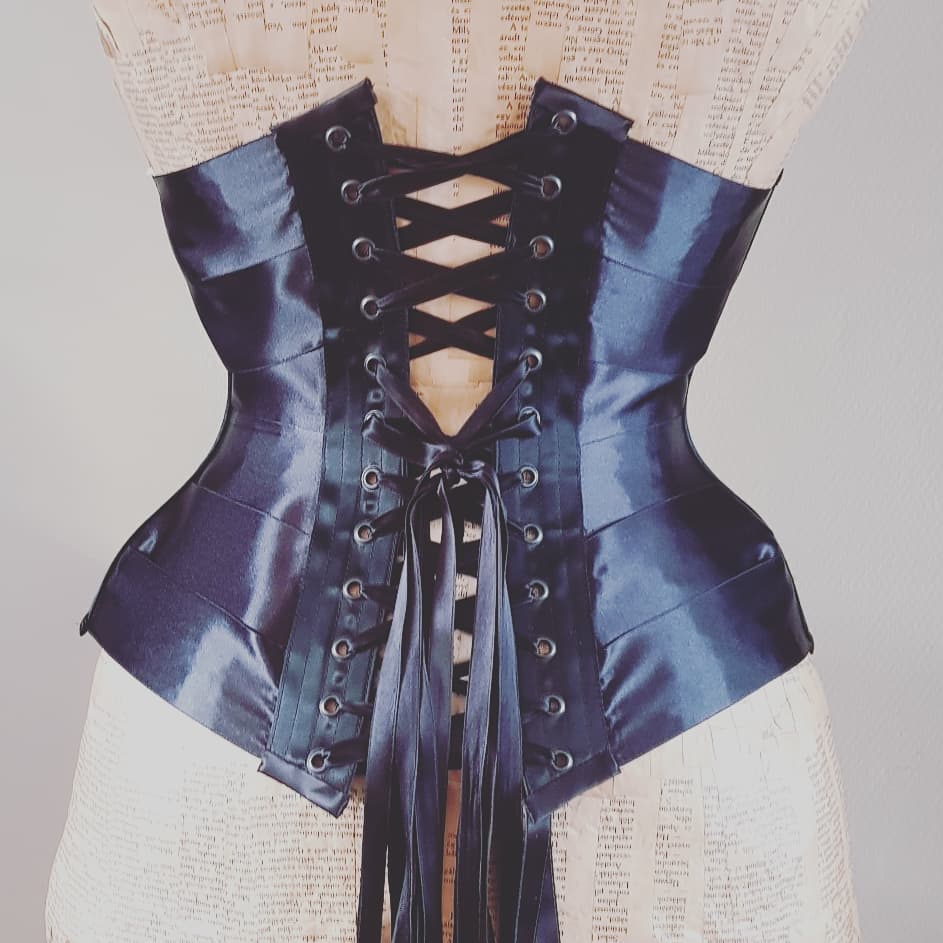
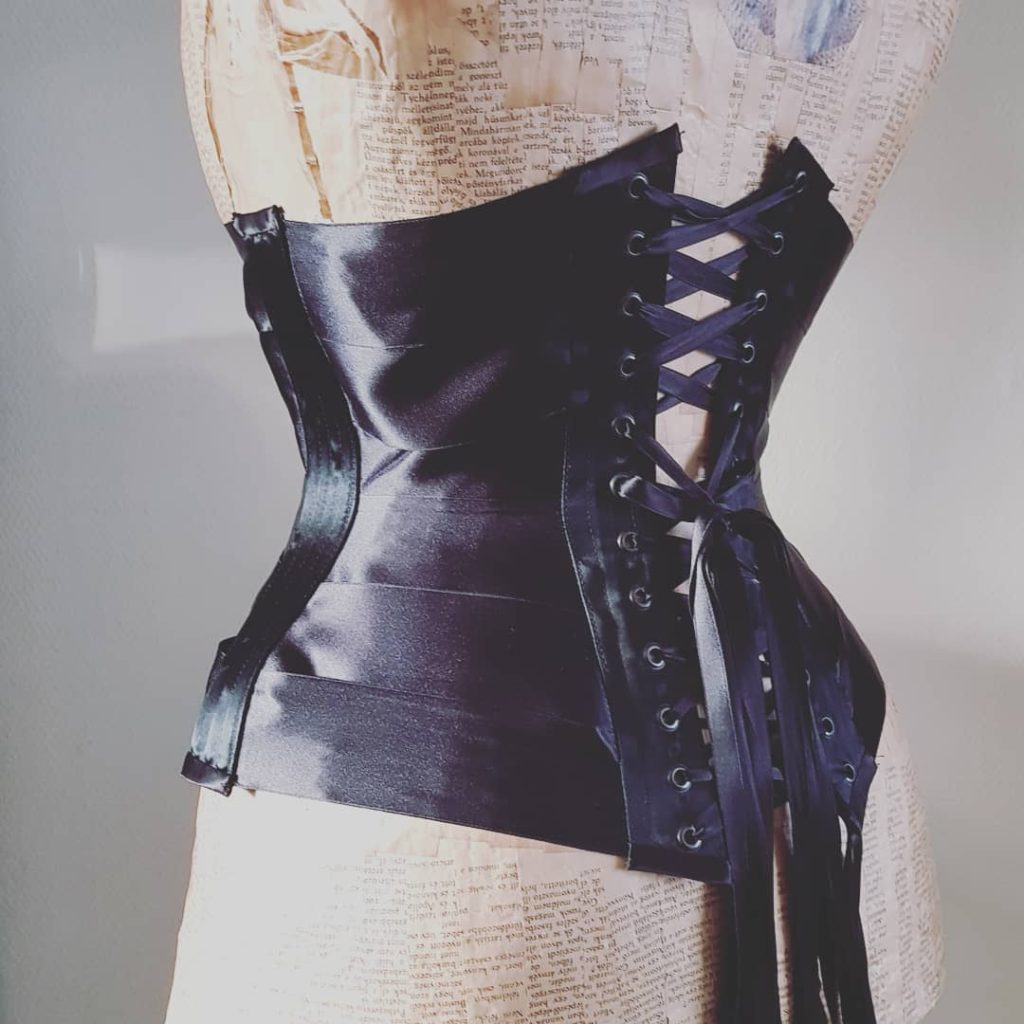
Fun fact about a ribbon corset is the shaping. In the case of this corset the centre front, side and centre back pieces are made out of straight strips of satin coutil. The side front and side back are made out of strips of ribbon. The shape therefore comes from the ribbon panels. In fact when you draft the pattern for a ribbon corset you basically make all the shape in two panels per side! Awesome right?!
Ribbon corset by Skeletons in the Closet
Anyhow I hope you like It as much as I do, you can order yours here:
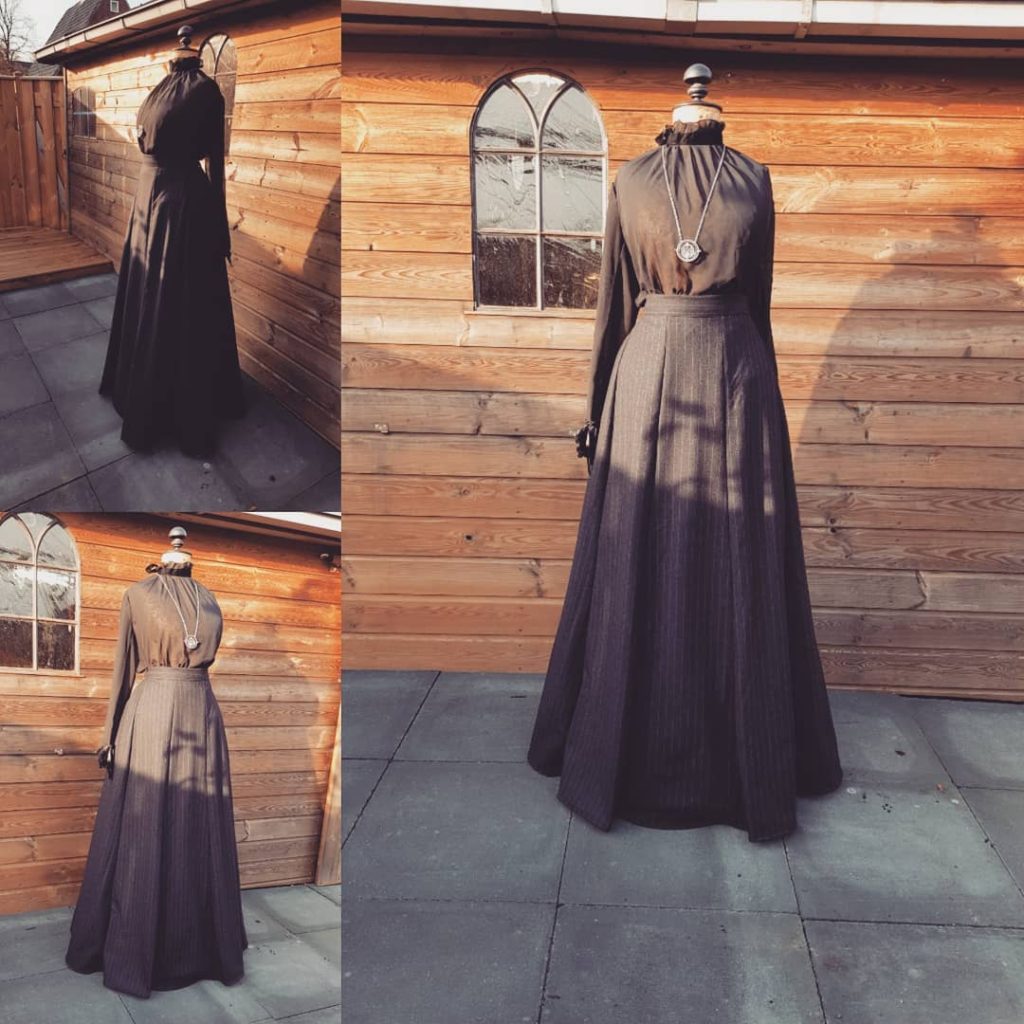
And for more Edwardian viewing pleasure, have you seen the shaping of Edwardian skirts? They are awesome, flat at the front and full at the back.
Mid December I went to The Hague for a collaboration with some amazing people.
Sanne van Bergenhenegouwen asked if I was willing to do the styling of a plus size lady. Because I am plus sized myself, we were in luck and I had an assortment of items to shoot.
Collaborating with likeminded creative people makes sure that you get amazing results. Somehow creativity with a lot of people together in one room creates more creativity, as if it grows. It certainly was that way for me. Especially when I got the pictures from the shoot.
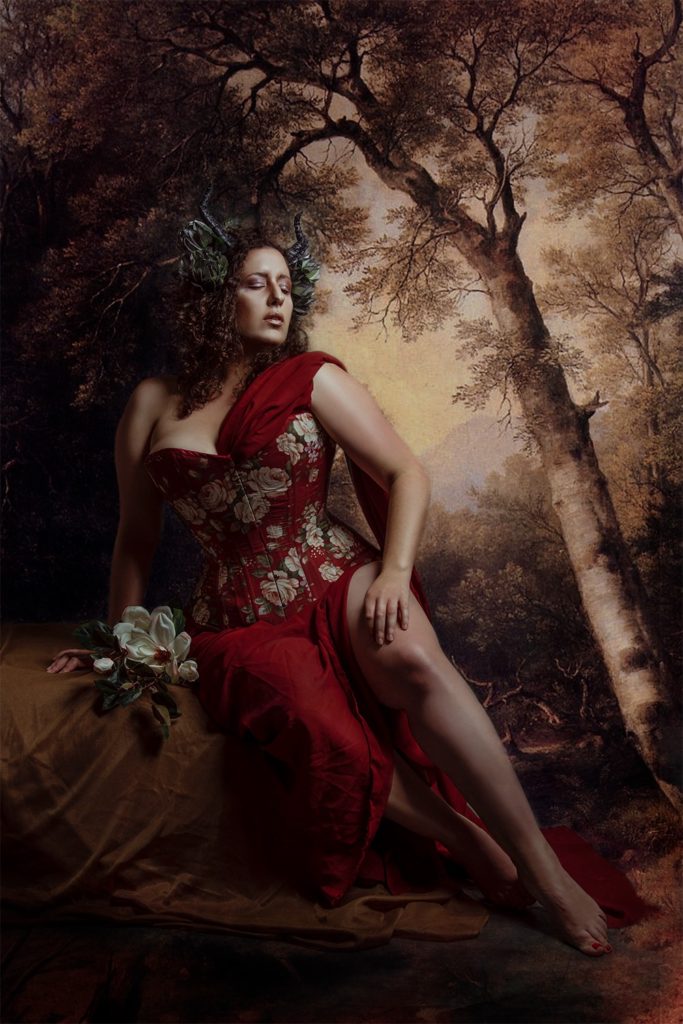
The first one is almost like a painting. This was the picture the mood board was made for. A photo inspired by the painting of the past. I love the use of light by Sanne in this picture. And the pose is just spot on.
Naline by Sanne van Bergenhenegouwen. MUA Saartje van Hauten
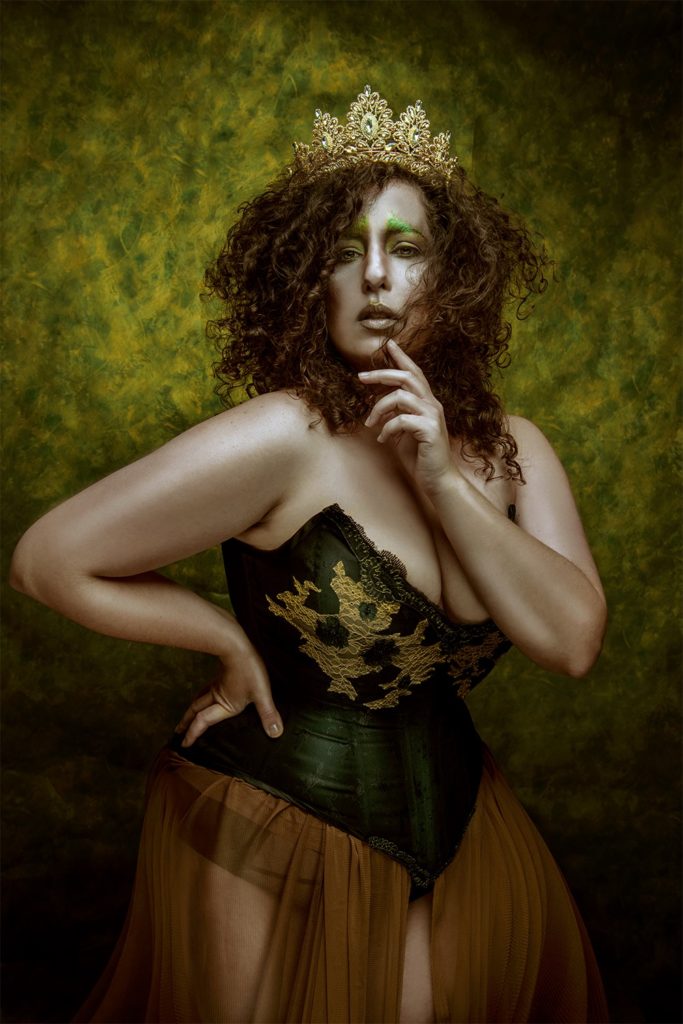
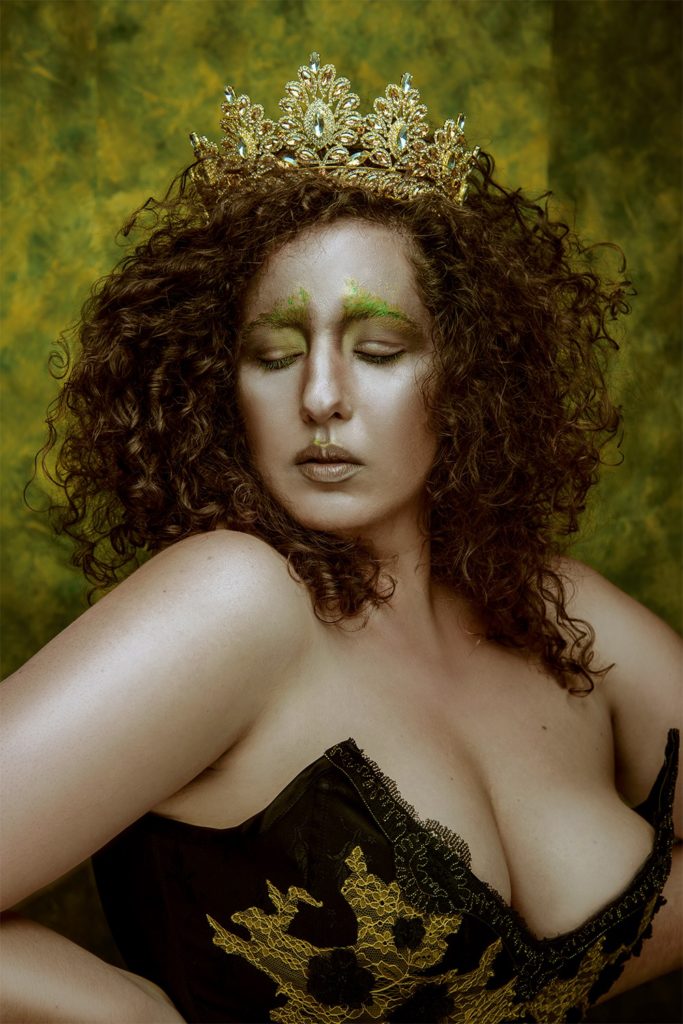
After doing the nymph we decided that in every woman resides a queen, and sometimes she just has to come out!
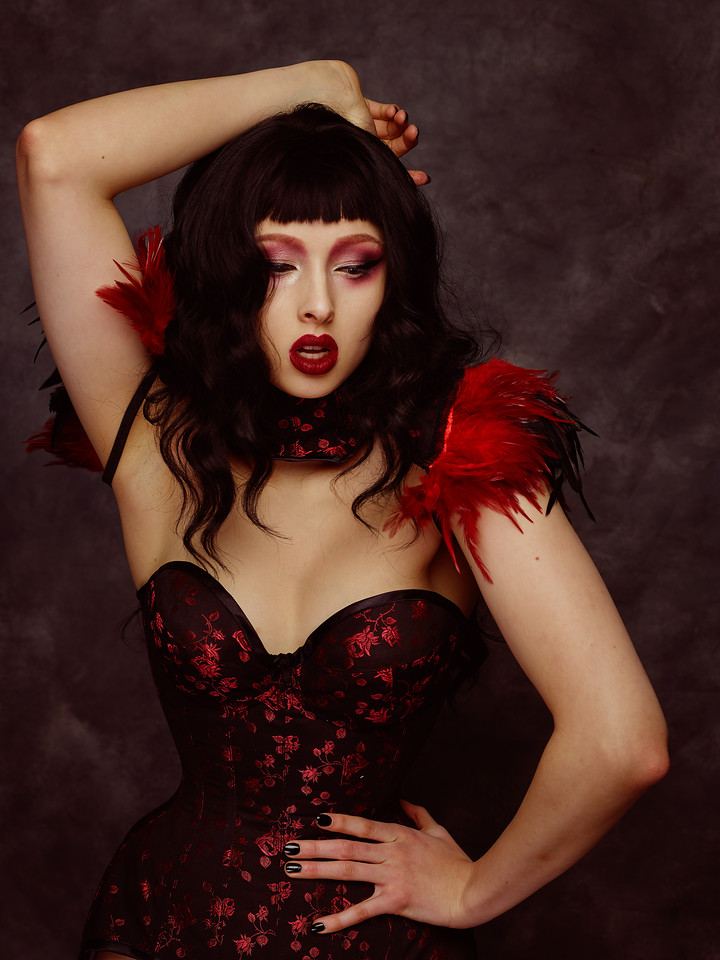
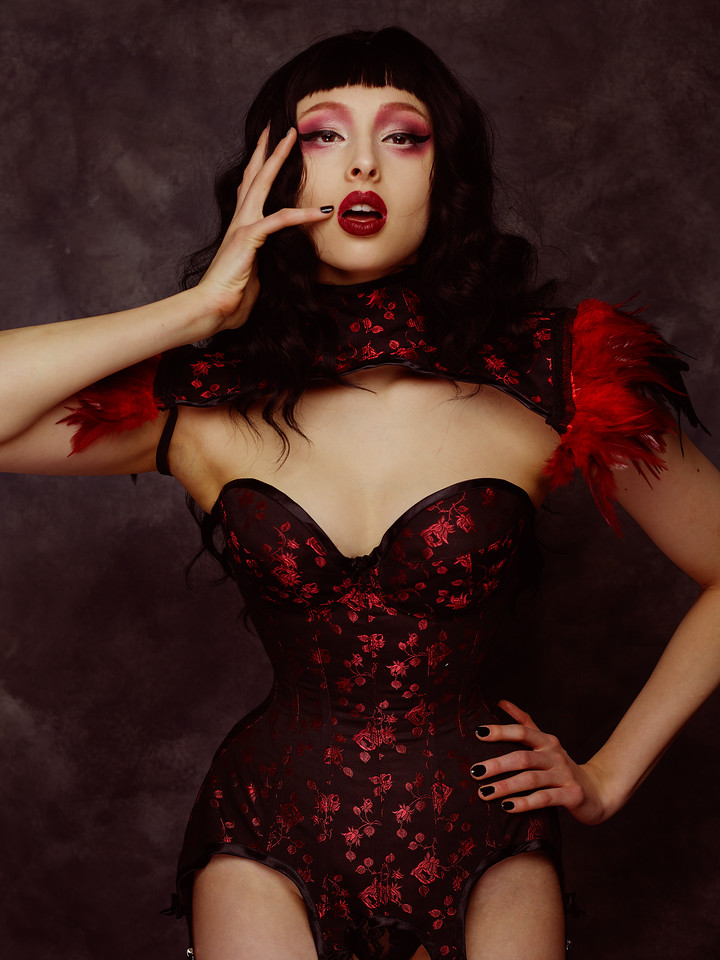
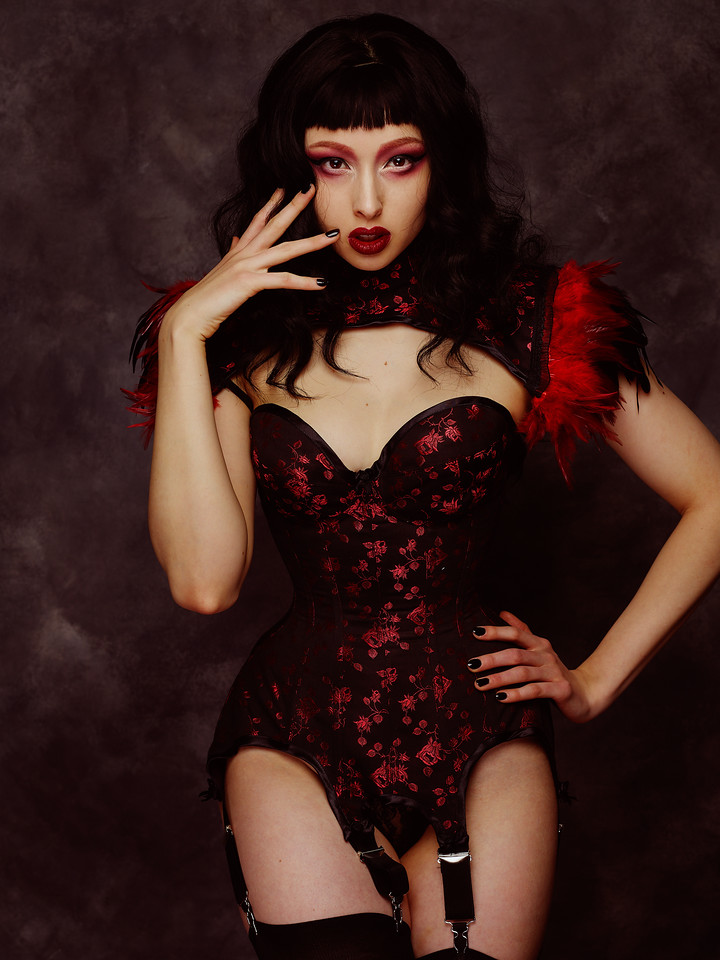
Naline by Sanne van Bergenhenegouwen. MUA Saartje van HautenNaline by Sanne van Bergenhenegouwen. MUA Saartje van Hauten
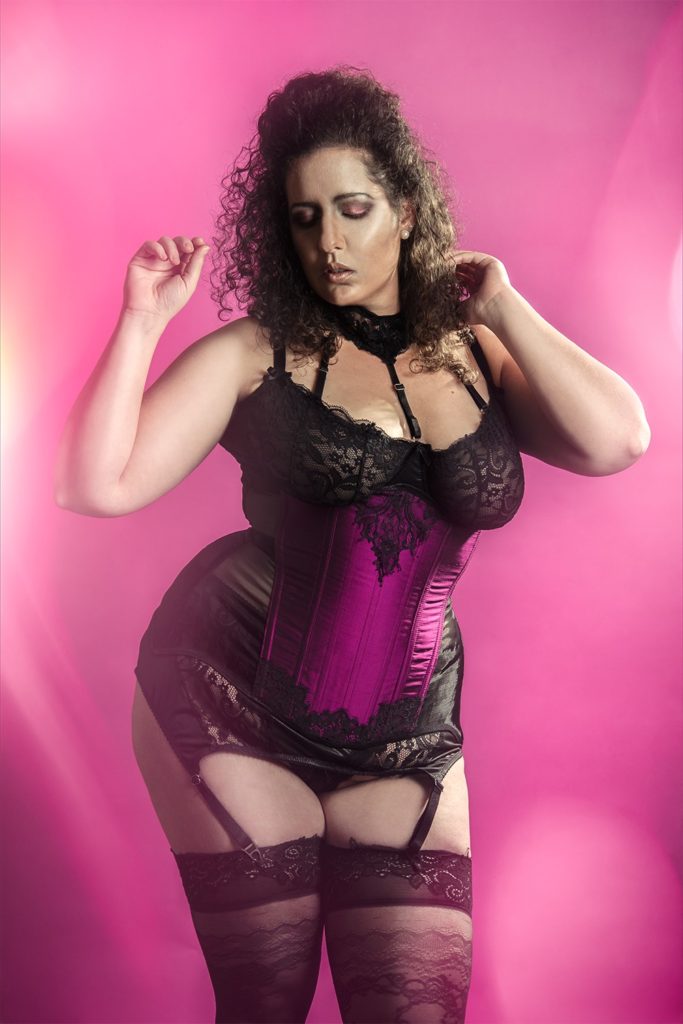
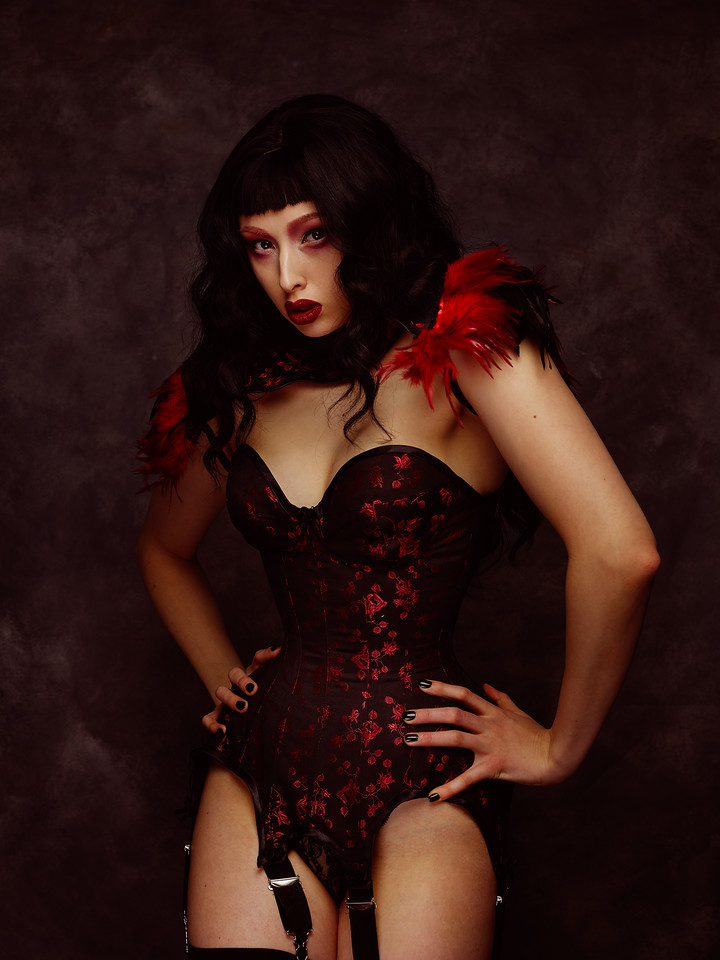
And last but not least, a lingerie photo. Because lingerie is something you wear for you!
Naline by Sanne van Bergenhenegouwen. MUA Saartje van Hauten
The whole team were total troopers, we did 3 completely different looks but were all onboard with the same ideas.
Naline is wearing the following Skeletons in the Closet items:
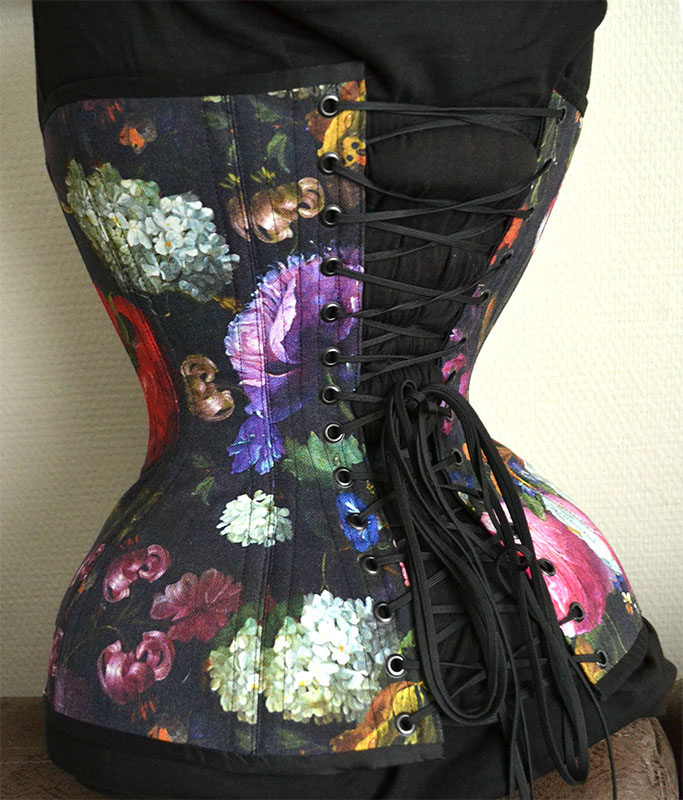
Picture 1: Victorian overbust corset in a floral cotton. Pattern matched at the front.
Picture 2 and 3: Vixen plunge corset. Made out of a cotton coutil with hand stitched gold lace and beads. Available in the webshop!
Picture 4: Longline corset/girdle. A lightweight corset made out of a silk front panel, mesh side panels with some lace at the front.
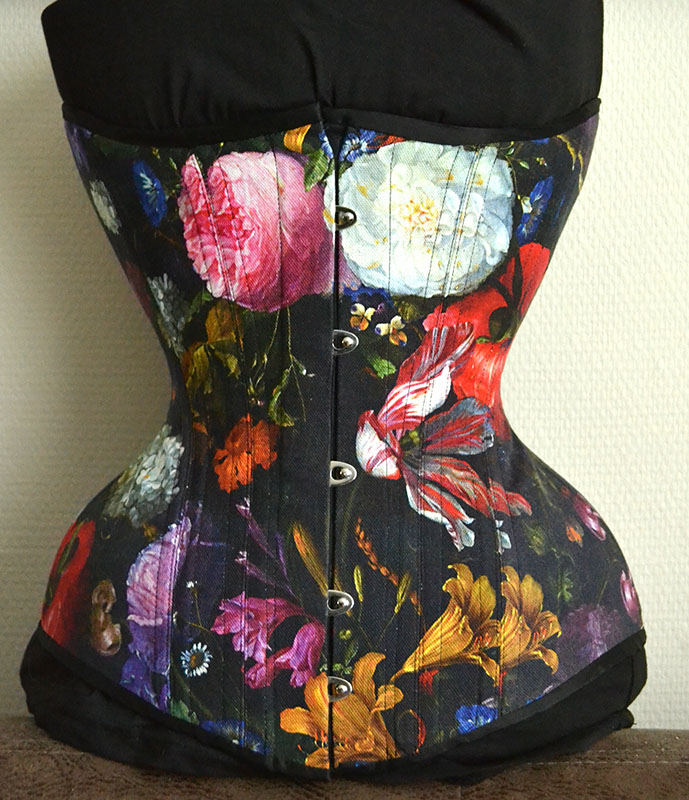
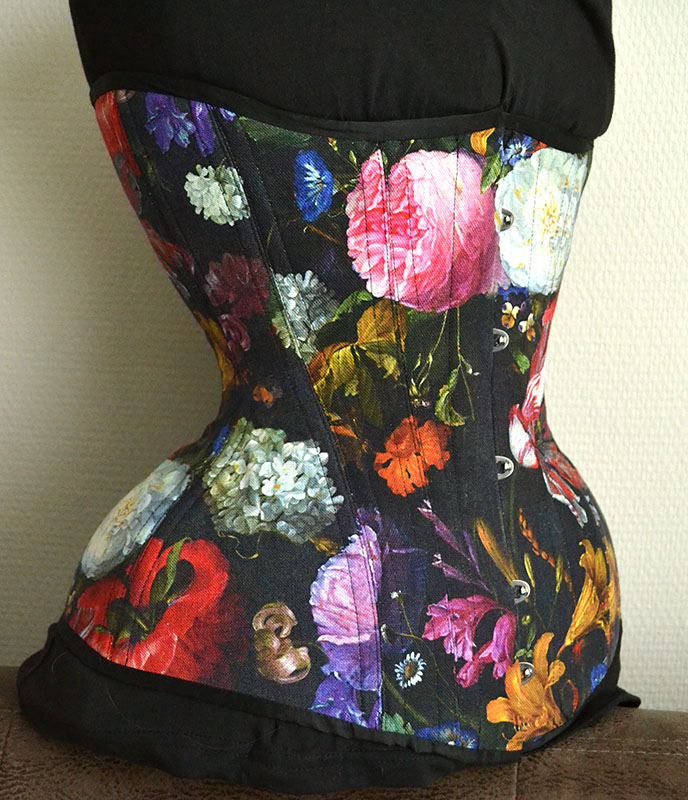
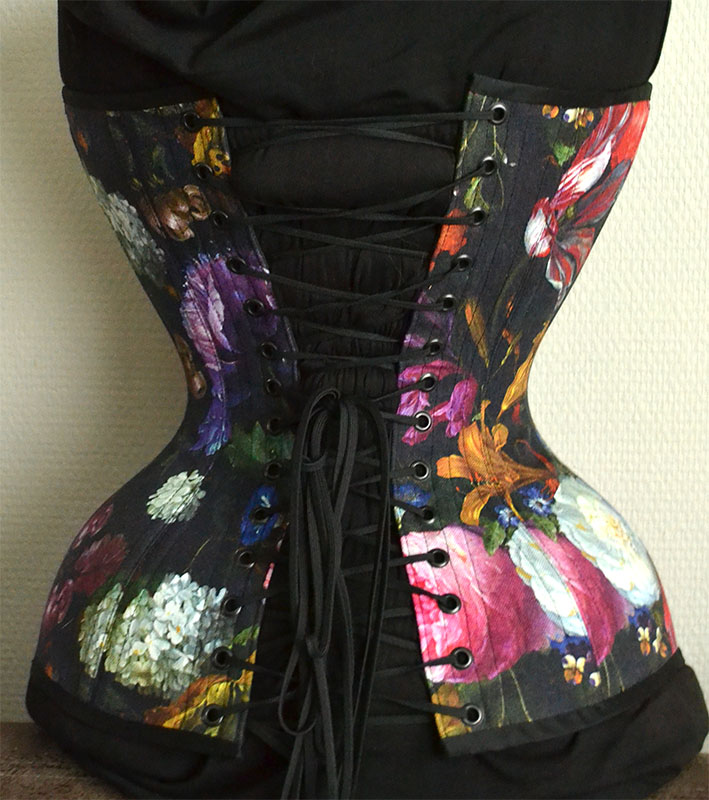
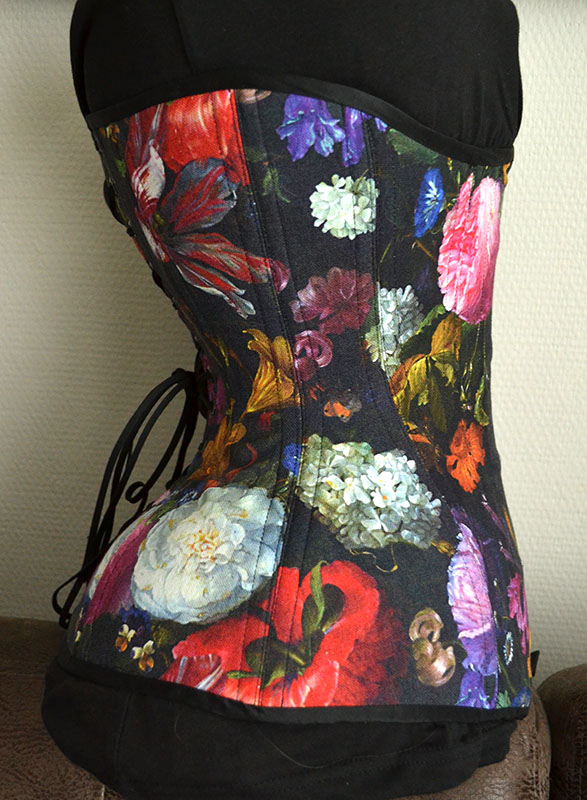
This fabric has become a bit of my thing over the past years. I love the colour and print on this cotton fabric.
This corset was made for a lovely experienced tightlacer. This means that the corset is extremely curvy.
When working with a patterned fabric you need to match the pattern or else the entire corset will look like an imbalanced mess. However due to the extremely curvy nature of this corset you cannot match the pattern everywhere, you have to choose where you want the flowers to flow over from one panel to the other, and where you are ok with not making the cut. Also, you have to keep in mind the grain of the fabric you are working with. After all you do not want wrinkles.
All in all, I am quite proud of this corset.
As you may have noticed, although I am not taking on any big orders (I still have my full-time job) I have found some room in my schedule for the occasional corset or bra. Please do understand that I do not wish to have a year fully booked, so I am taking it a season at the time. In a period of 3 months I take on a very limited amount of orders. For this fall we did the Dutch masters bra’s and Moonchild corsets, and for the winter we will open for 2 or so corset orders.
Stay tuned and follow me on Instagram and Facebook if you want to be the first to know. Or even better sign up to my mailing list.
Last year
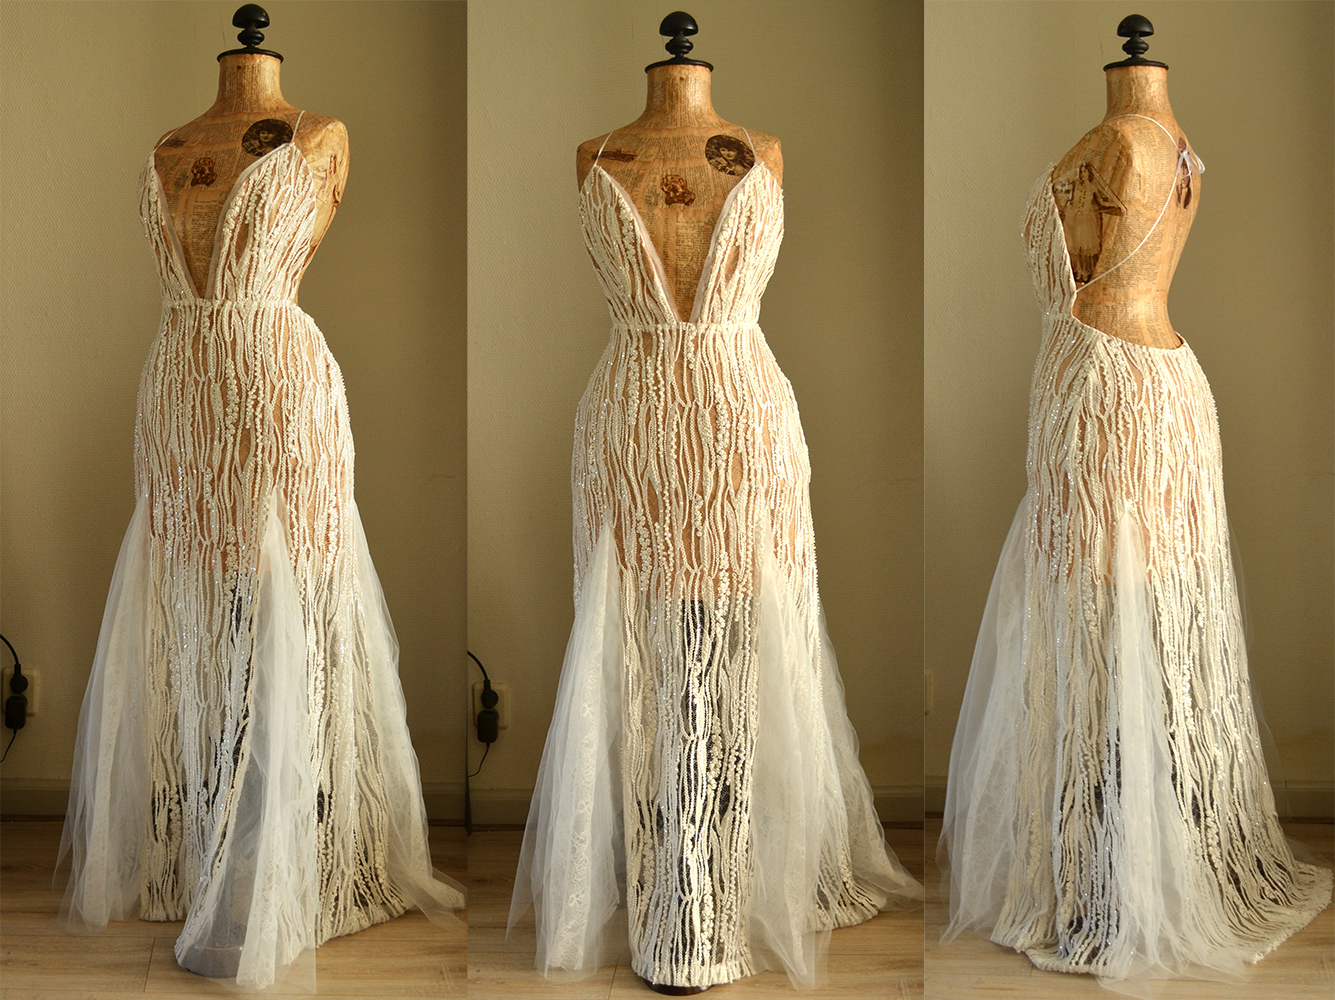
Fernanda contacted me that she needed a special dress for her beach wedding. She
wanted something with an open back and that had the nude gown look. As if you are
just wearing a lace dress with nothing underneath.
For a dress
like this the fabric makes the dress. So we ordered a lovely lace from a store
in the UK. We (or rather I) had a little stress with all the Brexit talk, but Brexit
got postponed and I got my fabric in time.
Underneath
the lace sits a skin colored fabric. The lace has little insets with tule.
This dress was unlike anything I had ever made before but I really love it, and I hope you do too.
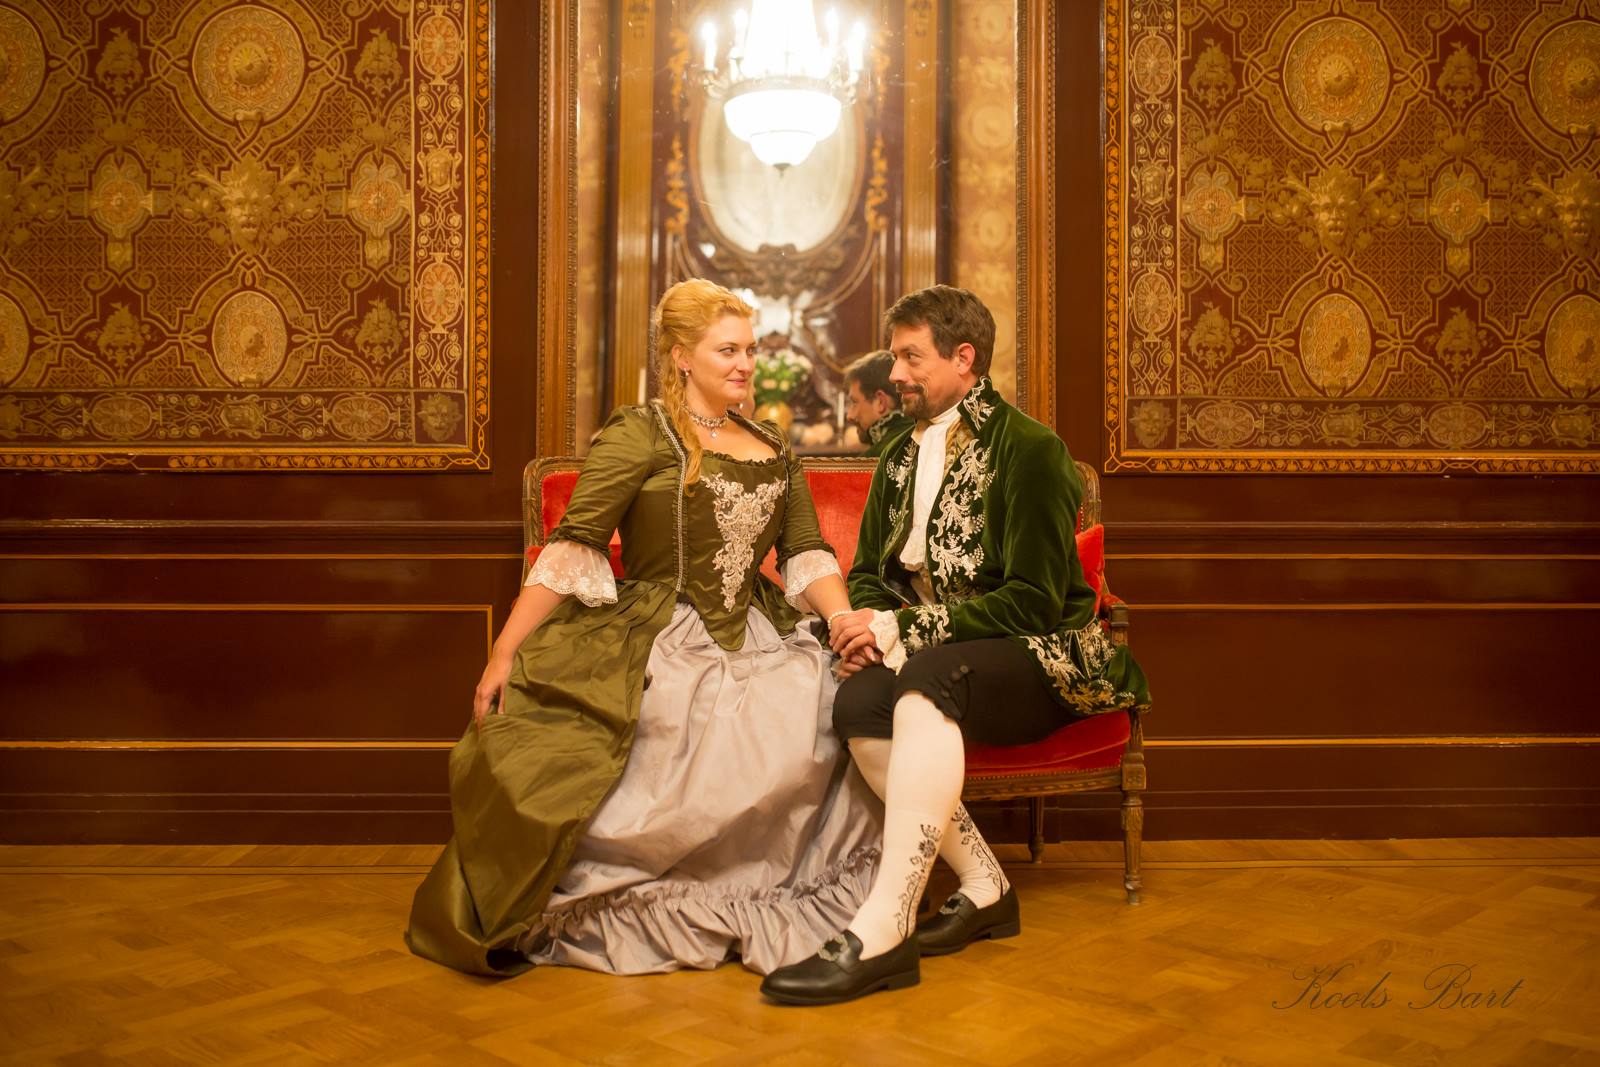
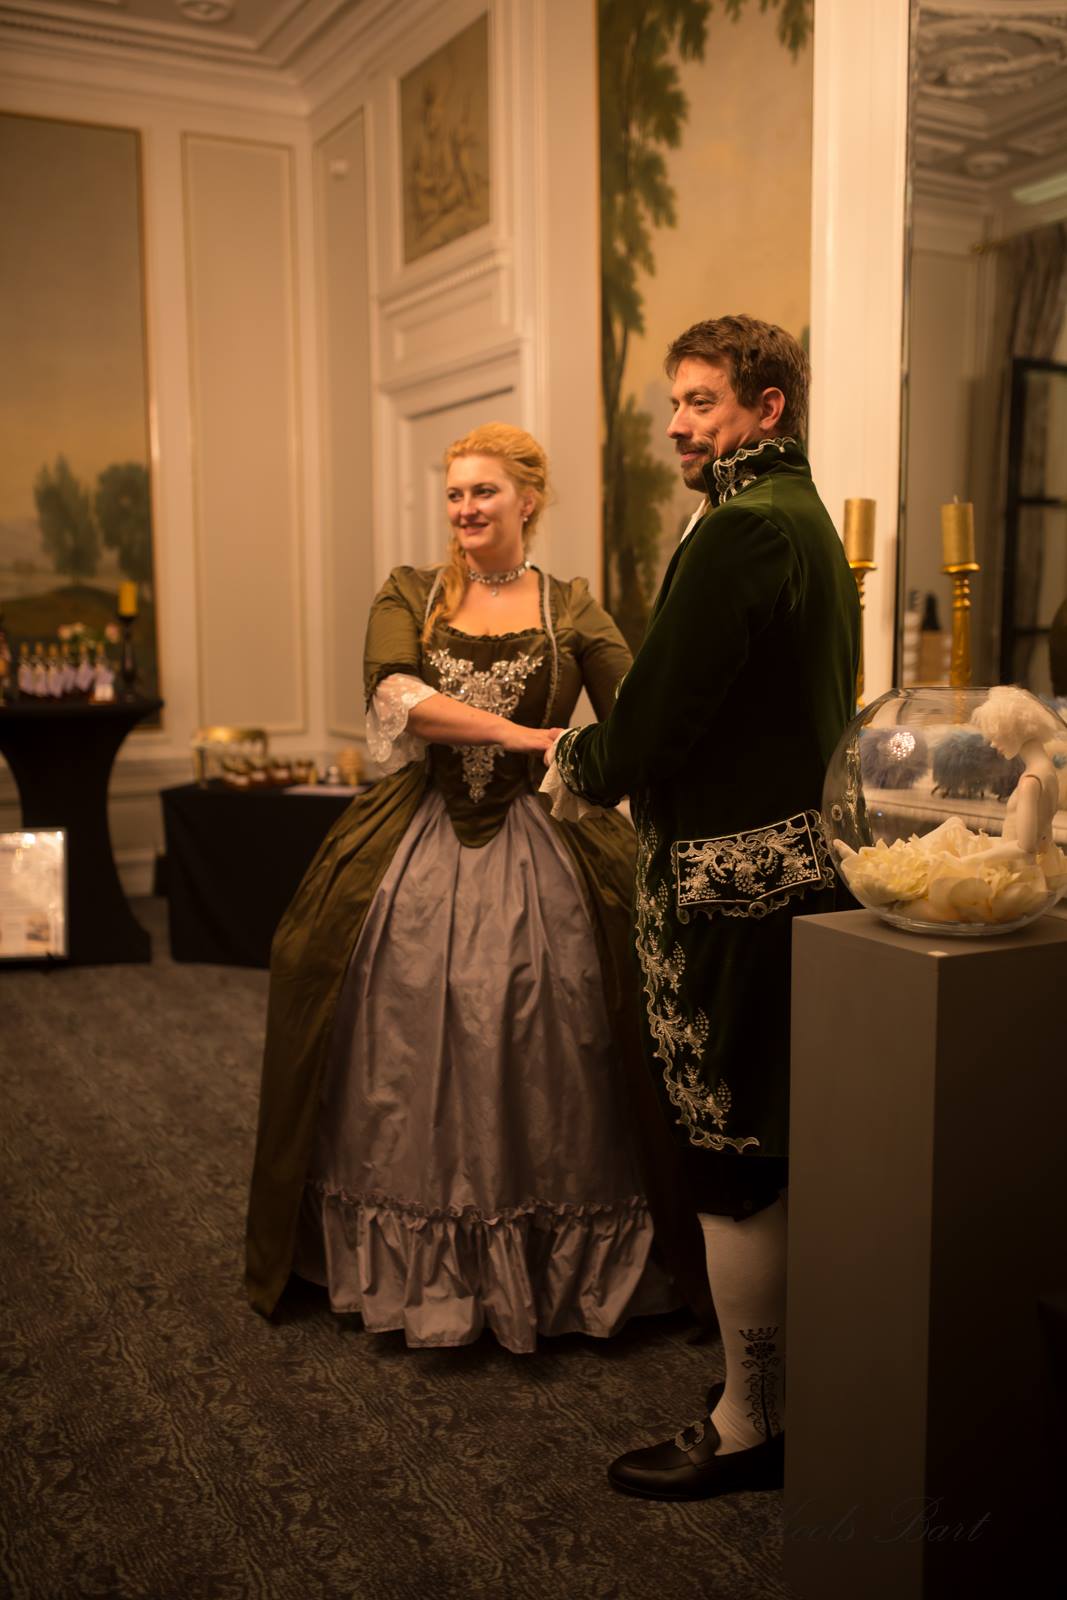
Salon de la Societe Raffinee, picture by Bart Kools
This autumn we were attending Salon de la Societé raffinee. Organised by my dear friend Shari. A Salon is an event where a Salonière introduces artists to the guests. A place to socialise with friends and imagin that you live in the 18th century. I was honored to be one of the artists who got to display the art of Skeletons in the Closet
For this event I decided to make a new costume for my Husband. Maarten has been looking at an historical example of an 18th century costume and would have loved to have a costume like that. So we decided to give it a try.
Salon de la Societe Raffinee, picture by Bart Kools
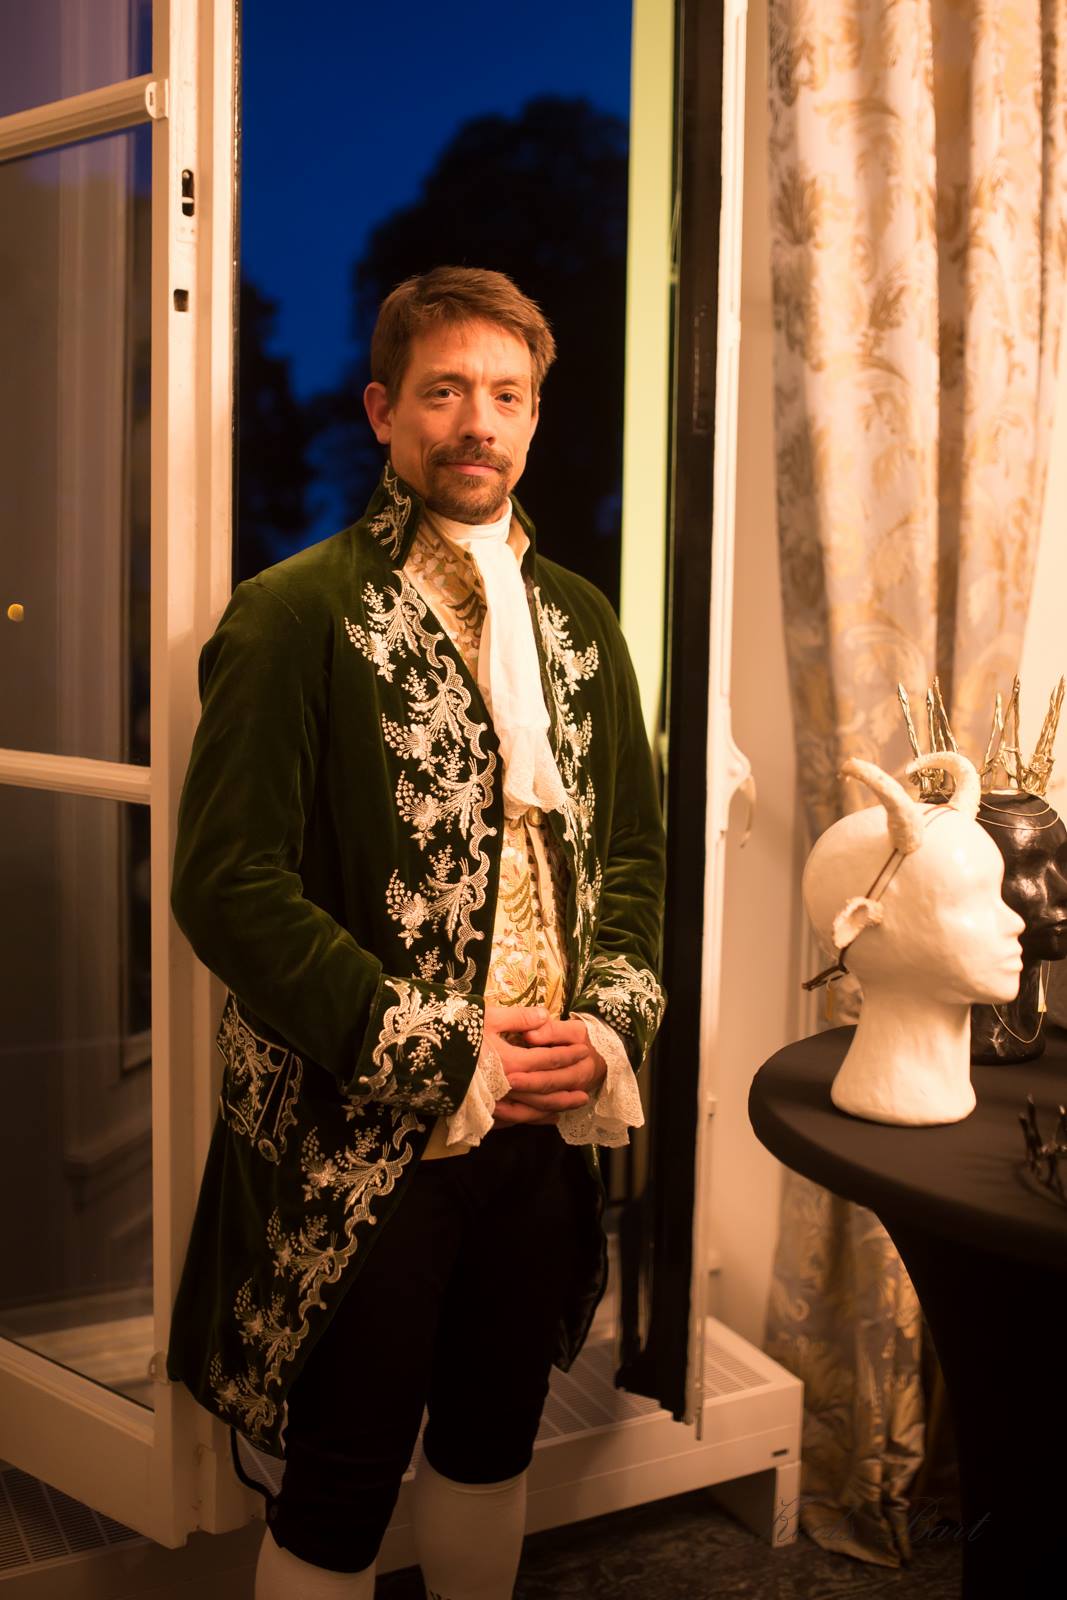
The 18th century is an era beyond my comfort zone, so this was quite a challenge. This costume had a lot of pieces. A white cotton underskirt. A cotton cravat. Black cotton breeches. An embroidered silk vest and an embroidered green and silver frock coat.
In order to make this project I have purchased an embroidery machine. Via Etsy I bought an embroidery pattern from Art Embroidery designs, Lubia makes the most wonderful historical patterns for embroidery machines! This gives your 18th century projects a real historical look.
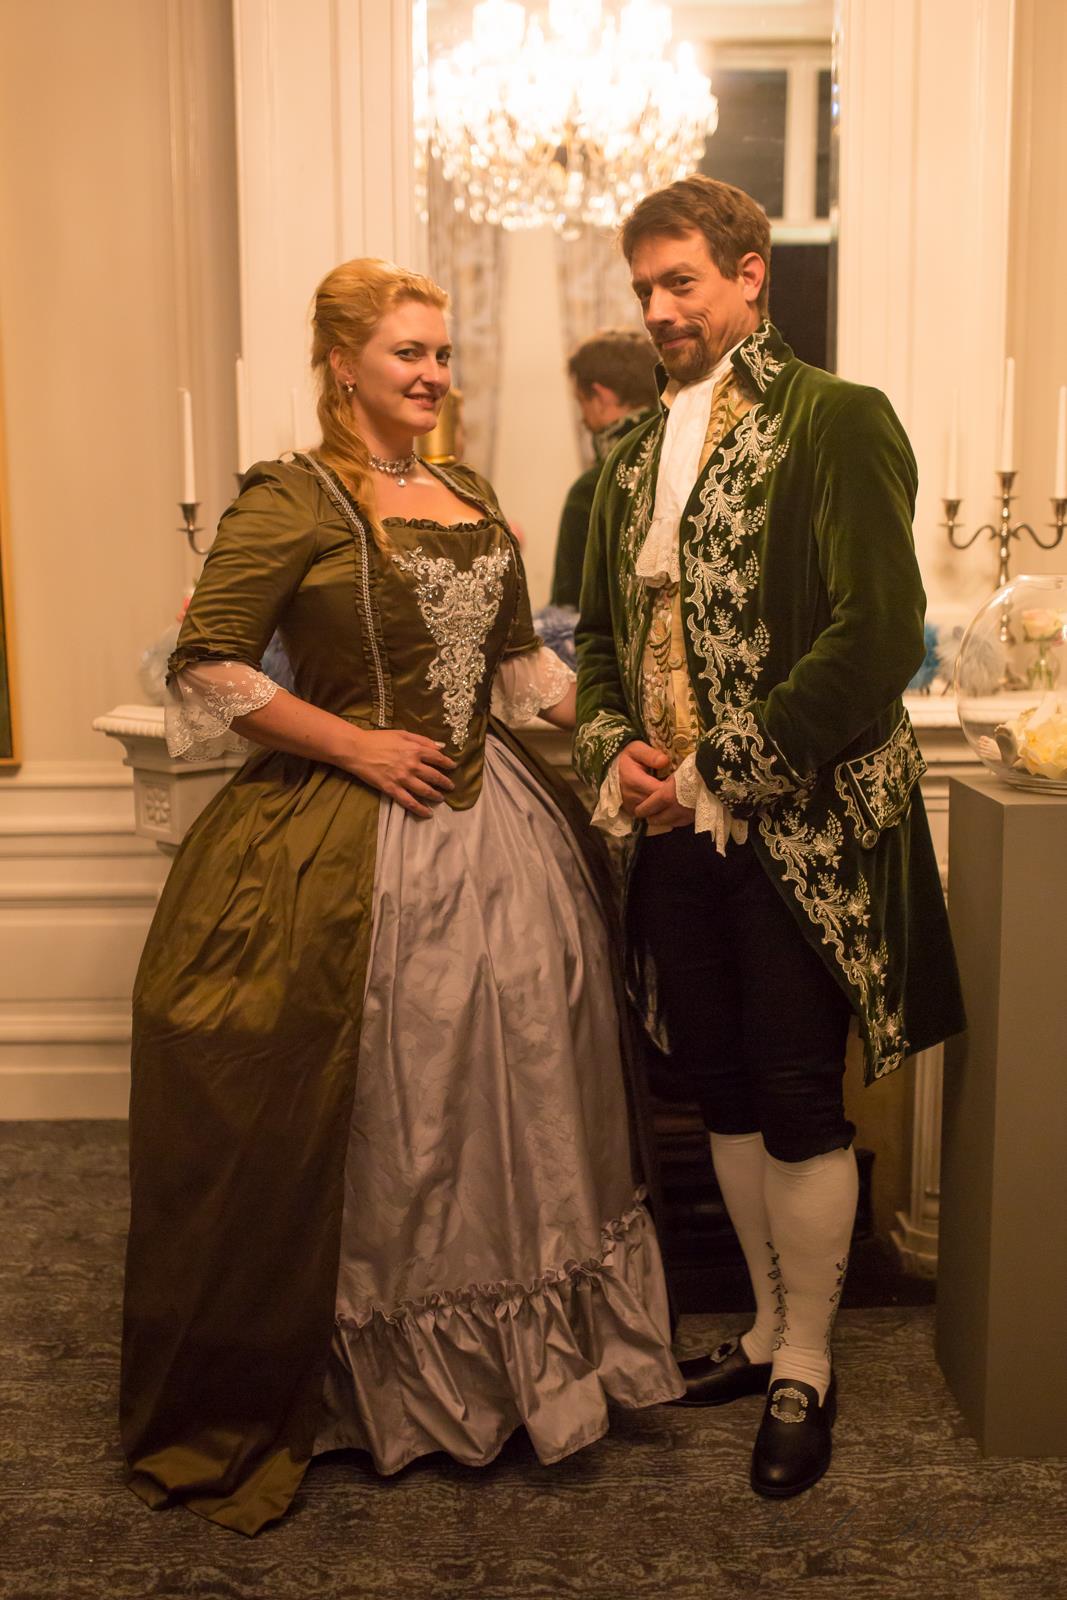
Salon de la Societe Raffinee, picture by Bart Kools
We started from the bottom up, I always work like this. Because if you wear layered clothing it is good to fit each layer over each other, so you don’t get a coat that only fits over a t-shirt but not over a blouse with vest.
Salon de la Societe Raffinee, picture by Bart Kools
The outfit took a total of 50 hours to make. Although the machine does most of the embroidery you have to stay with it. Especially for the vest where the embroidery had 9 different colors.
The Husband did most of the embroidery by himself while I was sewing away on the rest of the outfit.
Salon de la Societe Raffinee, picture by Lux Immortalis
For myself I made a 18th century fantasy dress. This dress is not historically accurate.
The dress is made out of silk, and has an beaded and embroidered stomacher.
If after seeing these garments you would like to discuss a custom gown or suit, feel free to contact me using our contact form.
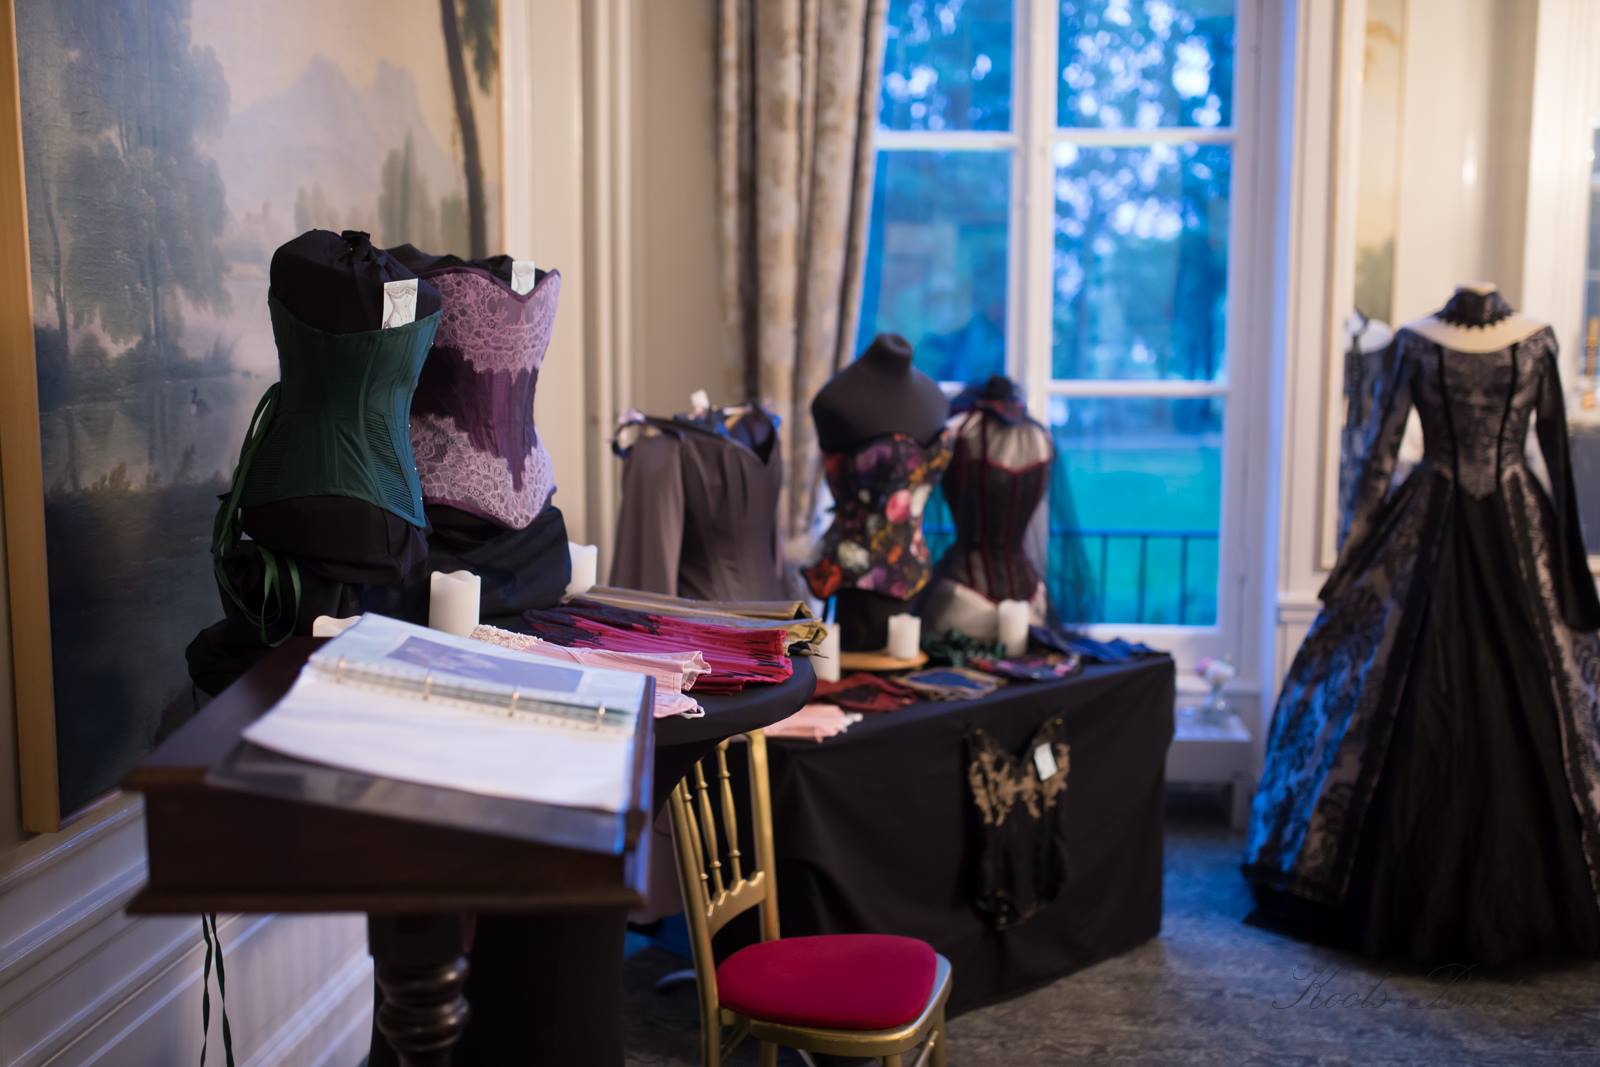
Here is also a picture of our booth at the Salon.
Salon de la Societe Raffinee, picture by Bart Kools
This style of corset has been in the making for quite a while. As with every new style of Corsetry I do extensive testing before I offer something to the public, so that I am sure my ideas actually work!
The corset is a mix between a longline corset with attached garters and a corset with cups. The cups of this corset are genuine cups with an underwire. The longline points end up in a garter making this corset a true underwear look corset. A corset like this would look amazing under a 50s style dress or a wedding gown!
The corset is made out of my favorite brocade coutil. It has internal boning casings and attached garters.
Hecate Corset by Skeletons in the Closet
Model Nathaly Lis
Photographer Richard Terborg
The cups make sure that the boobs are supported and not pushed up as high as might be with a victorian corset. Therefore this corset might work best under a modern style gown.
When my sister saw a photo of the corset she called it a squit, but I decided to call it Hecate instead.
I hope you like it. If you would like to order a similar corset please contact me.
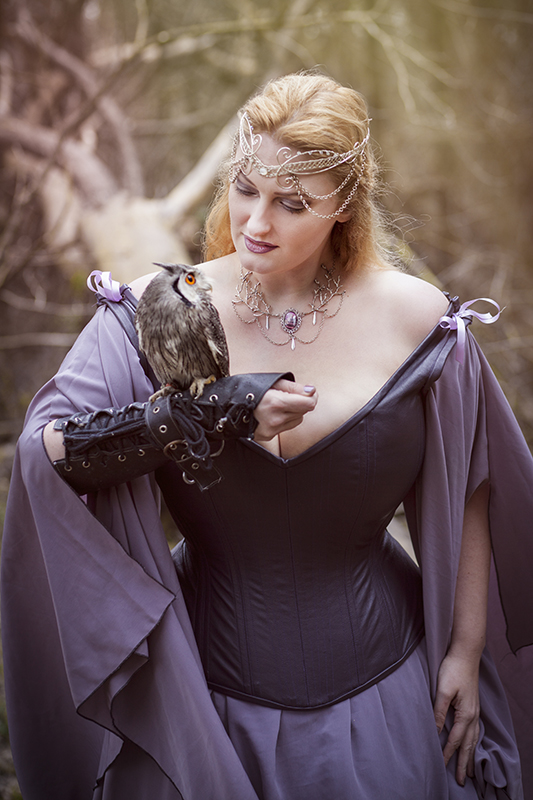
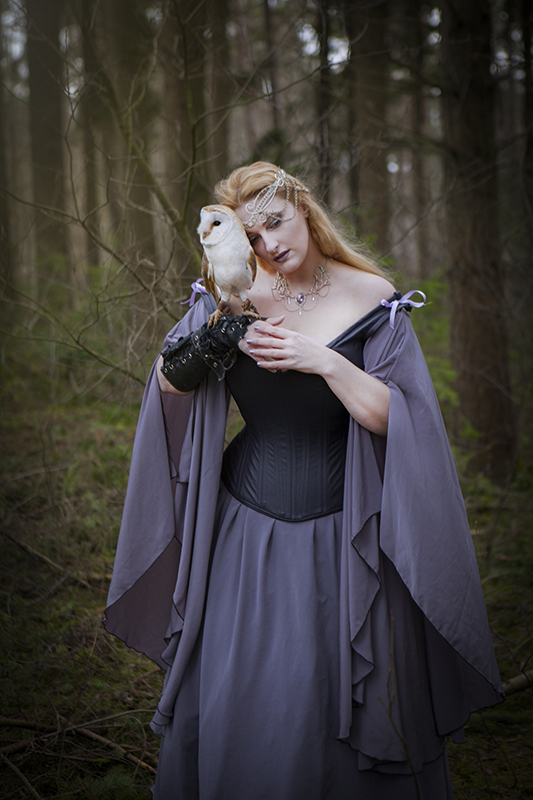
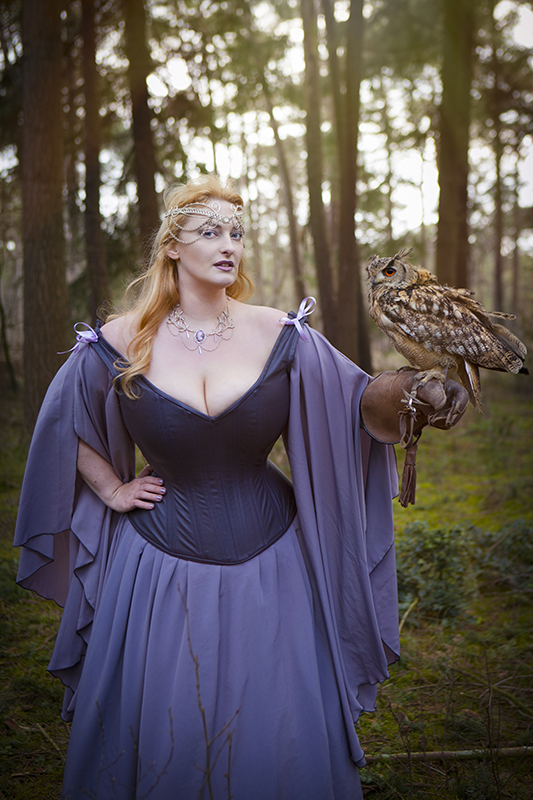
This Easter I had to opportunity to do a photoshoot with Angela Dekens from Little Owls.
I have had my Hithfaereth gown for a year now and never had the time to take proper pictures with me in it. So when there was an opening to shoot with Angela, I decided to go for it. We went to a forest close by called Beetsterzwaag. Angela and her partner showed up with 4 owls in tow to shoot with. I got to put on a leather glove and a little owl was set on my arm.
Something I did not expect was that the owls love to cuddle and are actually quite vocal. They also see everything, from other birds to little mice on the ground. It makes for quite tricky posing. They always look at what they find interesting, and that might not always be the lens.
First up was little Norna. She was so cute! A lovely little Northern White-faced owl that just loved to talk. She has a little moustache that moves when she talks. She is quite excited about everything.
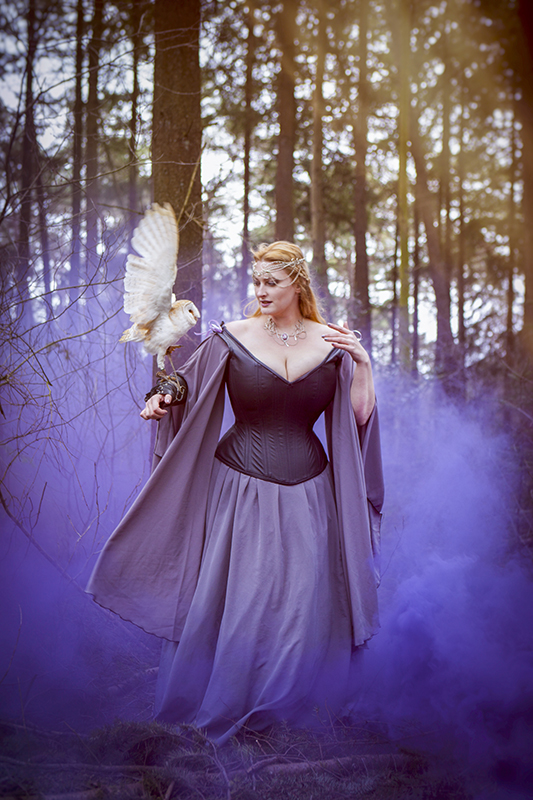
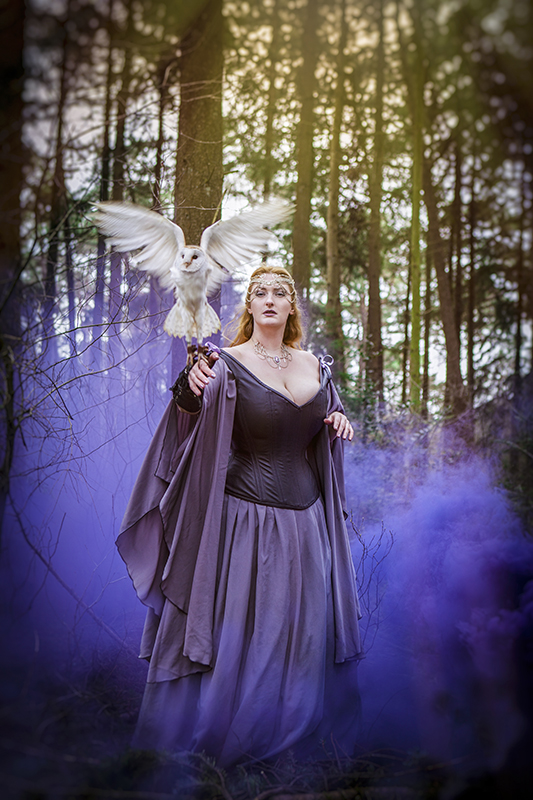
Next was Lea. Lea is probably the most famous of the little owls. She is a churchowl and so pretty and soft. She is also quite cuddly and very well behaved. Angela told me she even flys in wedding rings at ceremonies. Sadly I am already married. ?
We also played around a little with a smokebomb in purple, that matched the gown perfectly.
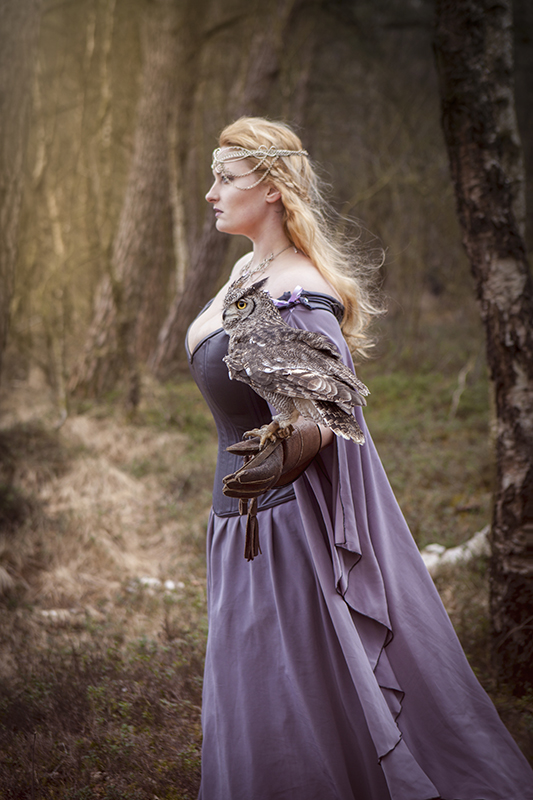
Next was quite a grumpy sir. Mr Bjorn. Bjorn is an African Oehoe. And although he is quite sweet, he can look quite stern. I love this shot since we both are looking out of the lake, making it a dreamy visage.
Last was Dailah, a Bengal Oehoe. Now to be completely honest, although I have met Dailah before at Imaginairium, he does intimidate me quite a bit. It is probably the eyes, and the large claws. However he is beautiful. So a picture with him was a must.
Shooting with the little owls was quite an experience. Angela was great in keeping me at ease and the owls are well trained.
The gown I am wearing is the Hithfaereth gown. More about this gown can be found in this blog post
I hope you like these pictures. I know I do!
Manage Cookie Consent
To provide the best experiences, we use technologies like cookies to store and/or access device information. Consenting to these technologies will allow us to process data such as browsing behaviour or unique IDs on this site. Not consenting or withdrawing consent, may adversely affect certain features and functions.
Functional
Always active
The technical storage or access is strictly necessary for the legitimate purpose of enabling the use of a specific service explicitly requested by the subscriber or user, or for the sole purpose of carrying out the transmission of a communication over an electronic communications network.
Preferences
The technical storage or access is necessary for the legitimate purpose of storing preferences that are not requested by the subscriber or user.
Statistics
The technical storage or access that is used exclusively for statistical purposes.The technical storage or access that is used exclusively for anonymous statistical purposes. Without a subpoena, voluntary compliance on the part of your Internet Service Provider, or additional records from a third party, information stored or retrieved for this purpose alone cannot usually be used to identify you.
Marketing
The technical storage or access is required to create user profiles to send advertising, or to track the user on a website or across several websites for similar marketing purposes.